Five things to love about modern.IE

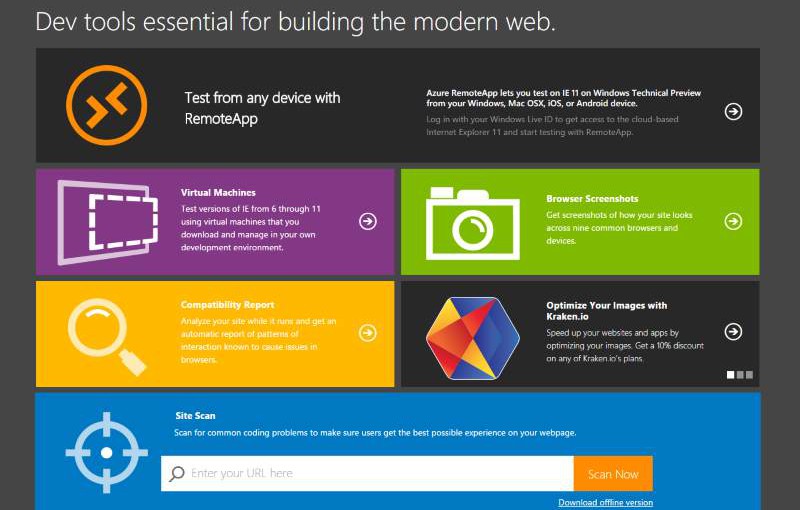
You might be surprised to learn that the browser testing resources website, modern.IE (provided by Microsoft) is not just about Internet Explorer. Although some of the features are geared solely toward IE testing, some are browser-agnostic and can be very useful when developing websites. Here are a few of the things modern.IE can do for you.

Virtual Machines

Download virtual machines

Working on websites often means debugging using different browser variants. Unless you are exceedingly lucky, that will include older versions of Internet Explorer. While services like BrowserStack are invaluable for testing, they cost money and are not always responsive enough for productive debugging. Instead, I have found virtual machines (VM) to be much more useful.

Microsoft has been making VM's available for Internet Explorer testing via the website modern.IE for quite some time now. You can download VM's for whatever development platform you have, whether it is OS/X, Windows, or Linux.

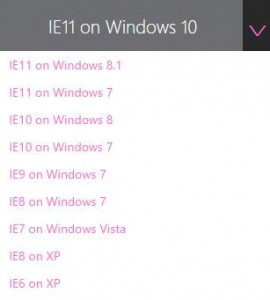
Available versions of Internet Explorer
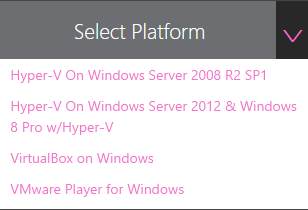
Select virtual machine platform

Azure RemoteApp

If you want to test your work against the latest Internet Explorer in Windows 10 and you do not want to download a virtual machine, or are working from an unsupported device, Azure RemoteApp is for you.

Azure RemoteApp

All you need is a Microsoft Live ID and you can login and test with the latest IE for free.

Browser Screenshots

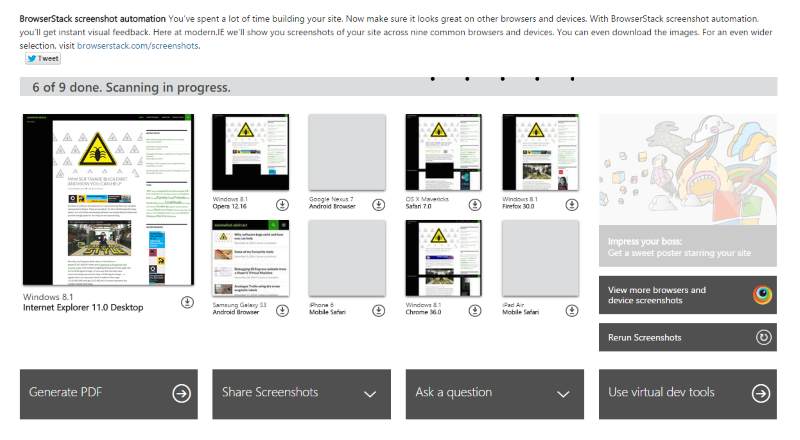
Browser Screenshots

Just want to check what your site looks like across various browsers and devices? The Browser Screenshots feature of modern.IE will give you screenshots across nine common browsers and devices. Somewhat surprisingly (at least to me), this includes more than just Internet Explorer; at the time of writing, you get:

  • Internet Explorer 11.0 Desktop on Windows 8.1
  • Opera 12.16 on Windows 8.1
  • Android Browser on Samsung Galaxy S3
  • Android Browser on Nexus 7
  • Mobile Safari on iPhone 6
  • Safari 7.0 on OS X Mavericks
  • Chrome 36.0 on Windows 8.1
  • Firefox 30.0 on Windows 8.1
  • Mobile Safari on iPad Air

Not only will it give you the screenshots, but you can share them with others, generate a PDF, and more.

Site Scan

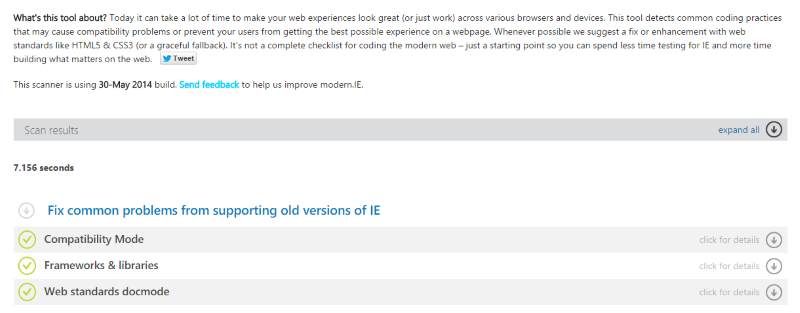
This scan checks for common coding practices that may cause user experience problems. It will also suggest fixes when it can. Not only that, but the source is available on GitHub so that you can run scans independently of modern.IE and the Cloud.

Site Scan

I ran this against my blog and it took just over seven seconds to return the results.

Compatibility Report

Compatibility Scan

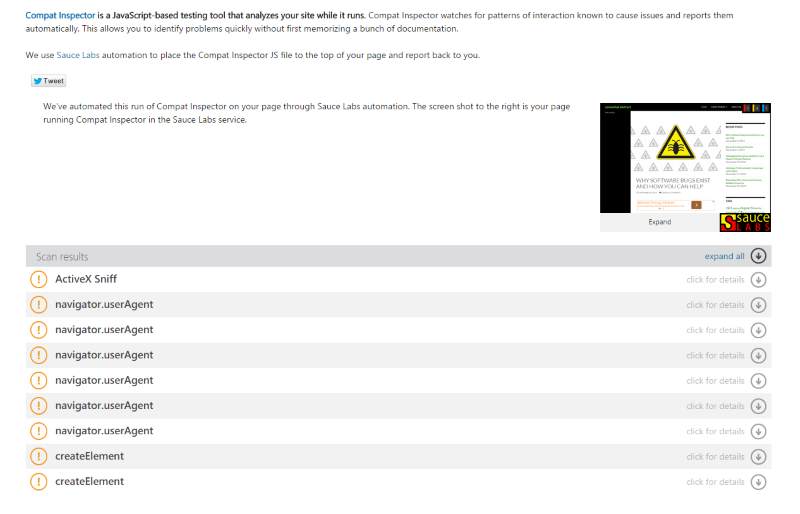
This feature will scan a given site for patterns of interactions that are known to cause issues in web browsers.  The first time I tried to run this, it did not work. However, a second attempt gave me results.

Controlling a bot using node.js and express

Last week was our work hackathon. During these events we get to spend a day hacking around with something fun, whether it is work related or not. Thanks to my friend and colleague, Brian Genisio, this time around we got to tinker with hardware and build some bots.

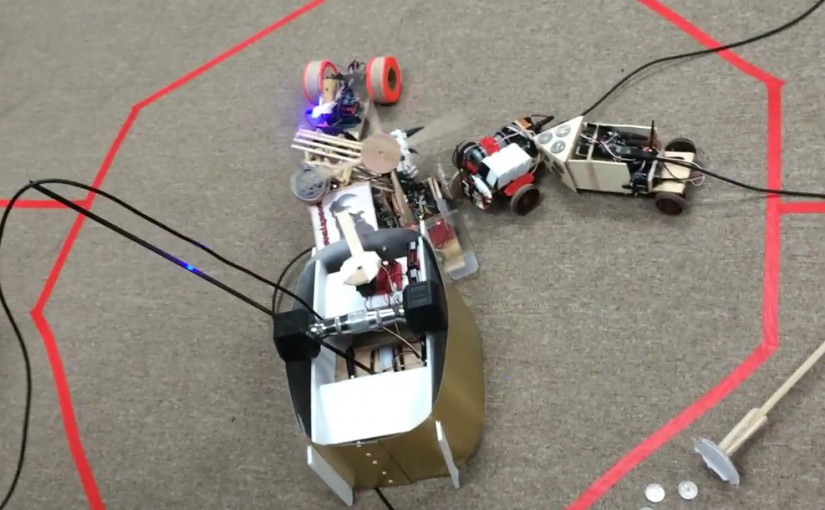
Using node.js, johnny-five, an Arduino Uno board and a bunch of additional components, teams created their own sumo bots. At the end of the day, we competed to see who had the best bot. Ours was the only bot that walked instead of using wheels and we were confident our design could have won. Unfortunately,  we faced some technical difficulties and a couple of design issues that prevented us from achieving our full potential. You can see our bot (it's the large gold one that lumbers in from the bottom) take on all the others in this video and slowly start pushing them all out of the way.

http://youtu.be/pW6t5qfsc4g

As I am sure you can tell from the audio, this was a thoroughly enjoyable and highly competitive hackathon. There were a variety of problems to address as we developed our bots. Some of them were unique to the bot being created, others were comment to all. One such problem was how to control the bot. Regardless of how the signal got to the Arduino board (Bluetooth, RF and USB were available), we had to command our bots to move forwards, backwards, left and right (and in some cases, to deploy an extensive range of weaponry and distractions).

After some trial and error, I settled on using a simple web server and web page front-end that made API calls to the server. The server would then map these API calls to bot controls. This provided a way for us to use mouse, keyboard and touch input to control our electronic sumo minion. You can see the very basic user interface1 in this Vine that I took during our build.

https://vine.co/v/Ounjjiu6Br5

Using AngularJS, the buttons in the web page were connected to API calls. By clicking buttons in the web page, using the numpad or AWSD keys, or touching the screen of my laptop, we could control the robot. The API itself was implemented using the Express package in node.

Express

I installed express into our node application, using npm:

npm install express

Then I added express to our bot code and defined a simple API to process web requests:

var express = require("express");

var app = express();

app.post('/move', doMove);
app.post('/rotate', doRotate);
app.post('/stop', doStop);

app.use(express.static(__dirname + '/public'));

app.listen(4242);

This snippet of code has been edited down to show the pertinent details; you can view the real code on GitHub. First, we require the express module, then we use it to create our server app. The three calls to post set up our three API methods and the handlers for those methods. Using the post method defined these as POST endpoints, we could have used put, get or delete, if it were appropriate. The use call sets up a redirect for static page requests so that those requests are satisfied from our public directory. Finally, we tell the app to listen on port 4242.

Each request that matches one of the three calls I have setup will be sent to the appropriate handling methods. These handlers each take a request object and a response object, which they can use to get additional information about the request and craft an appropriate response.

Here is an implementation of the doRotate method:

function doRotate(req, res) {
    var direction = req.param('direction');
    var rate = req.param('rate');
    drive.rotate(direction, rate);
    res.send();
}

In this handler, we get the direction and rate parameters from the request and pass them to the code that does the real work. At the end, we respond to the request. We could provide data in our response or even send an error if we wanted.

This allowed me to host a local website and API for controlling our bot. It was that simple.

Conclusion

Hacking a robot using node.js was a great way to delve into a new facet of JavaScript programming; hacking hardware. Not only that, but it allowed me to discover some of the cooler things that can be done quickly and easily using node.js, such as setting up a web server using express.

Have you hacked a robot with node? How did you implement control? Please leave a comment with your experience or any questions you may have. And if you are interested in hacking a bot of your own, watch this space.

  1. and an early prototype of our robot []

Navigation guard using AngularJS: onbeforeunload

onbeforeunload

I have been working on an add-on for one of our products that includes some data entry components. As part of this, I wanted to make sure that any changes to the data were saved before the user lost interest and went searching the Internet for cat pictures. I quickly turned to the window.onbeforeunload event.

The onbeforeunload  event is the last chance for a website to get the user's attention before they have navigated away to something more shiny or sparkly. In AngularJS, since a real navigation is not going to occur in a single-page application, two events are provided, $locationChangeStart  and $locationChangeSuccess, that can be used to similarly intercept in-app navigations.

Through onbeforeunload and the subsequent browser-based dialog, or the AngularJS events and a subsequent app-based dialog, the user is given the opportunity to cancel the navigation and address something important like unsaved data or a cute cat photo that they almost missed.

So, with events available to intercept navigation, I started hooking them up in all the places that needed them. A directive here, a factory there; before long I was duplicating almost the same code in nearly 20 places. There had to be a better way, so I created the saNavigationGuard service1.

saNavigationGuard

The saNavigationGuard service provides consumers with the ability to register callbacks, known as guardians, that will be called if a navigation event is detected. If a guardian wishes to prevent that navigation, it returns a message explaining why. The saNavigationGuard then signs up to the relevant events and when they occur, asks each guardian if it should go ahead. Whichever guardian returns a string first, wins, and the guardian acts accordingly to prevent the navigation.

In the case of onbeforeunload , the browser continues the event handling by offering the user a choice to continue or cancel the navigation. In the case of the $locationChangeStart  event, this part must be handled by the application. We will come back to how in another post; for right now, let's just look at the onbeforeunload scenario.

Here is the saNavigationGuard factory declaration:

angular.module('somewhatabstract').factory('saNavigationGuard', ['$window', function($window) {
	var guardians = [];

	var onBeforeUnloadHandler = function(event) {
		var message;
		if (_.any(guardians, function(guardian) { return !!(message = guardian()); })) {
			(event || $window.event).returnValue = message;
			return message;
		} else {
			return undefined;
		}
	}

	var registerGuardian = function(guardianCallback) {
		guardians.unshift(guardianCallback);
		return function() {
			var index = guardians.indexOf(guardianCallback);
			if (index >= 0) {
				guardians.splice(index, 1);
			}
		};
	};

	if ($window.addEventListener) {
		$window.addEventListener('beforeunload', onBeforeUnloadHandler);
	} else {
		$window.onbeforeunload = onBeforeUnloadHandler;
	}

	return {
		registerGuardian: registerGuardian
	};
}]);

First thing to note is on line 6 where I have used the any method from underscore (or lodash). This calls a predicate for each element in an array until the predicate returns true. In this case, we are passing our array of guardians and the predicate is calling that guardian to see if it currently wants to stop navigation. If it does, it will return a message.

If one of the guardians returns a message, the message it returns is captured and the predicate returns true. The message is then passed to the event so that the browser will show its dialog. If no guardian returns a message, then the browser is allowed to continue with the navigation unhindered (at least by this code).

Because of how factories are instantiated in Angular, the initialization code that actually signs-up to the onbeforeunload event only occurs once per Angular application. So, injecting this factory into your directives, factories, etc. means the event handling will be initialized just once. This gives a central point to control interception of navigation while allowing individual components to prevent navigation for their own reasons.

Usage

Here is a simple example of how this might be used:

angular.module('somewhatabstract').controller('saEditorThingyCtrl', ['$scope', 'saNavigationGuard', function($scope, saNavigationGuard) {
    var editing = false;
    var navigationGuardian = function() {
        return editing ? "Edit in progress" : undefined;
    };
    
    saNavigationGuard.registerGuardian(navigationGuardian);

    $scope.startEdit = function(){
        if (editing) return;
        editing = true;
        // Stuff happens
    };
    $scope.endEdit = function() {
        if (!editing) return;
        editing = false; 
    };
}]);

Of course, this is a contrived example but it illustrates how easy it is to put the saNavigationGuard to work. In fact, if you didn't want your guardian to be called all the time because you knew it usually would not block navigation, you could only have it registered when needed.

    ...
    var unregisterGuardian;
    
    $scope.startEdit = function(){
        ...
        unregisterGuardian = saNavigationGuard.registerGuardian(navigationGuardian);
        ...
    };
    $scope.endEdit = function() {
        ...
        unregisterGuardian();
        unregisterGuardian = undefined;
        ...
    };
    ...

This ability to register and unregister guardians brings me to my second noteworthy aspect of saNavigationGuard. When registering a new guardian, it is added to the start of the array of guardians rather than the end. This is because, in my use case, the more recently registered guardians are often the most urgent. I suspect this may be common for most uses.

Finally…

This post is the first in a series covering some useful things I have created in my experiences with AngularJS. In the posts to follow, I will be covering how we can expand saNavigationGuard to cover in-app navigation and how we can intercept web requests to provide both navigation guards and busy indication.

I hope you find the saNavigationGuard factory as useful as I have on my current project where I have guardians for active edits and when there are pending POST, PUT or DELETE requests.

If you use this or anything else that I have written about in your project or want to suggest some tweaks or alternatives, please don't forget to leave a comment.

  1. It's really a factory in the AngularJS world, but it's providing a service…oh, I'm not getting into this discussion again, just look up service vs. factory and read about why it doesn't matter as long as you choose. []

CodeMash 2.0.1.4

Adventure

It is almost nine years since I first set foot in the US. It was through that experience that I rediscovered the joy in challenging myself and embracing change, something I had not so strongly felt since I first started singing in a band. So, while I had faced challenges before as a result of my own decisions, none had been bigger. Even though the opportunity had been provided by someone else, it had been my choice to take it and to see it through1.

It took me a while to settle in to my new home (or even to acknowledge it as home), but I eventually joined the developer community in Ann Arbor and the wider mid-west region. The interaction with other developers has continued to provide challenging opportunities and encourage positive change within my career, as well other aspects of my life. It was through the basic act of attending one local Ann Arbor .NET Developers Group meeting and the people I met there that I learned about CodeMash.

CodeMash

CodeMash v2.0.1.4 logo
 
The CodeMash conference – a community-organized event held annually in Sandusky, Ohio – never fails to provide unique experiences or challenges. My first CodeMash, CodeMash v2.0.1.2 was unique because I had never attended a developer conference before (or any other conference), and CodeMash v2.0.1.3 provided a completely new experience when, after attending a fantastic workshop on public speaking, I went on to win the PechaKucha contest.

This year, I was guaranteed yet another unique experience when I was accepted to be a speaker. I am extremely grateful to friends, mentors and others for their support and encouragement leading up to speaking at CodeMash v2.0.14. It was a wonderful honor that I thoroughly enjoyed, and while it changed my CodeMash experience with the added anxiety of speaking and subsequent release when my session ended, I would definitely do it again if the chance arose.

To those that attended my talk on AngularJS for XAML developers, thank you. I  hope that you found it valuable. If you were there or if you have an interest, you can find my slide deck and code on GitHub (Deck|Code).

I am very grateful to the volunteers that organize and run CodeMash each year, as well as the many friends and mentors that have guided my own CodeMash experiences and the many other experiences within the developer community. Without these people, I would not have had such amazing opportunities, nor would I have learned how important it is to challenge myself and strive for new experiences. It is always uncomfortable to embrace change, but the rewards of doing so are often worth the pain.

To close, I encourage you to challenge yourself this year. Make sure to let me know in the comments below how you will challenge yourself and perhaps we can follow-up at the end of the year.

  1. Of course, there were many times in the weeks between being offered the position and setting foot in the US when I considered changing my mind, including just after the plane doors closed []