C#7: Tools

I have spent the first couple of months of 2017 learning about the new features in C#7. This would not have been possible without some tools to help me play around with the new language syntax and associated types. Since we have to wait a little longer until Visual Studio 2017 is released, I thought you might like to know what tools I have been using to tinker in all things C#7.

LINQPad Beta

Link: http://www.linqpad.net/Download.aspx#beta

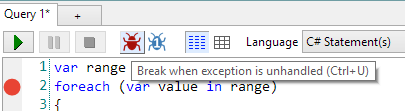
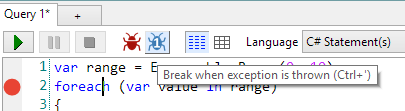
While early releases of Visual Studio 2017 (scheduled for release on March 7th) support the language, I initially found the release candidate to be unstable and frustrating. Not only that, but it can be cumbersome to spin up a quick example using Visual Studio, so I turned to my trusty friend, LINQPad.

LINQPad Beta showing me my return is missing a ref

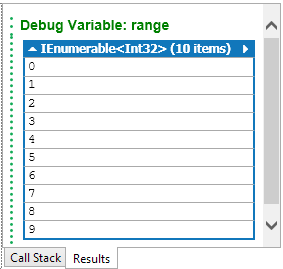
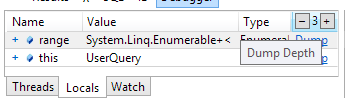
I cannot recommend LINQPad enough, it is a fantastic tool for prototyping, poking around data sources, and more besides, like tinkering with language features you don't yet understand. While LINQPad's current release only supports the C# language up to version 61, the beta release also supports C# version 7. Not only can you use the language, but with the fantastic analysis window, you can see how Roslyn breaks down each part of the code. If you want to get started quickly, easily play around with the cool new features, and have a powerful tool for digging deeper as the need arises, the LINQPad beta is the tool to get.

Visual Studio 2017 RC

Link: https://www.visualstudio.com/downloads/

Visual Studio 2017 RC splash

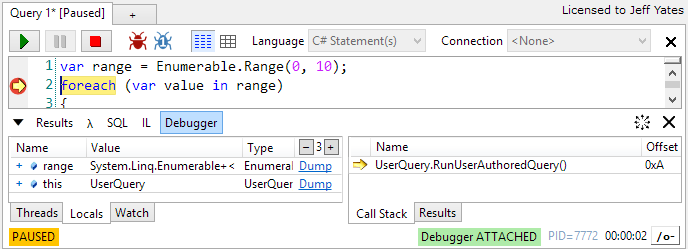
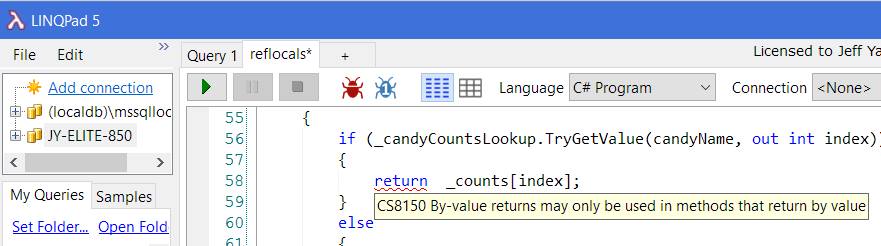
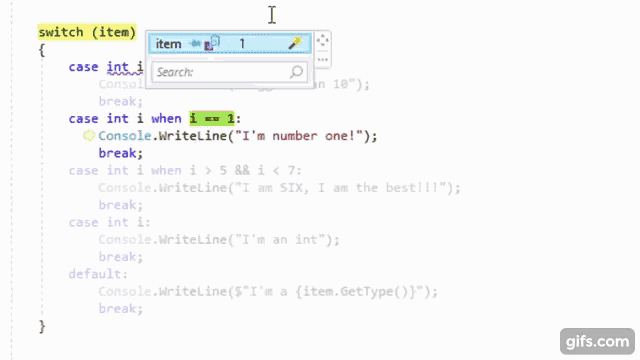
Yes, I know I said it was unstable and frustrating, but that was before, way back in January. These days the RC is much, much better and with the release date set for March 7th, there was never a better time to install Visual Studio 2017 RC and get a head start on getting to know some of the new things it can do, including C# 7. Tuples are fun, but poking around with them in the debugger is funner.

OzCode

Link: https://oz-code.com/

Pattern matching in OzCode

It is no secret that I love OzCode, the magical debugging extension for Visual Studio. It is so well-known that they asked me to be part of their OzCode Magician community program. So, it should come as no surprise that I have been using OzCode in my exploration of C#7. As the Visual Studio 2017 RC has matured, the clever people over at CodeValue have been creating previews of OzCode version 3, including amazing LINQ debugging support. Recently, I got to try an internal build that included support for all the cool new things in C#7.

OzCode 3 will be released on March 7th, the same day as Visual Studio 2017.

Documentation

Link: https://docs.microsoft.com/dotnet/articles/csharp/csharp-7

Never underestimate the power of reading documentation, it is one of the best tools out there. For my C#7 posts, I relied heavily on the new docs.microsoft.com site, specifically the .NET articles on C#. Not only is this a fantastic resource, but it has built-in support for commenting on the documentation so that you can ask questions and contribute to their improvement.

In Conclusion

This is the entire list of tools I used for my C#7 investigations. Try them out and get an early start on C#7 fun before the March 7th release of all the C#7 goodness. Happy tinkering and if you stumble on any useful tools, please share in the comments!

  1. It also supports SQL, F#, and VB []

C#7: Out Variables

Last time, we started to look at the new features introduced in C#7. Here is a quick refresher of just what those features are:

In this post, we will look at one of the simplest additions to the C# language; out variables.

int dummy

How often have you written code like this?

int dummy;

if (int.TryParse(someString, out dummy) && dummy > 0)
{
   // Do something
}

Or this?

double dummy;

if (myDictionary.TryGetValue(key, out dummy))
{
   //Do something
}

Sometimes you use the out value retrieved, sometimes you do not, often you only use it within the scope of the condition. In any case, there is always the variable definition awkwardly hanging out on its own line, looking more important than it really is and leaving space for it to accidentally get used before it has been initialized. Thankfully, C#7 helps us tidy things up by allowing us to combine the variable definition with the argument.

Using the out variable syntax, we can write this:

if (int.TryParse(someString, out int dummy) && dummy > 0)
{
    //Do something
}

In fact, we do not even need to declare the type of the variable explicitly. While often we want to be explicit to make it clear that it matters (and to ensure we get some compile time checking of our assumptions), we can use an implicitly typed variable like this:

if (myDictionary.TryGetValue(someKey, out var dummy))
{
    //Do something
}

In Conclusion

out variables are part of a wider set of features for reducing repetition (in written code and in run-time execution), and saying more with less (i.e. making it easier for us to infer intent from the code without additional commentary). This is a very simply addition to C# syntax, yet useful. Not only does it reduce what we need to type, it also improves code clarity (in my opinion), and reduces the possibility of silly errors like using a variable before it has been initialized, or worse, thinking that it being uninitialized was a mistake and hiding a bug by initializing it.

Until next time, if you would like to tinker with any of the C#7 features I have been covering, I recommend getting the latest LINQPad beta or Visual Studio 2017 RC.


Octokit and the Authenticated Access

Last week, I introduced Octokit and my plans to write a tool that will mine our GitHub repositories for information that can be used to craft release notes. This week, we will look at the first step; authentication. I am using Octokit.NET for my hackery; if you choose to use another variant of Octokit, some of the types and methods available may be different, but you should be able to follow along. In addition, I have no intention of documenting every aspect of Octokit and the GitHub API, so if you are intrigued by anything that I do not discuss, I encourage you to explore the relevant documentation.

The main `GitHubClient` class, used to access the GitHub APIs, has several constructors, some that take credentials (sort of) and some that do not. All but one of the constructors take a `ProductHeaderValue` instance, which provides some basic information about the application that is accessing the API. According to the documentation, this information is used by GitHub for analytics purposes and can be whatever you want.

Now, if you only want to read information about publicly accessible repositories, you do not need to provide any authentication at all. You can create a client instance and just get stuck in, like this:

var githubClient = new GitHubClient(new ProductHeaderValue("Tinkering"));
var repo = await githubClient.Repository.Get("octokit", "octokit.net" );
Console.WriteLine(repo.Name);

However, you can only perform some read-only tasks on public repositories and, unless you are performing the most trivial of tasks, you will hit rate limits for unauthenticated access.

NOTE: All of the Octokit.NET calls are awaitable

Authentication can be achieved in a several ways; via an implementation of `ICredentialStore` passed to a constructor of `GitHubClient`, by providing credentials to the `GitHubClient.Connection.Credentials` property, or by using the `GitHubClient.Oauth`. The `OAuth` API allows an application to authenticate without ever having access to a user's credentials; it is understandably a little more complex than approaches that just take credentials. Since, at this point, our focus is to craft some methods for extending the API functionality, we will worry about the `OAuth` workflow another time. The other two approaches are quite similar, although the constructor-based approach requires a little extra effort. The following two examples will both give you authenticated access, though I think the constructor-based access feels a little less hacky:

// Without the constructor
var githubClient = new GitHubClient(new ProductHeaderValue("tinkering"));
githubClient.Connection.Credentials = new Credentials("username", "password");
// With the constructor
public class CredentialsStore : ICredentialsStore
{
    public Task<Credentials> GetCredentials()
    {
        return Task.Run(() => new Credentials("username","password"));
    }
}

var githubClient = new GitHubClient(new ProductHeaderValue("tinkering"), new CredentialsStore());

Two-factor Authentication

Of course, using your username and password is futile because you have two-factor authentication enabled1. Luckily there is a constructor on the `Credentials` class that takes a token, which you can generate on GitHub.

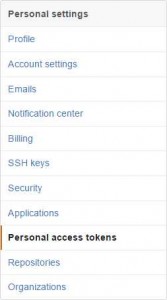
First, log into your GitHub account and choose Settings from the drop-down at the upper-right. On the fight, select Personal Access Tokens.

The right-hand side will change to the list of personal access tokens you have already created for your account (you may have created these yourself or an application may have created them via OAuth). Click the Generate New Token button and give it a useful name. You can now use this token as your credentials when using Octokit. I keep my token in the LINQPad password manager2 so that I can reference it in my code using the name I gave it, like this:

Util.GetPassword("the.name.I.gave.my.oauth.token")

In conclusion…

And that is it for this week. In the next entry of this series on Octokit, we will start getting to grips with releases and some of the basic pieces for my release note utility library.

  1. If you do not, you should rectify that []
  2. The LINQPad password manager is available via the File menu in LINQPad []

Octokit and the Documentation Nightmare

Before I get into the meat of this series of posts, I would like to set the scene. Like many organisations that perform some level of software development these days, we use GitHub. Here at CareEvolution, some developers use the web interface extensively, some use the command line, and others use the GitHub desktop client1, but most use a combination of two or more, depending on the task. This works great for developers, who have each found a comfortable workflow for getting things done, but it is not so great for those involved with DevOps, QA, or documentation where there is a need to find out user-friendly details of what the developers did. Quite often, a feature or bug fix involves several commits and while each has a comment or two, and perhaps an associated pull request (PR) or issue has a general description, but there is no definitive list of "this is what release X contains" that can be presented to a customer. Not only that but sometimes a PR or issue is resolved in an earlier release and merged forward. While we have lists of what a release is going to include, quite often there is more detail that we would like to include, and we often have additional changes as we adapt to the changing requirements of our customers. All this means that one or more people end up trawling the commits, trying to determine what the changes are. It is not a happy task.

"There is nothing more difficult to take in hand, more perilous to conduct, or more uncertain in its success, than to take the lead in the introduction of a new order of things."

Niccolo Machiavelli
The Prince (1532)

Now, I know that this could all be avoided if people documented changes more clearly, perhaps added release notes to commits, raised issues for documentation changes, or created release notes on the release when it is made. However, no matter how noble change may be, anyone who has worked in process definition for any length of time will know that changing the behaviour of people is the hardest task of all, and therefore it should be avoided unless absolutely necessary. It was with that in mind that I decided mining the existing data for information would be an easier first step than jumping straight to asking people to change. So, with the aim of making life a little easier, I started looking at ways to automate the trawling.

I figured that by throwing out noisy and typical developer non-descriptive commits like "fixed spelling" or "updated comment", and by combining commits under the corresponding PR or issue, I could create useful summary of changes. This would not be customer-ready, but it would be ready for someone to turn into a release note without needing to trawl git history. In fact, if I included details of who committed the changes, it might even provide a feedback loop that would improve the quality of developer commit messages; developers do not like interruptions, so anyone asking for more detail on a commit they made should start to reinforce that if they wrote better commits, PRs, issues, they would get less interruptions.

Octokitty2

Octokit .NET logoAfter a dismissing using git locally to perform this task (I figured those who might need this tool would probably not want to get the repository locally) and reading up on the GitHub API a little, I cracked open LINQPad —my tool of choice for hacking— and went looking for a Nuget package to help. It was during that search that I happily stumbled on Octokit, the official GitHub library for interacting with the GitHub API. At the time of writing, Octokit reflects the polyglot nature of GitHub users, providing variants for Ruby, .NET, and Objective C, as well as experimental versions for Python, and Go. I installed the Octokit Nuget package into LINQPad and started hacking (there is also a reactive version for `IObservable` fans).

Poking around the various objects, and reading some documentation on GitHub (Octokit is open source), I got a feel for how the library wrapped the APIs. Though, I had not yet got any code running, I was making progress. Confident that this would enable me to create the tool I wanted to create, I started writing some code to gather a list of releases for a specific repository and stumbled over my first hurdle; authentication. It turns out it is not quite as straight-forward as I thought (the days of username and password are quite rightly behind us3), and so, my adventure began.

And then…

This is a good place to stop for this week, I think. As the series progresses, I will be piecing together the various parts of my "release note guidance" tool and hopefully, end up with a .NET library to augment Octokit with some useful history mining functionality. Next time, we will take a look at authentication with Octokit (and there will be code).

  1. OSX and Windows variants []
  2. or, James Bond for kids []
  3. OK, that's a lie, but I want to encourage good behaviour []

Debugging in LINQPad

If you have been reading my blog over the last few months you will no doubt be aware that I am a regular user of LINQPad. I do not have any commercial involvement with LINQPad nor its creators, I just really like it. Recently, I decided to try out the latest release, which adds integrated debugging to the already feature rich tool. This amazingly powerful new feature adds yet another reason why this application should be in every developer's arsenal, regardless of experience and ability (it is a great learning tool for students). Here is a brief overview of this new feature, which is available with the premium license (currently on sale for $85 at time of writing; it may not be the case as you are reading this).

When running the latest LINQPad, the debugging feature adds some new buttons to the familiar toolbar. All the debugging features are available for both statement and program-based queries in C#, VB, and F# (not expressions or SQL languages). The first new button is the `Pause` button, also known as `Break`. This works as you might expect, pausing the current code execution. The other two are to specify how exceptions should be handled, informing  the debugger to break on unhandled exceptions and when exceptions are thrown. Breakpoints can be added by clicking in the margin to the left of the code or pressing `F9` when the caret is on the desired line.  When a breakpoint is active on a line, it is indicated as a large red circle. For those who regularly use Visual Studio, the breakpoint and general debugger experience will be familiar.

Pressing `F5` will run the query (or selected lines) as usual, but now, any breakpoints set on executing lines will cause the code to break. At this point, LINQPad will reveal some familar and not-so-familiar tools for debugging the code. General status information is displayed at the bottom of the LINQPad window, showing things like whether the code is executing or paused, whether the debugger is attached or not, and the process ID.

The next code statement to execute is highlighted in the code with a yellow arrow in the margin (in this case, overlaid on the breakpoint circle), and the code highlighted in yellow. In the lower left portion of the screen, we can see local variables and executing threads. We can also set up our own watches as necessary. Any objects in the `Locals` and `Watch` tabs can be expanded using the `+` glyph to reveal their constituent values. As in Visual Studio, these tabs allow the expansion of just-in-time LINQ queries so you can delve into the deep dark secrets of your code. However, you can also take advantage of LINQPad's fantastic dump feature and dump any value out to the `Results` tab on the right. If you want to control how far down the object graph a dump will go, you can modify the `Dump Depth` using the `+` and `-` controls in the column header.

The `Dump` output for the `range` variable
Specifying the depth of the dump

For more information on LINQPad and its many features, check out the LINQPad website (http://linqpad.net). In my opinion, whether you use the free version or one of the paid upgrades, you will have one of the best coding utilities available for .NET.