🦟 Debugging and fixing hydration issues

Photo by Gilles Rolland-Monnet on Unsplash

This is part 9 of my series on server-side rendering (SSR):

  1. πŸ€·πŸ»β€β™‚οΈ What is server-side rendering (SSR)?
  2. ✨ Creating A React App
  3. 🎨 Architecting a privacy-aware render server
  4. πŸ— Creating An Express Server
  5. πŸ–₯ Our first server-side render
  6. πŸ– Combining React Client and Render Server for SSR
  7. ⚑️ Static Router, Static Assets, Serving A Server-side Rendered Site
  8. πŸ’§ Hydration and Server-side Rendering
  9. [You are here] 🦟 Debugging and fixing hydration issues
  10. πŸ›‘ React Hydration Error Indicator
  11. πŸ§‘πŸΎβ€πŸŽ¨ Render Gateway: A Multi-use Render Server

Happy New Year, everyone and welcome back to my series on React server-side rendering (SSR)! It has been a while. I apologise for the absence; it has been a difficult time for us all during this pandemic. Perhaps I will address that fully in another post sometime; for now, let's dig back into SSR!

I have re-read all of the previous posts in this series and the notes I made on what the next entries should be. As with most software development endeavours (like all those side projects we have going on), I have lost track of what was going on and my notes did not have anywhere near as much context as I had hoped when I wrote them. So, before we dig into what is next, let's briefly recap where we were and buy me a little more time to get it together.

πŸ“œ The story so far…

This is post nine in what I thought was going to be a four post series (estimates are hard). Here are the previous entries:

  1. πŸ€·πŸ»β€β™‚οΈ What is server-side rendering (SSR)?
  2. ✨ Creating A React App
  3. 🎨 Architecting a privacy-aware render server
  4. πŸ— Creating An Express Server
  5. πŸ–₯ Our first server-side render
  6. πŸ– Combining React Client and Render Server for SSR
  7. ⚑️ Static Router, Static Assets, Serving A Server-side Rendered Site
  8. πŸ’§ Hydration and Server-side Rendering

In the entries so far we have created a React app and built ourselves a render server that provides a result we can hydrate. It is almost working beautifully, but when we tried to hydrate our SSR (server-side rendered) result, we hit a snag; our SSR result does not cleanly hydrate because the path to our logo SVG file is different between the server and the client renderings. As you may recall, for hydration to work properly, the initial render cycle of our React app on both the server and client must produce the same HTML.

So, this week, let's dig into that hydration issue with some ideas on how to debug it and how to fix it. If all goes well and I remember what my fix was going to be, we will have a successfully server-side rendered application that hydrates by the end of this post. I don't know about you, but I'm excited to find out if I can do it.

πŸ”Ž Discovering Hydration Errors

React has improved since I first started writing this series (it has been a couple of years, after all). Hydration errors now contain much more information about the error that helps us identify the problematic component – while our app is simple and therefore, a lot easier to reason about and find the source of a problem, many production apps are incredibly complex and therefore not so easy to debug.

Animation showing the app hydrated with an image placeholder rotating the center of the app instead of the image that should have loaded.
Our app after hydration failed

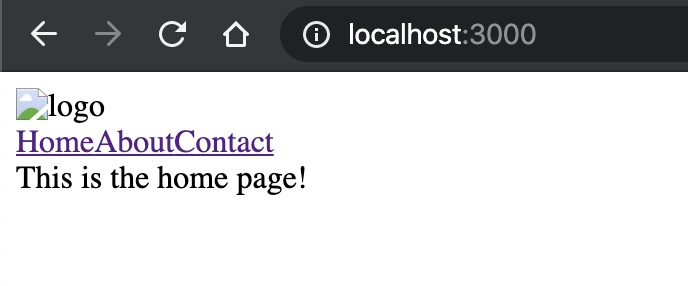
Back when we were last looking at this and our app hydrated without its spinning logo, here is what the hydration error looked like:

Console output showing warning that says "Prop 'src' did not match" along with the server and client values.
Hydration error in React 16.12

In this example (from an earlier version of React 16), we are told is that a src attribute did not match and we are told what the two different values are. For a case like an image that only appears in one place in our app, this is not so hard to track down, but many hydration issues are not so easy to spot.

And here is what React says about the same error today:

Console output showing warning that says "Prop 'src' did not match" along with the server and client values, and a stack of the components so that it is easy to identify which component did not render properly.
Hydration error in React 17.0

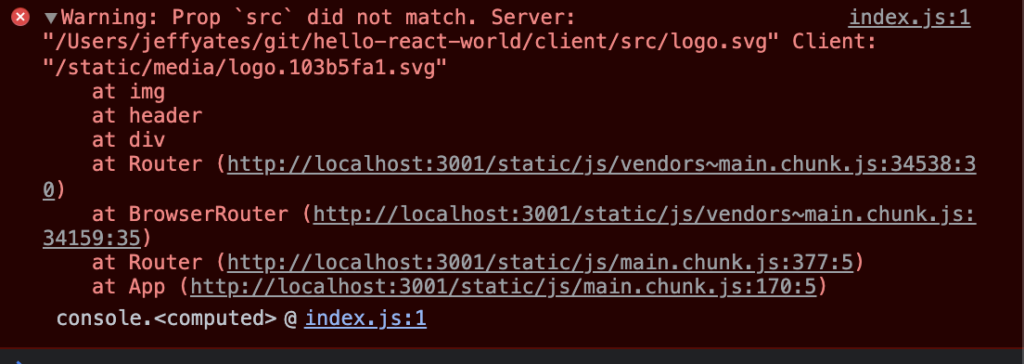
This is from React 17, though more recent versions of React 6 also provide more similar detail. This updated hydration error output not only gives us the information we had before, but also gives us a stack of components showing us exactly where in the component hierarchy the issue lives. I think you will agree that this is a vast improvement. It certainly reduces the things I was originally going to discuss about debugging hydration1.

From this more detailed error message, we can determine that our issue (as we already know from looking at the hydrated result) is that the URL for the logo is wrong; the server is setting it to an absolute file path instead of the magic sauce that the webpack build is using.

This is one of many hydration errors that can show up. Some of the more common errors relate to browser feature detection being used as conditions within components β€” since the server has no idea about the user's browser, its screen dimensions, features, or other details, any decisions it makes based on such information will likely not match the same decision when made on the client, and therefore, hydration errors. To avoid these, the initial render cycle on both the client and the server must be the same, saving any browser-specific decisions until after that first render cycle is complete. Unfortunately, if we were running production React here, we would not be guaranteed to have an obvious indication of the hydration error. In fact, this specific issue would not even be a hydration issue in production since attributes are not compared during hydration in the production build of React. However, if this were a more serious issue where the component hierarchy itself changed between server and client, the hydration failure could cause the entire application to re-render from scratch. Spotting hydration errors and fixing them can prevent serious user-facing performance issues, and since we do not get a signal during production we have to make sure we are looking for these errors during development2.

Fixing Our Image Hydration

Before we finish this post, we should really fix our image. The image URL is not working because the server handles the SVG in a very naΓ―ve way; we just use the import path, which will not match the path the client ultimately uses.

There are a few ways we can fix this and like so many things in software development, there is no single "right way" – it always depends on how much effort one wants to make and how much time we have in order to achieve a desired outcome. Here are our immediate options:

  1. Overhaul the build so that we can reuse on the server the same file paths generated by the client build.
  2. Use yarn build to generate the production site and then let the server use the same files.
  3. Introduce a delayed rendering so that the initial renders of server and client will always match.

Option 1 is where I would like us to ultimately be. It allows us to decouple the deployment of the static site and the server-side rendering setup, giving us a scalable solution. The render server at Khan Academy uses a similar to this approach and my work on that server inspired me to write this blog series in the first place.

Option 2 is what many sites do. They deploy the render server with the built client code, and as such, it always has the right paths. While we are leveraging this approach a little since our server imports code from the client folder, going all the way to having to do production builds just to test this in development is not helpful. In addition, this approach does not scale very well.

Option 3 is a very useful approach. Using a hook or stateful component to delay client-specific code until after the initial render is a versatile solution to many hydration issues. For example, if you want to add identifiers to your elements to satisfy accessibility requirements (which you should want), you can use a mechanism like this to ensure those identifiers are the same during initial render between the server and client. Those pesky feature detection issues mentioned earlier are also easily fixed with this approach. This is known around Khan Academy is using an SSR placeholder; as in rendering placeholder content during the initial render on both client and server, then replacing that with the real content on subsequent re-renders. There can be a lot of complexity here to avoid unnecessary re-rendering, but when done right, it is a useful tool in the server-side rendering toolkit.

The SSR Placeholder

In order to avoid unnecessary rendering, such as odd cascading renders where one component delays until the 2nd render, then it's children do the same, to the point where things nested n levels deep are waiting n+1 render cycles to render for the first time, we have to be smart about implementing our delayed rendering component.

For one solution, take a look at the WithSSRPlaceholder component I wrote for Khan Academy's Wonder Blocks component library, based on earlier work in our engineering team. It tracks state and makes sure that nested uses do not delay any longer than the root instance, avoiding cascading render cycles. Because the server only does a single render and does not mount the component, state changes do not get rendered on the server and we just get a single render, but in the client, the state change triggers another render and we get the update we are looking for3. It may seem tempting to just use useEffect or useState, but if you want nice reusable components that can nest happily without those aforementioned cascading renders, then some sort of context is going to be needed.

That said, useEffect and useState are perfect for our really simple app to get us hydrating, as this note in the React documentation suggests:

To exclude a component that needs layout effects from the server-rendered HTML, render it conditionally with showChild && <Child /> and defer showing it with useEffect(() => { setShowChild(true); }, []). This way, the UI doesn’t appear broken before hydration.

reactjs.org

So, to resolve the hydration error we see in our example app, let's refactor our logo rendering into a component that uses this technique.

import React, {useState, useEffect} from 'react';
import logo from './logo.svg';
import './App.css';

const SpinningLogo = (props) => {
    const [showLogo, setShowLogo] = useState(false);

    useEffect(() => {
        setShowLogo(true);
    }, [showLogo]);

    if (showLogo) {
        return <img src={logo} className="App-logo" alt="logo" />;
    }
    return null;
};
export default SpinningLogo;
import React from 'react';
import {Link, Route, Switch} from "react-router-dom";
import Router from "./Router.js";
import SpinningLogo from "./SpinningLogo.js";
import './App.css';

function App(props) {
  const {ssrLocation} = props;
  return (
    <Router ssrLocation={ssrLocation}>
      <div className="App">
        <header className="App-header">
          <SpinningLogo />
          <div className="App-links">
            <Link className="App-link" to="/">Home</Link>
            <Link className="App-link" to="/about">About</Link>
            <Link className="App-link" to="/contact">Contact</Link>
          </div>
        </header>
        <section className="App-content">
          <Switch>
            <Route path="/about">
              This is the about page!
            </Route>
            <Route path="/contact">
              This is the contact page!
            </Route>
            <Route path="/">
              This is the home page!
            </Route>
          </Switch>
        </section>
      </div>
    </Router>
  );
}

export default App;

Now we have a component, SpinningLogo, that manages some state and only renders our logo image when that state is set true. On the initial render in both server and client, it is false and so renders nothing, but on the subsequent render in the client, it is true and we get our logo.

Or at least we should. Sadly, running this refactored code causes our server to stop working altogether and we get a confusing error.

/Users/jeffyates/git/hello-react-world/client/node_modules/react/cjs/react.development.js:1476
      throw Error( "Invalid hook call. Hooks can only be called inside of the body of a function component. This could happen for one of the following reasons:\n1. You might have mismatching versions of React and the renderer (such as React DOM)\n2. You might be breaking the Rules of Hooks\n3. You might have more than one copy of React in the same app\nSee https://reactjs.org/link/invalid-hook-call for tips about how to debug and fix this problem." );
            ^
Error: Invalid hook call. Hooks can only be called inside of the body of a function component. This could happen for one of the following reasons:
1. You might have mismatching versions of React and the renderer (such as React DOM)
2. You might be breaking the Rules of Hooks
3. You might have more than one copy of React in the same app
See https://reactjs.org/link/invalid-hook-call for tips about how to debug and fix this problem.
    at resolveDispatcher (/Users/jeffyates/git/hello-react-world/client/node_modules/react/cjs/react.development.js:1476:13)
    at useState (/Users/jeffyates/git/hello-react-world/client/node_modules/react/cjs/react.development.js:1507:20)
    at SpinningLogo (/Users/jeffyates/git/hello-react-world/client/src/SpinningLogo.js:6:37)
    at processChild (/Users/jeffyates/git/hello-react-world/server/node_modules/react-dom/cjs/react-dom-server.node.development.js:3353:14)
    at resolve (/Users/jeffyates/git/hello-react-world/server/node_modules/react-dom/cjs/react-dom-server.node.development.js:3270:5)
    at ReactDOMServerRenderer.render (/Users/jeffyates/git/hello-react-world/server/node_modules/react-dom/cjs/react-dom-server.node.development.js:3753:22)
    at ReactDOMServerRenderer.read (/Users/jeffyates/git/hello-react-world/server/node_modules/react-dom/cjs/react-dom-server.node.development.js:3690:29)
    at renderToString (/Users/jeffyates/git/hello-react-world/server/node_modules/react-dom/cjs/react-dom-server.node.development.js:4298:27)
    at renderPage (/Users/jeffyates/git/hello-react-world/server/index.js:13:31)
    at IncomingMessage.<anonymous> (/Users/jeffyates/git/hello-react-world/server/index.js:68:29)

There's no need to panic. There are three possible reasons this error suggests might be the cause of our issue:

  1. You might have mismatching versions of React and the renderer (such as React DOM's renderer)
  2. You might be breaking the Rules of Hooks
  3. You might have more than one copy of React in the same app

If we reason through our code, we can work out what is really going on. First, we can check the server and client and verify they are both using the same versions of React and React DOM, and yes, they most definitely are. Second, from looking at the documentation and the fact that this is such a simple case, it is unlikely we are breaking the Rules of Hooks. This leaves option three, but how could we have multiple copies of React?

If you recall, we got our server working originally by importing the App component directly from our client code into the server. Of course, that component imports React from its context and therefore resolves to the client code's node module dependencies, but our server is already importing React and ReactDOM from its own node module dependencies, and voila, we have the potential for two copies of React.

To fix this, we can have the server import React and ReactDOM from the client codebase too.

require("./require-patches.js");
const http = require("http");
const express = require("express");
const React = require("../client/node_modules/react");
const {renderToString} = require("../client/node_modules/react-dom/server");
const getProductionPageTemplate = require("./get-production-page-template.js");
const App = require("../client/src/App.js").default;

const port = 3001;
const app = express();

const renderPage = (pageTemplate, reactComponent) => {
    const renderedComponent = renderToString(reactComponent);
    return pageTemplate.replace('<div id="root"></div>', `<div id="root">${renderedComponent}</div>`);
};

if (process.env.NODE_ENV === "production") {
    app.use(express.static("../client/build"));
}

app.get("/*", (req, res, next) => {
    /**
     * Production is easy. We'll load the template and render into it.
     */
    if (process.env.NODE_ENV === "production") {
        res.send(
            renderPage(getProductionPageTemplate(), <App ssrLocation={req.url} />),
        );
        next();
        return;
    }

    /**
     * During development, we're going to proxy to the webpack dev server.
     */
    if (process.env.NODE_ENV !== "production") {
        /**
         * Let's make life easier on ourselves and only accept UTF-8 when it's
         * a text/html request. We're in dev, so we don't need GZIP savings.
         */
        const headers = Object.assign({}, req.headers);
        if (req.headers["accept"] && req.headers["accept"].indexOf("text/html") > -1) {
            headers["accept-encoding"] = "utf8";
        }

        /**
         * Now call the client dev server, which we know is on port 3000.
         */
        http.get(
            {
                port: 3000,
                path: req.url,
                headers: headers,
            },
            (proxiedResponse) => {
                /**
                 * If our original request was text/html, we want to render
                 * react in there. So, let's gather that response and then
                 * render the page.
                 */
                if (req.headers["accept"] && req.headers["accept"].indexOf("text/html") > -1) {
                    let responseBody = "";
                    proxiedResponse.setEncoding("utf8");
                    proxiedResponse.on("data", (chunk) => {
                        responseBody += chunk;
                    }).on("end", () => {
                        res.send(
                            renderPage(responseBody, <App ssrLocation={req.url} />),
                        );
                        next();
                    }).on("error", e => {
                        res.status(500);
                        res.send(e);
                    });
                    return;
                }

                res.writeHead(proxiedResponse.statusCode, proxiedResponse.headers);
                proxiedResponse.pipe(res, {end: true});
                next();
            },
        );
    }
});

app.listen(port, () => console.log(`Example app listening on port ${port}!`));

With React, ReactDOM and our App all coming from the client code, the hydration of our SSR result is now working!

Animated screengrab of the App we have been building, showing the rotating logo and the Home, About, and Contact links.
Our server-side rendered and hydrated application now looks the same as if it was render solely client-side

πŸŽ‰We have done it. Our first server-side rendered app that is properly hydrating. We have cut a few corners to get here, and learned a few things along the way. Hopefully, this exercise has not only highlighted the complexities of implementing successfully hydrating code, and spotting and debugging hydration issues, but it has also begun to demonstrate how complex our code can get as we try to implement a working server-side rendering solution.

Join me for the next post in this series when we leverage the knowledge we have built so far to find a server-side rendering approach that is scalable, generic, and cuts a lot less corners. In the meantime, please leave any questions or concerns in the comments – the more I code and blogs I write about this topic, the more I learn, and I am certain there are things I can learn from you too.

  1. Setting breakpoints, peeking at values inside React, etc. You know, real dirty debugging stuff – getting right down there in the dirt. []
  2. One goal with this series of posts is to eventually create a render server architecture that will make production-time detection of hydration issues easier to spot; time will tell if I achieve that goal. []
  3. For the hooks world, my colleague, Kevin Barabash has expanded this solution to use a RenderStateRoot component that sets up and manages the context, and a useRenderState hook for determining what phase of rendering a component is in []

πŸ’§ Hydration and Server-side Rendering

Featured image created from photos by Dan Gold and insung yoon on Unsplash.

This is part 8 of my series on server-side rendering (SSR):

  1. πŸ€·πŸ»β€β™‚οΈ What is server-side rendering (SSR)?
  2. ✨ Creating A React App
  3. 🎨 Architecting a privacy-aware render server
  4. πŸ— Creating An Express Server
  5. πŸ–₯ Our first server-side render
  6. πŸ– Combining React Client and Render Server for SSR
  7. ⚑️ Static Router, Static Assets, Serving A Server-side Rendered Site
  8. [You are here] πŸ’§ Hydration and Server-side Rendering
  9. 🦟 Debugging and fixing hydration issues
  10. πŸ›‘ React Hydration Error Indicator
  11. πŸ§‘πŸΎβ€πŸŽ¨ Render Gateway: A Multi-use Render Server

Over the course of this series on server-side rendering (SSR), we have tackled some interesting problems1.

In the last post on this topic, we finally combined our client app and server, giving an SSR result that looks and works a lot like the non-SSR version…or at least it seemed that way. As it turns out, we are missing a big piece of the SSR story and, I'm afraid to say, that once we add that in we will see that we still are not quite done. That piece is hydration.

ℹ️Code for this series can be found at https://github.com/somewhatabstract/hello-react-world.

πŸ™‹πŸ»β€β™‚οΈ What is Hydration?

React does a lot of things to help simplify the rendering and operation of a client-side web application. In order to do that, a root component that represents our application has to be mounted into the page. This is done via the ReactDOM.render call. It takes the component representing our application and a DOM node indicating where in the page the application will exist. In our simple web application, this looks something like this.

ReactDOM.render(<App />, document.getElementById('root'));

Without server-side rendering, the root node that we are giving here is entirely empty. When the ReactDOM.render call occurs, React fills that empty node with our application. When we have an SSR result, that node already has content in it. Instead of replacing that content, we want React to attach. running application to it. This is where hydration comes in. During hydration, React works quickly in a virtual DOM to match up the existing content with what the application renders, saving time from manipulating the DOM unnecessarily. It is this hydration that makes SSR worthwhile.

There are two big rules to hydrating an application in React.

  1. The initial render cycle of the application must result in the same markup, whether run on the client or the server.
  2. We must call ReactDOM.hydrate instead of ReactDOM.render in order to instruct React to hydrate from our SSR result.

We will get back to the first item as it is going to drive some further work once we have addressed the second; making React hydrate our SSR result.

🚰 Making our application hydrate

There are two ways we can make our page hydrate. We could either assume we will always SSR and therefore always call hydrate instead of render, or we could support both hydrate and render depending on how our application gets deployed. The benefit of the former is that we do not have to do any branching in our client-side code for the two modes; the benefit of the latter is that our application is flexible, allowing us to use the client-side application without demanding that we SSR, even in development.

In the end, it really is best to support both, so we are going to need to update our client application to understand the difference between the two states and act accordingly. So, how does our client application know which to do; hydrate or render?

There are many ways to do this. Some things that spring to mind are:

  1. Look at the element being used for the root of our application and if it has children, hydrate instead of render.
  2. Embed JavaScript in the page markup that sets a flag to specify one or the other.
  3. Use a function to perform the action and then use embedded JavaScript to change which operation that function performs.

I am sure you could think of some more. Since we already have to get the element in order to mount the React application, I am going to stick with option 1 for now (we can always change our minds if need be). Below I have included the index.js of our client application before and after adding hydrate support. In both files I have highlighted what changes. Note that we do not even have to touch our SSR implementation in order to get this working.

import React from 'react';
import ReactDOM from 'react-dom';
import './index.css';
import App from './App';

ReactDOM.render(<App />, document.getElementById('root'));
import React from 'react';
import ReactDOM from 'react-dom';
import './index.css';
import App from './App';

const mountElement = document.getElementById('root');
const reactMountFn = (mountElement.childElementCount === 0)
    ? ReactDOM.render
    : ReactDOM.hydrate;

reactMountFn(<App />, mountElement);

Right, let's see what happens when we run our application with this updated code. First, in development mode, we start the client and the server2. If we have done this correctly, visiting the non-SSR route should use render and visiting the SSR route should use hydrate; and if we've really done things correctly, we'll never know.

Developer Mode render
Developer Mode hydrate with SSR

Oh dear; something is not looking so great. It feels like we took a step backwards here. Last time we had a server-side rendered application that looked just like the client-only version, and now we're back to not even loading the SVG asset properly. What happened?

🚱 When hydration fails

If we open the console for the version that is performing hydration, we can see a big hint to our problem.

Error in Google Chrome console reading:

Warning: Prop `src` did not match. Server: "/Users/jeffyates/git/hello-react-world/client/src/logo.svg" Client: "/static/media/logo.5d5d9eef.svg"

I had mentioned at the end of our last post that our SVG was getting the wrong path because we were not including our root React component with all the webpack magic, and this is the result. Our server-side rendered content has a different path than the React application wants to use when rendered on the client.

Did I say rendered? Don't I mean hydrated? Well, React is rendering the client application in a virtual DOM and comparing it to the content it is trying to hydrate in the page (our SSR result); if there is a mismatch, the rendered part wins. In the worst case, this can cause the entire application to re-render in the client in order for React to guarantee the client-side application is in the correct state.

These hydration warnings are, in my view, a big deal but are so easily overlooked. They are hidden away in the console messages of development builds – production builds do not raise them, React just silently deals with the situation in the way it thinks best, which could be a total re-render of your application. Not only that, but they are pretty hard to debug. This one is clear, but when it comes to others, they may just say that there's a div it did not expect; good luck finding out which div that is. Finally, if there is more than one, you will only see the second one once you fix the first, so staying on top of these is important if you want to ensure your SSR results can be used to their full potential, avoiding those costly client-side re-renders if the hydration fails.

πŸ€— Don't Panic

Of course, there's no need to panic; we have made incredible progress. We actually have a server-side rendering application that is attempting to hydrate. This is pretty fantastic and the only error we seem to have right now, the SVG path mismatch, is as much down to how our code is built using webpack as it is to do with React. Next time, we will dig into this hydration warning, work out how to fix our SVG path, and pave the way for a deeper dive into fixing hydration issues.

As always, thank you for your attention. Server-side rendering is a fun topic, in my opinion, but it can seem overwhelmingly complex3. I hope this series is proving useful in breaking apart that complexity and surfacing the sharp edges on which we can get easily caught. Let's smooth those edges down together.

Until then, be well! πŸ’™

  1. I think they are interesting – I hope you agree []
  2. Remember, last time we made it so that our SSR server gets files from the client dev server to ensure we get that good webpack magic. []
  3. it was for me when I first got started []

⚑️ Static Router, Static Assets, Serving A Server-side Rendered Site

Featured image from photo by Greg Jeanneau on Unsplash

This is part 7 of my series on server-side rendering (SSR):

  1. πŸ€·πŸ»β€β™‚οΈ What is server-side rendering (SSR)?
  2. ✨ Creating A React App
  3. 🎨 Architecting a privacy-aware render server
  4. πŸ— Creating An Express Server
  5. πŸ–₯ Our first server-side render
  6. πŸ– Combining React Client and Render Server for SSR
  7. [You are here] ⚑️ Static Router, Static Assets, Serving A Server-side Rendered Site
  8. πŸ’§ Hydration and Server-side Rendering
  9. 🦟 Debugging and fixing hydration issues
  10. πŸ›‘ React Hydration Error Indicator
  11. πŸ§‘πŸΎβ€πŸŽ¨ Render Gateway: A Multi-use Render Server

Last time, we worked to combine the client website implementation and the server rendering architecture into a single solution. Unfortunately, where we ended up was a failing app. This week we are going to jump straight in where we left off with the goal of finally server-side rendering our website. I'll let you in on a little secret; we hit that goal this week1!

πŸ—Ί StaticRouter

At the end of our attempts to integrate our website with the server, we got this error:

Error: Invariant failed: Browser history needs a DOM

To fix this, our first instinct might be to provide a DOM using perhaps JSDOM. However, this additional dependency is not the right way to resolve this error. Instead, we can look to React Router. It turns out that besides the BrowserRouter, React Router provides other router implementations such as HashRouter, MemoryRouter, and StaticRouter. There are different scenarios where these different routers come into play – for example, the MemoryRouter is really useful for testing, including storyboard style tests where one might want to verify that navigation would happen without actually having it happen. In the case of server-side rendering, it is the StaticRouter component that is there to help us. StaticRouter is pretty much what it says. It provides all the things React Router's infrastructure needs to render routes but with none of the navigation support. We tell it the location we are at and it ensures that is the route we render.

To get StaticRouter into our app we have now come to the point where our client-side website implementation can no longer be oblivious to our server-side rendering implementation. As we shall find during our SSR adventures, this will not be the only time our client app must consider its server-side rendering, but we can make it as seamless as possible. To start, let's modify our root App component so that we can control whether it renders a BrowserRouter or a StaticRouter.

import React from 'react';
import {BrowserRouter, StaticRouter} from "react-router-dom";

export default function Router(props) {
    const {ssrLocation, children} = props;

    if (ssrLocation == null) {
        return <BrowserRouter>{children}</BrowserRouter>;
    }

    return <StaticRouter location={ssrLocation}>{children}</StaticRouter>;
}
import React from 'react';
import {Link, Route, Switch} from "react-router-dom";
import Router from "./Router.js";
import logo from './logo.svg';
import './App.css';

function App(props) {
  const {ssrLocation} = props;
  return (
    <Router ssrLocation={ssrLocation}>
      <div className="App">
        <header className="App-header">
          <img src={logo} className="App-logo" alt="logo" />
          <div className="App-links">
            <Link className="App-link" to="/">Home</Link>
            <Link className="App-link" to="/about">About</Link>
            <Link className="App-link" to="/contact">Contact</Link>
          </div>
        </header>
        <section className="App-content">
          <Switch>
            <Route path="/about">
              This is the about page!
            </Route>
            <Route path="/contact">
              This is the contact page!
            </Route>
            <Route path="/">
              This is the home page!
            </Route>
          </Switch>
        </section>
      </div>
    </Router>
  );
}

export default App;
require("./require-patches.js");
const express = require("express");
const React = require("react");
const {renderToString} = require("react-dom/server");
const {getPageTemplate} = require("./get-page-template.js");
const App = require("../client/src/App.js").default;

const port = 3000;
const app = express();

const pageTemplate = getPageTemplate();

const renderPage = (reactComponent) => {
    const renderedComponent = renderToString(reactComponent);
    return pageTemplate.replace('<div id="root"></div>', `<div id="root">${renderedComponent}</div>`);
};

app.get("/*", (req, res) => res.send(
    renderPage(<App ssrLocation={req.url}  />),
));

app.listen(port, () => console.log(`Example app listening on port ${port}!`));

The first thing I did was to create a new component in our client app called Router. This component encapsulates the choice between using BrowserRouter or StaticRouter. It takes two props: children and ssrLocation. The first, children is what the component will render as its children (this is a React idiom – to use the prop children for any child components that a component will render). The second, ssrLocation is the URL that will be used with the StaticRouter when server-side rendering. If ssrLocation is not specified, we assume we are client-side and use BrowserRouter; if ssrLocation is specified, we assume we are server-side and use ServerRouter.

Second, I updated our App component to use this new Router component and to allow for the provision of an ssrLocation prop. I have highlighted the more important lines of that change.

With the client-side app now smart enough to handle the two worlds, we need the server to provide the ssrLocation prop. This change is highlighted in the server/index.js.

If we run the server with yarn start and visit localhost:3000 to see if it worked.

Screenshot from browser showing the URL of localhost:3000, and a page with an image placeholder called "logo", three links without padding nor margins labelled "Home", "About", and "Contact", and the text "This is the home page!"

Success-ish! We can even visit a different route like localhost:3000/about and see that it renders the about page. Brilliant, even though there is no nice spinning SVG and no styles, we rendered our app without an obvious error. Still, where is that logo and where are out styles? If we look at the server's console we see a couple of errors indicating that some files were requested but we failed to return them because we failed to decode the URL. Are these errors a clue to our missing CSS?

yarn run v1.21.1
$ NODE_ENV=development babel-watch index.js
Example app listening on port 3000!
URIError: Failed to decode param '%PUBLIC_URL%/manifest.json'
    at decodeURIComponent (<anonymous>)
    at decode_param (/hello-react-world/server/node_modules/express/lib/router/layer.js:172:12)
    at Layer.match (/hello-react-world/server/node_modules/express/lib/router/layer.js:148:15)
    at matchLayer (/hello-react-world/server/node_modules/express/lib/router/index.js:574:18)
    at next (/hello-react-world/server/node_modules/express/lib/router/index.js:220:15)
    at expressInit (/hello-react-world/server/node_modules/express/lib/middleware/init.js:40:5)
    at Layer.handle [as handle_request] (/hello-react-world/server/node_modules/express/lib/router/layer.js:95:5)
    at trim_prefix (/hello-react-world/server/node_modules/express/lib/router/index.js:317:13)
    at /hello-react-world/server/node_modules/express/lib/router/index.js:284:7
    at Function.process_params (/hello-react-world/server/node_modules/express/lib/router/index.js:335:12)
URIError: Failed to decode param '%PUBLIC_URL%/favicon.ico'
    at decodeURIComponent (<anonymous>)
    at decode_param (/hello-react-world/server/node_modules/express/lib/router/layer.js:172:12)
    at Layer.match (/hello-react-world/server/node_modules/express/lib/router/layer.js:148:15)
    at matchLayer (/hello-react-world/server/node_modules/express/lib/router/index.js:574:18)
    at next (/hello-react-world/server/node_modules/express/lib/router/index.js:220:15)
    at expressInit (/hello-react-world/server/node_modules/express/lib/middleware/init.js:40:5)
    at Layer.handle [as handle_request] (/hello-react-world/server/node_modules/express/lib/router/layer.js:95:5)
    at trim_prefix (/hello-react-world/server/node_modules/express/lib/router/index.js:317:13)
    at /hello-react-world/server/node_modules/express/lib/router/index.js:284:7
    at Function.process_params (/hello-react-world/server/node_modules/express/lib/router/index.js:335:12)

If we run the server in production mode with yarn start:prod and revisit localhost:3000, we see the same HTML rendered with no logo nor CSS and this time, there are no server console errors. However, if we look in the browser console, we see some curious errors:

2.dbb51963.chunk.js:1 Uncaught SyntaxError: Unexpected token '<'
main.448e42f3.chunk.js:1 Uncaught SyntaxError: Unexpected token '<'
manifest.json:1 Manifest: Line: 1, column: 1, Syntax error.

If we select the Network tab and refresh, then click on the response for one of these files, we can see exactly what is happening to cause the console errors, and see a clue as to why our logo is missing.

Our server is responding to every request as if it were the request for a page, when we really want it to return the files that were requested. In addition, we can see that instead of being written with tags, the SVG has been written out with HTML entities. These are two different problems. Let's fix the SVG one first.

🎩 Repetitive Magic

If you recall, last time around we taught NodeJS how to import SVG and CSS files with custom import extensions that looked like this:

const fs = require("fs");
const requireText = function (module, filename) {
    module.exports = fs.readFileSync(filename, 'utf8');
};
require.extensions[".svg"] = requireText
require.extensions[".css"] = requireText;

This is then used in our App component as follows (I have pared this down to just the import and usage for clarity):

import logo from './logo.svg';

<img src={logo} className="App-logo" alt="logo" />

That is not right. Of course our logo is not showing up because we're producing a nonsense source string. To see why our client app does not have this issue, let's run it in dev mode and see how that img tag gets rendered.

<img src="/static/media/logo.5d5d9eef.svg" class="App-logo" alt="logo">

That is weird. That file path does not even exist. It turns out webpack is doing some magic work for us to ensure that the import of the SVG file becomes an actual URL to the static file on disk rather than some nonsense inline pseudo-HTML like we have from our server. So, what do we do?

Well, we could do a few things:

  1. Work on mimicking this behavior, continuing down our path of trying to import the client code inside of our server app, providing our own magic for dealing with SVG files.
  2. Change the build process for the client-side app so that the server can use the built version of the JavaScript and benefit from webpack's magic.
  3. Something else entirely.

The advantage to option 1 is that it would be an interesting problem to solve. We could change our custom import stuff to track what SVG gets imported and then work out some way of ensuring that its reference in the React causes the URL to appear instead of the content (perhaps by using a property accessor). The disadvantage is that this feels like work we should not need to do; like we're fighting against the current. There are already tools doing this magic work; why do we need to reimplement that magic? Why can we not just reuse it as it is?

With option 2, it means starting to unpack all the things that the create-react-app tool set up for us, taking control of the webpack bundling configuration and all that good stuff, so that we can import the production builds of files. Even if we managed it, it would not work for development, since our render server is not requesting files from the webpack dev server. In addition, it seems like the problem is now dictating odd parts of our solution; why should the client build be optimized only for server use when it also has to work in the client, which may have different concerns? There has to be a better way and there is. However, before we discover that better way, our option 3 – something else, we should first consider the other problem; our render server is trying to render file requests as web pages. What we need is for our server to serve the files themselves instead.

πŸ“€ Serving Files

To be clear, in a real world situation, we may well use a CDN to orchestrate some of this work. Based on its rules, it would either server files and cached renders, or request a new render from our render server, and our render server would obtain any files it needs either from the CDN or from a local folder that replicates those files. However, we want to learn more and so let's assume for now that we don't have a CDN and our render server is going to be the server browsers talk to first. Therefore, it's going to need to know how to serve the different types of requests; files, pages, etc.

This is a solved problem, so it should be pretty easy to get working. Part of the issue is that our handler currently assumes everything is a request for HTML. Instead, it should probably be looking at the Accept header in the request to determine what is needed and then act accordingly. However, we must consider both our final production behavior where files will be served from a static folder, and our development behavior where we are going to want to get those files from webpack's dev server so that we can benefit from its development time bundling and static file generation.

Production

Since development is going to be a little harder, let's work on production first, since that is not just easier, it's a lot easier. Thanks to the built-in static middleware that Express provides, we can specify our build folder as the source of static files and express does the rest.

if (process.env.NODE_ENV === "production") {
    app.use(express.static("../client/build"));
}

app.get("/*", (req, res) => res.send(
    renderPage(<App ssrLocation={req.url} />),
));

Before our route handler, we add a check for production, and if it passes, we add the middleware for the /static route. If we refresh our production server, amazingly, everything appears to work2!

Development

If only development was as easy. I mean it could be, we could just defer all our calls to the client webpack dev server and we would have a working site, but we would not be testing out any actual server-side rendering. Instead, we need to proxy everything to the webpack dev server first, including the web pages. Why the web pages too? Well, if you may recall earlier in this post, our early attempts had two server-side errors where we failed to interpret URLs. This was because the index.html template for development requires some string substitution that webpack handles for us. If our render server loads that template via webpack, not only will it give us the right substitutions, but it is going to embed the CSS and scripts for us too. Of course, since we also want to stick in some rendered HTML, we will need intercept those specific requests and add our own bits.

Before we can do any of that, we need to know the address of the client server. As it happens, it is currently the same as our render server; localhost:3000. That's a bit of a problem, so let's move our render server to 3001 while we're at it. That way, both the client development server and our render server can coexist.

There are quite a few changes I made to get this working, all of them in the render server itself. Since the index.html template for the development mode is served via the webpack dev server, I modified the template loading code to only support the production build template. I also updated the server to use port 3001 and I implemented changes to the route handler so that during development, we proxied requests to the webpack dev server. Finally, I modified our custom file importers to just import as their own filenames. I made this change because as we found out, reading the file contents was not helping us and in fact, may have actually been hindering our ability to debug. By having the filenames instead, it should give a better experience for us when we're debugging.

require("./require-patches.js");
const http = require("http");
const express = require("express");
const React = require("react");
const {renderToString} = require("react-dom/server");
const getProductionPageTemplate = require("./get-production-page-template.js");
const App = require("../client/src/App.js").default;

const port = 3001;
const app = express();

const renderPage = (pageTemplate, reactComponent) => {
    const renderedComponent = renderToString(reactComponent);
    return pageTemplate.replace('<div id="root"></div>', `<div id="root">${renderedComponent}</div>`);
};

if (process.env.NODE_ENV === "production") {
    app.use(express.static("../client/build"));
}

app.get("/*", (req, res, next) => {
    /**
     * Production is easy. We'll load the template and render into it.
     */
    if (process.env.NODE_ENV === "production") {
        res.send(
            renderPage(getProductionPageTemplate(), <App ssrLocation={req.url} />),
        );
        next();
        return;
    }

    /**
     * During development, we're going to proxy to the webpack dev server.
     */
    if (process.env.NODE_ENV !== "production") {
        /**
         * Let's make life easier on ourselves and only accept UTF-8 when it's
         * a text/html request. We're in dev, so we don't need GZIP savings.
         */
        const headers = Object.assign({}, req.headers);
        if (req.headers["accept"] && req.headers["accept"].indexOf("text/html") > -1) {
            headers["accept-encoding"] = "utf8";
        }

        /**
         * Now call the client dev server, which we know is on port 3000.
         */
        http.get(
            {
                port: 3000,
                path: req.url,
                headers: headers,
            },
            (proxiedResponse) => {
                /**
                 * If our original request was text/html, we want to render
                 * react in there. So, let's gather that response and then
                 * render the page.
                 */
                if (req.headers["accept"] && req.headers["accept"].indexOf("text/html") > -1) {
                    let responseBody = "";
                    proxiedResponse.setEncoding("utf8");
                    proxiedResponse.on("data", (chunk) => {
                        responseBody += chunk;
                    }).on("end", () => {
                        res.send(
                            renderPage(responseBody, <App ssrLocation={req.url} />),
                        );
                        next();
                    }).on("error", e => {
                        res.status(500);
                        res.send(e);
                    });
                    return;
                }

                res.writeHead(proxiedResponse.statusCode, proxiedResponse.headers);
                proxiedResponse.pipe(res, {end: true});
                next();
            },
        );
    }
});

app.listen(port, () => console.log(`Example app listening on port ${port}!`));
const fs = require("fs");

let productionTemplate;
export const getProductionPageTemplate = () => {
    if (!productionTemplate) {
        productionTemplate = fs.readFileSync("../client/build/index.html").toString();
    }
    return productionTemplate;
};
const fs = require('fs');

const requireText = function (module, filename) {
    console.log(`Pretend import of ${filename}`)
    module.exports = filename;
};

require.extensions['.svg'] = requireText
require.extensions['.css'] = requireText;

After making these changes, if we fully reload our development server, it appears to work! Fantastic! We're done right? Well, not quite. Though it may not be obvious, especially when compared with some of our earlier errors, we have some problems remaining:

  1. The HTML we render on the server has the wrong SVG path in it. Because we're rendering the non-production version of the App component in the server, it has no access to the magic sauce that webpack introduces. This is going to be the case for any other similar imports we do.
  2. We are not yet performing what React refers to as hydration. This means that all the work we did on the server is pretty much ignored once it reaches the client, and the React app is remounted from scratch. This may not seem important for our little app since it is already so fast (mainly because it does almost nothing), but for a bigger application all we have done is make serving the page slower with no actual benefit!

πŸ‘‹πŸ» Until next time

Next time we will work on addressing these issues and finally have server-side rendering that works. Of course, even then our journey is not over. With a fundamental render server working, it will be prime territory for us to branch out into dealing with some gnarlier problems like server-side rendering parts of an app that rely on asynchronous operations like data requests, speeding up our app by only loading the parts we need, and how to optionally render components between server and client without getting rehydration errors.

As always, thanks for joining me on this journey through the lands of server-side rendering with React. Until next time, have a lovely week! πŸ’™

  1. Sadly, we our site won't benefit from it whatsoever []
  2. It really is not, but we'll get to that another time. []

πŸ– Combining React Client and Render Server for SSR

Photo by Mike Petrucci on Unsplash

This is part 6 of my series on server-side rendering (SSR):

  1. πŸ€·πŸ»β€β™‚οΈ What is server-side rendering (SSR)?
  2. ✨ Creating A React App
  3. 🎨 Architecting a privacy-aware render server
  4. πŸ— Creating An Express Server
  5. πŸ–₯ Our first server-side render
  6. [You are here] πŸ– Combining React Client and Render Server for SSR
  7. ⚑️ Static Router, Static Assets, Serving A Server-side Rendered Site
  8. πŸ’§ Hydration and Server-side Rendering
  9. 🦟 Debugging and fixing hydration issues
  10. πŸ›‘ React Hydration Error Indicator
  11. πŸ§‘πŸΎβ€πŸŽ¨ Render Gateway: A Multi-use Render Server

Here we are at last? Finally, a server-side rendered application? We shall see1. After making a simple client-side React application and talking about, building, and extending a server-side rendering (SSR) architecture, we can do the work of combining the two.

Last time we took our simple express server and got it to return an HTML page that included some actual rendered React. It was not particularly flashy, but it did prove out the concept. So, what now? Well, we need to somehow have our server-side code render our client-side code.

πŸ₯£ Combining the server and client

Currently, these are two separate projects. One, our client-side app, is using JSX; the other, our server-side app, does not know what JSX is. To combine them, we need to either teach the server about JSX or incorporate a built version of the client app.

My personal preference is to keep the server as unaware of the client-side specifics as possible. This has the advantage that in the long term, the server might even need to know that it is rendering React at all. However, before we resort to that, let's try to compromise a little for the sake of keeping things simple.

Incorporating our client app into our server app is not quite so simple as just copying the code over. Our server needs to understand it. Thankfully, it only needs to understand how to turn JSX into regular JS, so we can add our own Babel configuration for that. Since the client app is in its own Git repository, we can import a version of it via commit SHA. However, we do need the production build of the template, which creates a problem since we cannot build the client application in the server repository; it has developer dependencies that won't be fulfilled in the server project.

The traditional way to resolve that would be to publish the client app as a package in a package repository. That way the built template would be a part of the package for us to include. Of course, we are not going to do that; it's far more work than I want to do right now. Instead, what we will do is have both packages co-exist in the same repository as siblings. The server can then easily invoke commands on the client application if it so requires in order to ensure access to the client production assets. This allows both server and client to exist on their own while still allowing for the integration we seek2.

To get the server able to compile the JSX files, I ran the following commands, added the given Babel config file, and modified our package.json scripts to add babel-watch to the start command so that we can edit code and auto-transpile and restart3. With these changes, I then updated the index.js server file to replace our previous hack of using React.createElement with some actual JSX.

yarn add --dev @babel/cli @babel/core @babel/proposal-plugin-class-properties @babel/preset-env @babel/preset-react
{
  "name": "hello-react-world-ssr",
  "version": "0.0.1",
  "description": "A server-side rendering server",
  "main": "index.js",
  "license": "MIT",
  "dependencies": {
    "express": "^4.17.1",
    "react": "^16.12.0",
    "react-dom": "^16.12.0"
  },
  "scripts": {
    "start": "NODE_ENV=development babel-watch index.js"
  },
  "devDependencies": {
    "@babel/cli": "^7.8.4",
    "@babel/core": "^7.8.4",
    "@babel/plugin-proposal-class-properties": "^7.8.3",
    "@babel/preset-env": "^7.8.4",
    "@babel/preset-react": "^7.8.3",
    "babel-watch": "^7.0.0"
  }
}
const express = require("express");
const React = require("react");
const {renderToString} = require("react-dom/server");
const {getPageTemplate} = require("./get-page-template.js");

const port = 3000;
const app = express();

const pageTemplate = getPageTemplate();

const renderPage = (reactComponent) => {
    const renderedComponent = renderToString(reactComponent);
    return pageTemplate.replace('<div id="root"></div>', `<div id="root">${renderedComponent}</div>`);
};

app.get("/*", (req, res) => res.send(
    renderPage(<div>Hello World!</div>),
));

app.listen(port, () => console.log(`Example app listening on port ${port}!`));

Running yarn start demonstrates that this updated code is working, so our final step is to incorporate our actual App component. This is as simple as importing the App component and then replacing the <div>Hello World!</div> with <App />. Great! yarn start again.

Sadly, this immediately results in an error when the App component tries to import the SVG logo. To work around this, we can extend Node's require to support the SVG extension (while we're at it, we also have to do this for the CSS imports).

const fs = require("fs");

const requireText = function (module, filename) {
    module.exports = fs.readFileSync(filename, 'utf8');
};

require.extensions[".svg"] = requireText
require.extensions[".css"] = requireText;

Now when we yarn start, things appear to be all right. However, if we navigate to localhost:3000, instead of any part of our app, we get an error:

Error: Invariant failed: Browser history needs a DOM
    at invariant (/hello-react-world/client/node_modules/tiny-invariant/dist/tiny-invariant.cjs.js:13:11)
    at Object.createBrowserHistory (/hello-react-world/client/node_modules/history/cjs/history.js:273:16)
    at new BrowserRouter (/hello-react-world/client/node_modules/react-router-dom/modules/BrowserRouter.js:11:13)
    at processChild (/hello-react-world/server/node_modules/react-dom/cjs/react-dom-server.node.development.js:3159:14)
    at resolve (/hello-react-world/server/node_modules/react-dom/cjs/react-dom-server.node.development.js:3124:5)
    at ReactDOMServerRenderer.render (/hello-react-world/server/node_modules/react-dom/cjs/react-dom-server.node.development.js:3598:22)
    at ReactDOMServerRenderer.read (/hello-react-world/server/node_modules/react-dom/cjs/react-dom-server.node.development.js:3536:29)
    at renderToString (/hello-react-world/server/node_modules/react-dom/cjs/react-dom-server.node.development.js:4245:27)
    at renderPage (/hello-react-world/server/index.js:14:31)
    at app.get (/hello-react-world/server/index.js:19:5)

Oh noes! Indeed, we forgot that our app currently renders inside a BrowserRouter component and we don't have a browser with history on our render server. Of course, we could fake one, but there is no need as React Router already has us covered with StaticRouter. However, in order to use that, we're going to need to change our client-side component a little to accommodate our server expectations.

Next time, we will introduce the StaticRouter, and see that it leads to more things that we must address to get our application working the way we want. Until then, please question, comment, and discuss. The aim of this whole series is to learn more about how we can leverage SSR. That means we will continue to get messy with doing things the hard way and build an appreciation for the easy way we hopefully uncover. πŸ•΅πŸ»β€β™‚οΈ

  1. Hint: the answer is "sort of". []
  2. Knowledgeable folks among you will already see problems with this approach; we shall get to those []
  3. Eventually, we may want to build our server so that we do not need babel-watch for production usage; for now, it is not important. []

πŸ–₯ Our first server-side render

Photo by Markus Spiske on Unsplash

This is part 5 of my series on server-side rendering (SSR):

  1. πŸ€·πŸ»β€β™‚οΈ What is server-side rendering (SSR)?
  2. ✨ Creating A React App
  3. 🎨 Architecting a privacy-aware render server
  4. πŸ— Creating An Express Server
  5. [You are here] πŸ–₯ Our first server-side render
  6. πŸ– Combining React Client and Render Server for SSR
  7. ⚑️ Static Router, Static Assets, Serving A Server-side Rendered Site
  8. πŸ’§ Hydration and Server-side Rendering
  9. 🦟 Debugging and fixing hydration issues
  10. πŸ›‘ React Hydration Error Indicator
  11. πŸ§‘πŸΎβ€πŸŽ¨ Render Gateway: A Multi-use Render Server

Over the last few weeks, we have been chipping away at server-side rendering and how to implement it. In the last post, we created a server; in this one, we will see if we can make that server render a page containing some server-side rendered React. If you recall from last time, there are two ways we can approach implementing our render server:

  1. Standalone with a way to pass our React app to it
  2. Integrated so that it knows all about our React app

Both approaches start from common origins; they both need a server that can render a React component inside a page. By the end of this post, we should be able to request a URL from our server and receive a rendered HTML page with some rendered React embedded inside of it. This will give us some fundamentals that we can then use next time to finally render our client-side application.


πŸ–Œ Rendering React on the server

app.get("/*", (req, res) => res.send("Hello World!"));

The server that we made last time will be the basis for our solution. Above is our current route handler for the server. Regardless of the get request, the server responds with Hello World!. What we want to do is to replace Hello World! with the rendered React component tree embedded within an HTML page.

When rendering in a browser, our React application is mounted so that it will dynamically update based on events like mouse movements, network requests, etc. When we are rendering on the server, we do not want all that. In fact, we do not even have a DOM like the browser does in which to create elements and event handlers and the like1. Instead of mounting the React application, we want to capture the very first render of the application and stop. React provides a methods for doing things like this in the React DOM package. We are going to use its renderToString method2.

The renderToString method takes a React component and gives us back a string of the markup that is initially rendered by that component. Before we can try it, we need to add the appropriate packages to our server: react and react-dom.

yarn add react react-dom

Now, in theory, we can render some React. Sadly, just updating our route handler with a component as shown below will not work.

app.get("/*", (req, res) => res.send(
    renderToString(<div>Hello World!</div>)
));

If we add this and then run our server with yarn start, we get a rather cryptic error output.

app.get("/*", (req, res) => res.send(renderToString(<div>Hello World!</div>)));
                                                    ^

SyntaxError: Unexpected token <
    at Module._compile (internal/modules/cjs/loader.js:723:23)
    at Object.Module._extensions..js (internal/modules/cjs/loader.js:789:10)
    at Module.load (internal/modules/cjs/loader.js:653:32)
    at tryModuleLoad (internal/modules/cjs/loader.js:593:12)
    at Function.Module._load (internal/modules/cjs/loader.js:585:3)
    at Function.Module.runMain (internal/modules/cjs/loader.js:831:12)
    at startup (internal/bootstrap/node.js:283:19)
    at bootstrapNodeJSCore (internal/bootstrap/node.js:623:3)

The issue is, our server has no idea how to handle JSX syntax (the embedded HTML-like description of our React component; <div>Hello World!</div>). Our client-side application works because the create-react-app package sets up some tools to process JSX files and turn them into valid JavaScript that can be understood by a modern browser. Our server-side application does not have any of that magic and so it does not work.

Rather than spending time to add that magic into our server, it feels more appropriate to assume our server is just another browser and that our client-side code will already be transformed into JavaScript by the time we see it3. Instead, just to test our React rendering, we can replace the JSX with its transpiled counterpart, which is a call to React.createElement. React.createElement takes the component being rendered and its props. In our case, we are rendering an HTML div element. These are special cases where a string is used to represent them, rather than a real React component type. Therefore, our simple JSX example becomes; note how the text is passed as the children of the component.

app.get("/*", (req, res) => res.send(
    renderToString(React.createElement("div", { children: "Hello World!" }))),
);

If we now yarn start our server application, it runs and when we visit http://localhost:3000, we see our Hello World! text. This is great. It means that given a suitably transpiled React component, we can server-side render it. Now that we have the ability to render a component, we need to embed that rendered component inside a full HTML page.

πŸ“„ The Page Template

OK, so we have some HTML that represents our rendered component. Now we need to put that into an HTML page, we need to think about what that page looks like. What does the page include? We can revisit the React app we made and see for ourselves.

<!DOCTYPE html>
<html lang="en">
  <head>
    <meta charset="utf-8" />
    <link rel="icon" href="/favicon.ico" />
    <meta name="viewport" content="width=device-width, initial-scale=1" />
    <meta name="theme-color" content="#000000" />
    <meta
      name="description"
      content="Web site created using create-react-app"
    />
    <link rel="apple-touch-icon" href="/logo192.png" />
    <!--
      manifest.json provides metadata used when your web app is installed on a
      user's mobile device or desktop. See https://developers.google.com/web/fundamentals/web-app-manifest/
    -->
    <link rel="manifest" href="/manifest.json" />
    <!--
      Notice the use of  in the tags above.
      It will be replaced with the URL of the `public` folder during the build.
      Only files inside the `public` folder can be referenced from the HTML.

      Unlike "/favicon.ico" or "favicon.ico", "/favicon.ico" will
      work correctly both with client-side routing and a non-root public URL.
      Learn how to configure a non-root public URL by running `npm run build`.
    -->
    <title>React App</title>
  </head>
  <body>
    <noscript>You need to enable JavaScript to run this app.</noscript>
    <div id="root"></div>
    <!--
      This HTML file is a template.
      If you open it directly in the browser, you will see an empty page.

      You can add webfonts, meta tags, or analytics to this file.
      The build step will place the bundled scripts into the <body> tag.

      To begin the development, run `npm start` or `yarn start`.
      To create a production bundle, use `npm run build` or `yarn build`.
    -->
  <script src="/static/js/bundle.js"></script><script src="/static/js/0.chunk.js"></script><script src="/static/js/main.chunk.js"></script></body>
</html>

Above is the development-time HTML template that is used with our simple React app. I have highlighted some important sections.

  1. The head containing page metadata, including title, description, favicon, etc.
  2. Scaffold body to provide a mounting point for our React component
  3. Scripts

The head content is static4 and the scripts are inserted by the build operation of our client app. The bit that matters to us is the mounting point for our React app, <div id="root"></div>, as this is where anything we render will need to be inserted by our server-side rendering operation.

Of course, we want to do all this with production code. To see how that affects things, we can run yarn build in our React app. Running this creates a build folder with all sorts of things in it, including a slightly different version of our HTML template (we will perhaps consider the other files another time).

<!DOCTYPE html>
<html lang="en">
  <head>
    <meta charset="utf-8" />
    <link rel="icon" href="/favicon.ico" />
    <meta name="viewport" content="width=device-width,initial-scale=1" />
    <meta name="theme-color" content="#000000" />
    <meta
      name="description"
      content="Web site created using create-react-app"
    />
    <link rel="apple-touch-icon" href="/logo192.png" />
    <link rel="manifest" href="/manifest.json" />
    <title>React App</title>
    <link href="/static/css/main.b0083702.chunk.css" rel="stylesheet" />
  </head>
  <body>
    <noscript>You need to enable JavaScript to run this app.</noscript>
    <div id="root"></div>
    <script>
      !(function(f) {
           // SNIPPED FOR CLARITY
      })([]);
    </script>
    <script src="/static/js/2.78e6b881.chunk.js"></script>
    <script src="/static/js/main.dcbf6a7c.chunk.js"></script>
  </body>
</html>

This looks a little different than what we had before, but it is not as different as you may think. We still have the head element metadata (though this time it includes a CSS file, which was not there in the development version), we still have the scripts (though there is now some inlined scripting that wasn't there before, which I have snipped out just to make things a little more readable), and most importantly, we still have our mounting point, <div id="root"></div>.

Given this information, we can update our server application to return a full page containing our rendered component. For our purposes here, we will hard code a simple page template. Eventually, we can replace this simple template and the React component being rendered with the production output of our client application.

πŸ–Ό Rendering the page and the component together

Using what we have learned here, I have modified the server as follows.

const express = require("express");
const React = require("react");
const {renderToString} = require("react-dom/server");

const port = 3000;
const app = express();

const pageTemplate = `<!DOCTYPE html>
<html lang="en">
  <head>
    <meta charset="utf-8" />
    <meta
      name="description"
      content="SSR result"
    />
    <title>React App</title>
  </head>
  <body>
    <noscript>You need to enable JavaScript to run this app.</noscript>
    <div id="root"></div>
  </body>
</html>
`;

const renderPage = (reactComponent) => {
    const renderedComponent = renderToString(reactComponent);
    return pageTemplate.replace('<div id="root"></div>', `<div id="root">${renderedComponent}</div>`);
};

app.get("/*", (req, res) => res.send(
    renderPage(React.createElement("div", {children: "Hello World!"})),
));

app.listen(port, () => console.log(`Example app listening on port ${port}!`));

We have a page template string called pageTemplate. Then we have a renderPage method that does a simple replace operation to replace <div id="root"></div> in our template with the same div containing our rendered React component. Finally, in the get handler, the renderPage method is invoked with our React component.

If we yarn start this version of the server and visit http://localhost:3000, viewing the resultant page source gives us the following HTML.

<!DOCTYPE html>
<html lang="en">
  <head>
    <meta charset="utf-8" />
    <meta
      name="description"
      content="SSR result"
    />
    <title>React App</title>
  </head>
  <body>
    <noscript>You need to enable JavaScript to run this app.</noscript>
    <div id="root"><div data-reactroot="">Hello World!</div></div>
  </body>
</html>

On the highlighted line, you can see the inserted server-side rendered React code. Success! We haven't even loaded any scripts client-side to see this result. Of course, if we want an app that a user can interact with, we are going to need to change that. Join me next time when we work out how to integrate our server with our client-side application in order to get our very first server-side rendered app. Of course, that does not mean we will have reached our destination on this server-side rendering adventure; on the contrary, it feels like we have barely begun.

Thanks again for reading. I hope that something you find here is useful. Please comment as you see fit. πŸ’

  1. We could introduce a DOM using a library like JSDOM. However, that is an extra step that we would like to avoid as it increases the latency of our server-side rendering process. Instead, we should aim to make sure our React app does not rely on there being a DOM present at all. []
  2. It is worth looking at the other options, such as renderToNodeStream, to see what they can offer you and your specific SSR challenges []
  3. You may notice that this starts to lead us down one of our two paths; does the server know all about the client code, or does it get blindly provided somehow? []
  4. For now, let's assume that the page metadata (item 1, above) remains static; while we can certainly build in a mechanisms to make this dynamic, such as changing page title when the selected route is different, that will over-complicate things at this stage. []