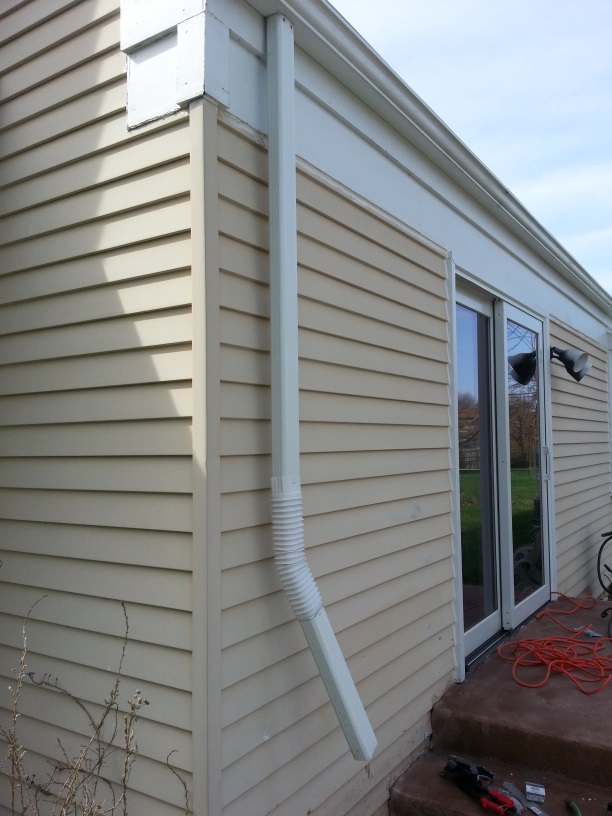
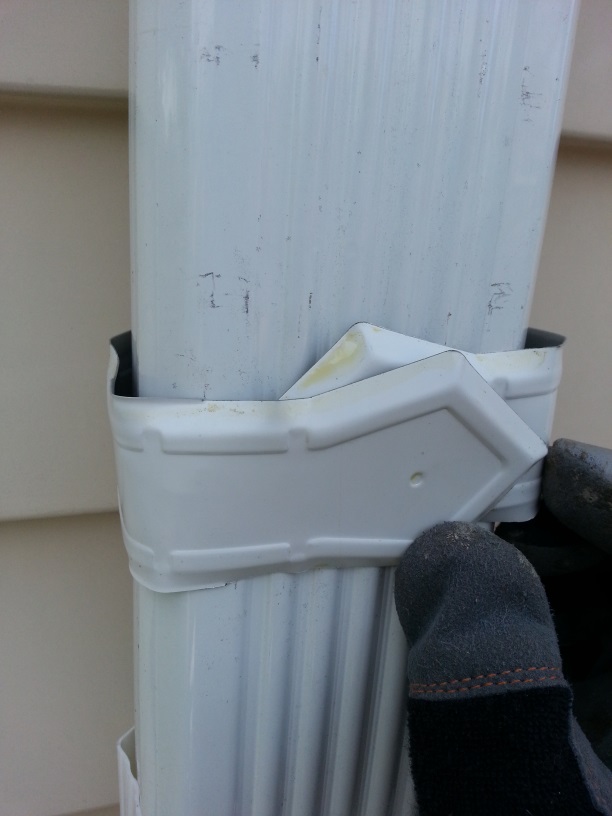
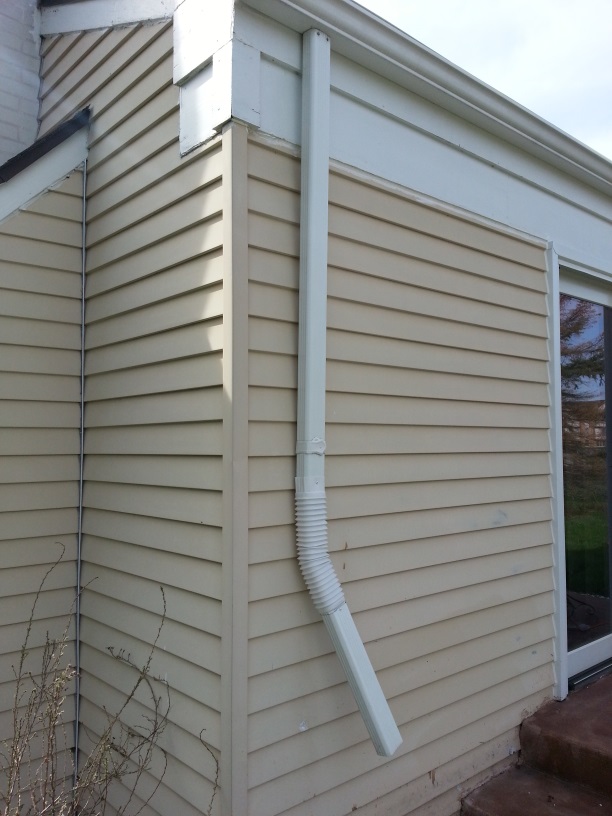
The downspout that my neighbour and I had modified to feed water to the rain barrel was not secured to the siding, allowing it to pivot at the gutter. When the rain barrel was present, there was not much movement in the downspout, but when the barrel was set aside over winter (as you can see in the photo above), the spout would move in just about every breeze that blew. So, I stopped procrastinating and tooled up to fix it in place.
Tools
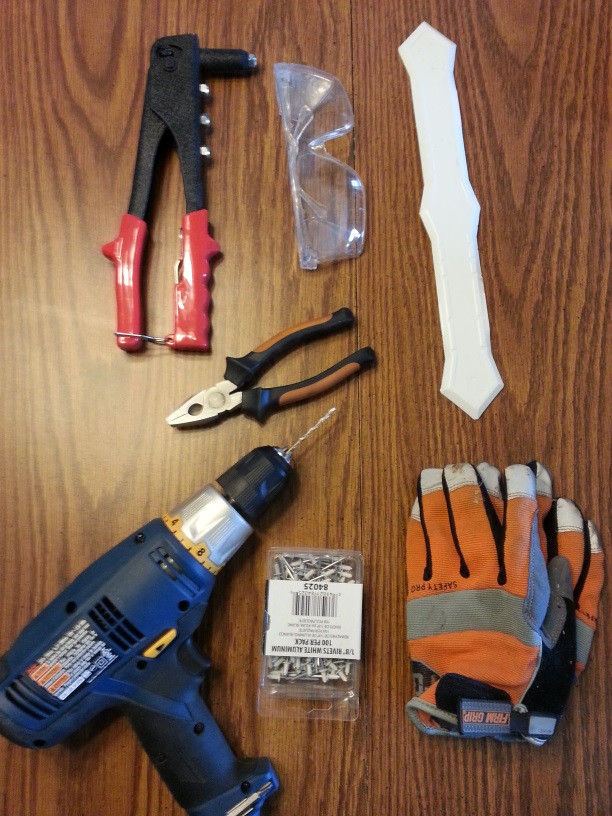
Tools for the job
The tools and other items used for this project were (from top left, clockwise to center):
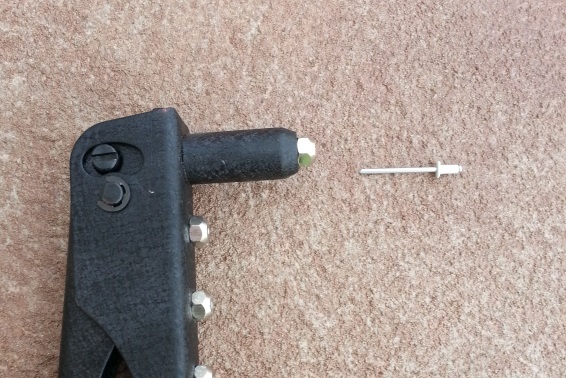
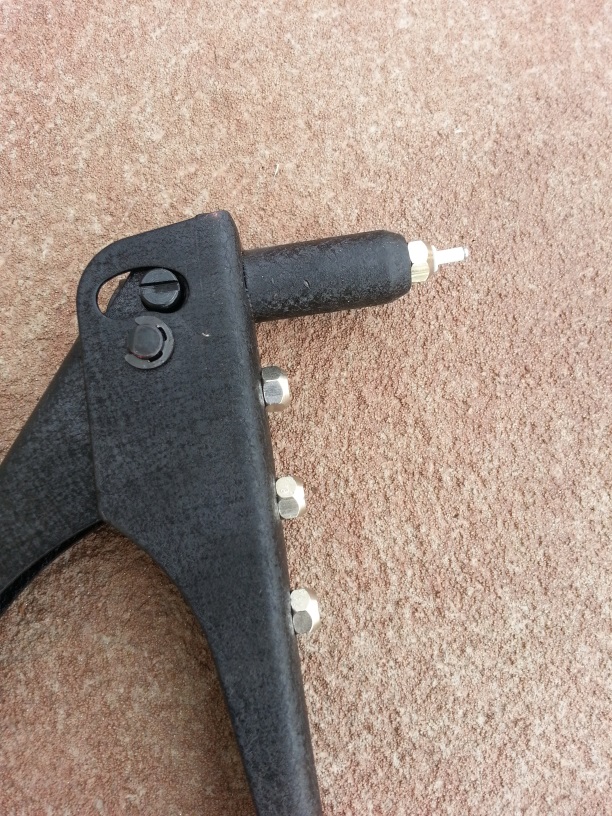
Rivet guns are kind of cool (at least I've always thought so). They allow things to be joined together from only one side, which means I don't have to get to the other side of my siding in order to rivet something to it. A rivet gun works by gripping the pin of the rivet and pulling it, causing the other end to bulge out, which holds the rivet in place. When it can't bulge anymore, the pin snaps off.
Rivet gun side-by-side with rivetRivet gun with rivet insertedRivet pin snapped off
The Work
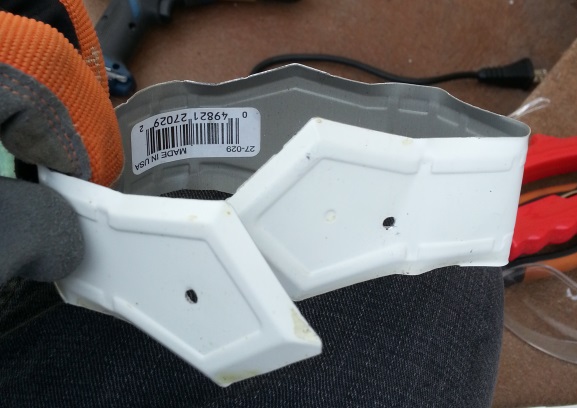
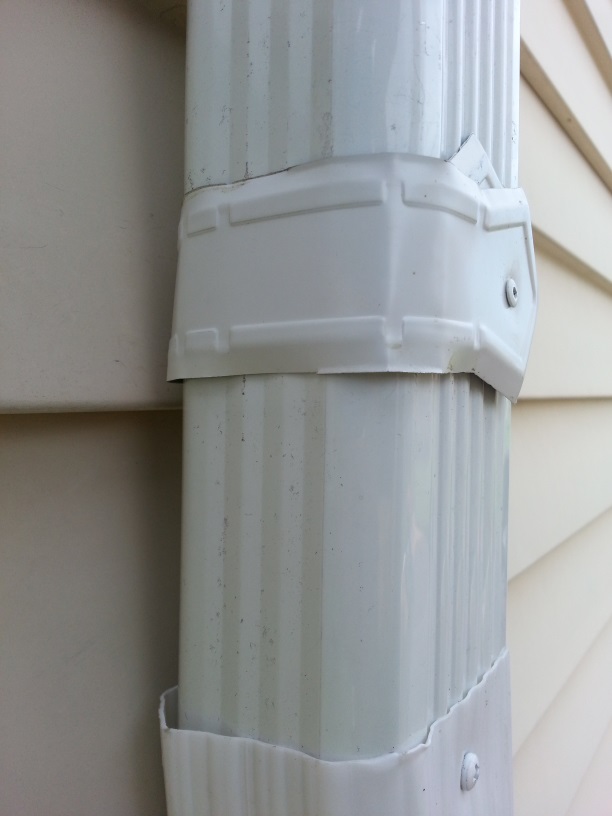
My intention was to match the existing approach used on the other downspouts, which was to attach the bracket to the house and then bend it around the downspout and rivet it. However, the existing brackets were all nailed to the house through the siding. I did not have nails to hand for this, so I decided to rivet the bracket to the siding.
First, I bent the bracket around the downspout. From what I know, this is not the traditional way to bend these brackets (usually, they are splayed out so the decorative arrows are flush to the siding), but I wanted everything to match up. Once the bracket was bent to fit the downspout, I drilled holes in each end where I would eventually rivet them together.
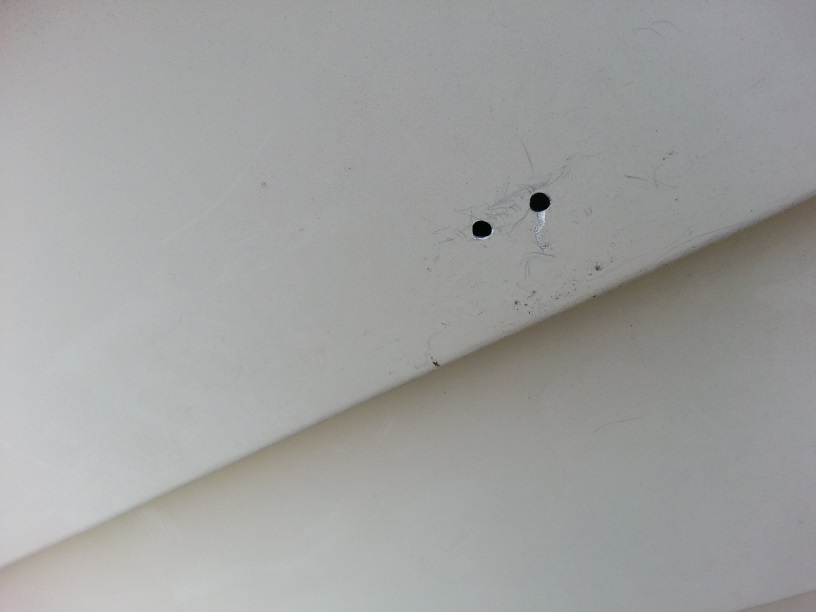
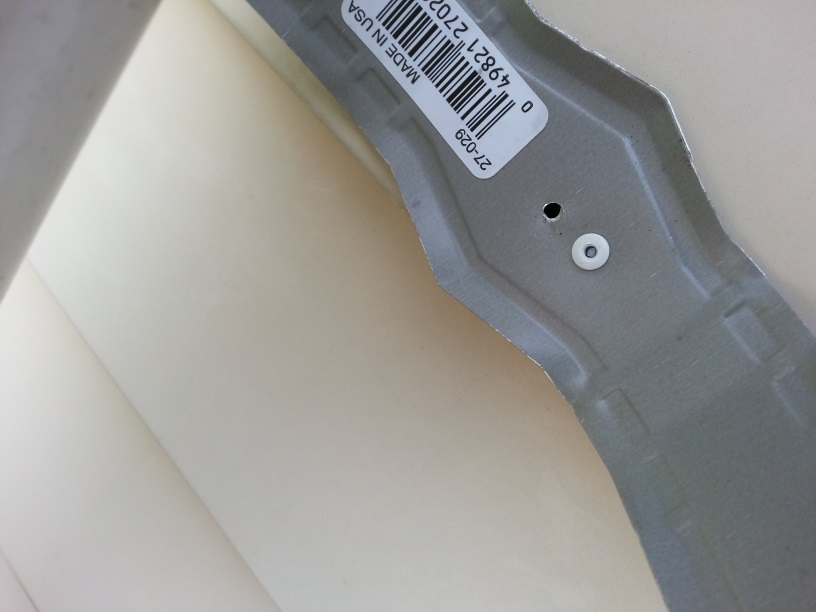
Before I could rivet the bracket around the downspout, it needed to be mounted to the siding, so I drilled two holes in the bracket and siding for rivets and used the rivet gun to secure the bracket in place.
Then I folded the bracket around the downspout and secured it with one more rivet.
Last night was the quarterly hackathon at work, the day where we get to work on something fun and new until 4am and then demo to the team. Beers were drunk, Thai food was eaten and the sports tournaments were played out (darts and ping pong, or table tennis, if you prefer). It was a great time and although my work wasn't as brilliant as some of my colleagues, I felt accomplished by the time we crawled off for breakfast sometime around 7am.
That was 6 hours ago. I'm still awake. I've been awake since sometime between 7am and 9am yesterday.
I don't know why, really. I ran an errand for the wife this morning and one thing led to another. Before I knew it, I had not only completed the errand (returning some plants and a grow light stand to Growing Hope after Chrissy did some seed starting for them), I had also completed our own grow light stand (a project we purchased the pieces for back when I made the raised bed) and cleaned the cat litter boxes. Luckily for you, I didn't take pictures of the latter task; I'm keeping those precious memories of being watched by a cat while I dug around in his feces (mostly) to myself, but I digress.
Often, when you garden, you have to start some seeds. When the weather is inclement prior to the growing season, as it often is in these parts, you need to start those seeds indoors and, much like this winter in Michigan, there's no Sun indoors (I'm thankful for that, I like my stuff unsinged), so an artificial source of equivalent light is required. That's where the grow light stand comes in.
Unlike the one we had borrowed from Growing Hope, which was a simple wood construction with two A-frames at each end joined by two planks from which the 4' long fluorescent grow lamps were suspended, our grow light stand was to be made out of PVC. As mentioned earlier, we had purchased the pieces for it some time ago, which explains why some of the pieces were wrong. Thankfully, Home Depot awesomely gave me store credit for those incorrect pieces despite a lack of receipt. That's customer service for you.
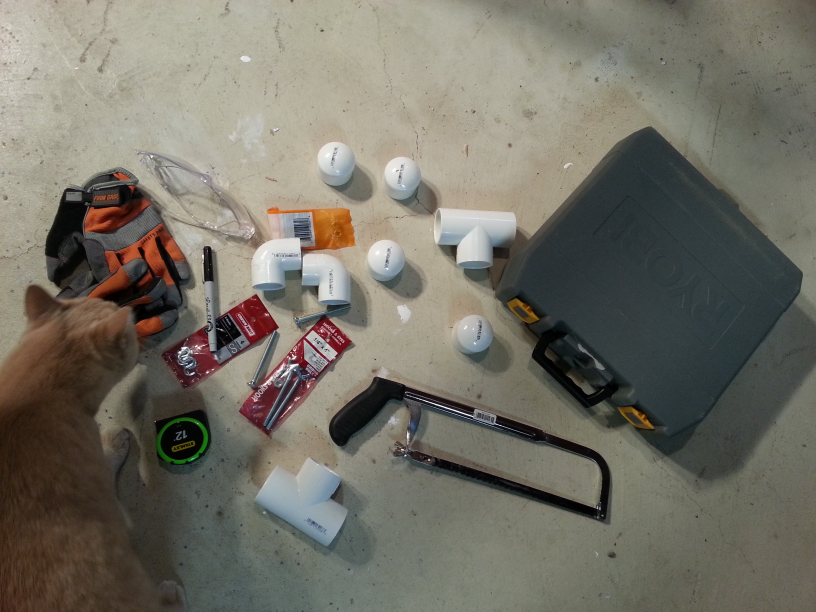
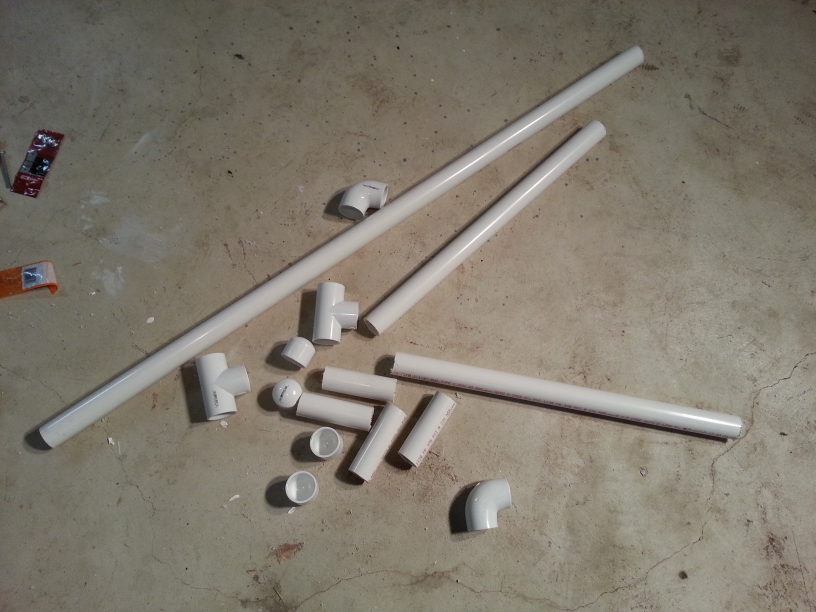
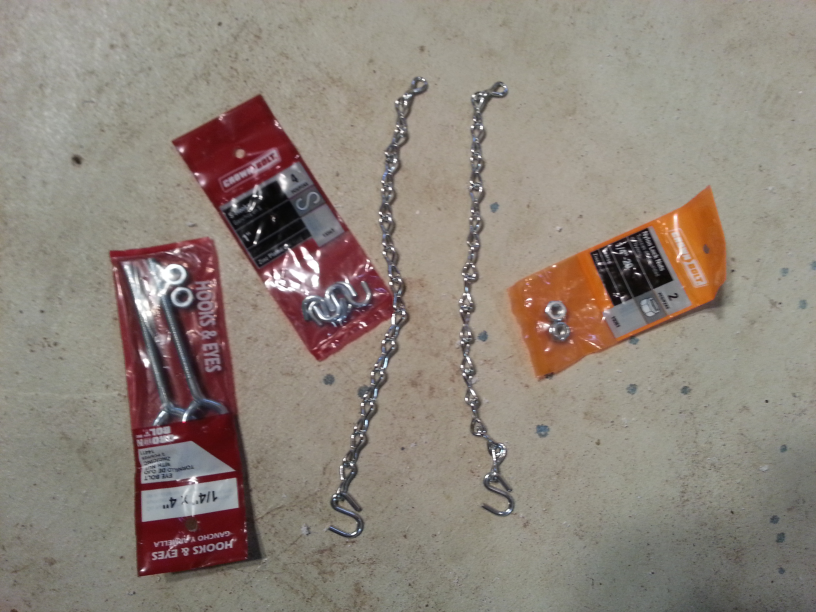
The parts required for this little project were:
120" of 2" PVC pipe
4x end caps
2x three-way connectors
2x elbow connectors
2x ¼" eye bolts with 4 nuts
2x S hooks
1x shop light
2x fluorescent grow lamp tubes
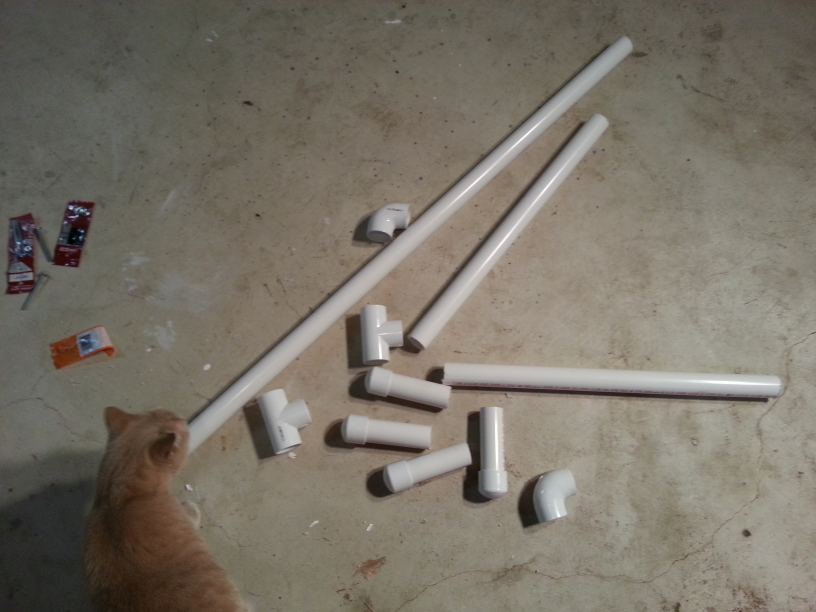
Barry inspecting the parts and tools
In addition, the following tools were used:
Safety Gloves and Glasses
Drill
¼" drill bit
Permanent marker (I used the one Chrissy got from John Mayer's fan club)
Hacksaw
Pliers
Wrench/Spanner (for tightening the nuts)
The assembly was really quite easy and probably would have taken about an hour at most if I hadn't needed to go to Home Depot twice (once for the shop light and again to get the correct size elbows).
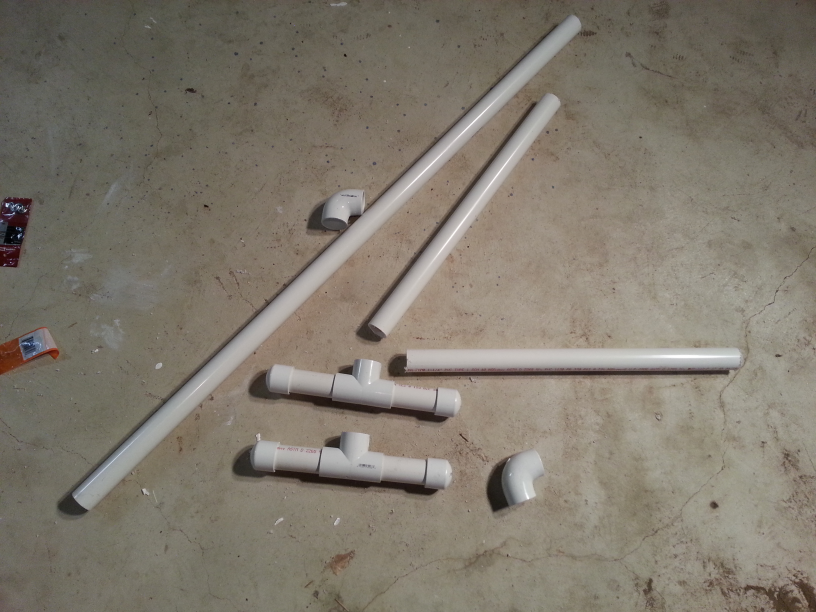
First, the PVC pipe was marked (with the John Mayer fan club marker) and cut (with the hacksaw) to the following lengths:
4x 5"
2x 24"
1x 52"
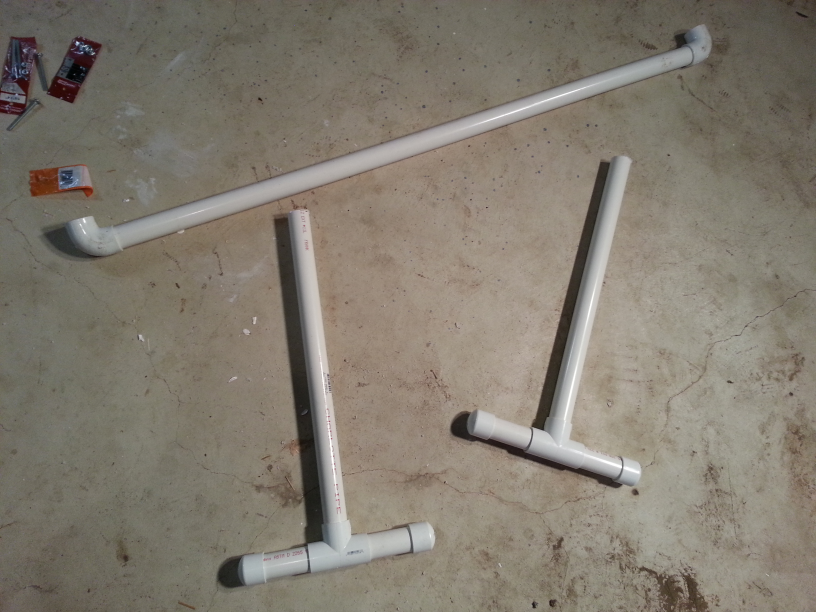
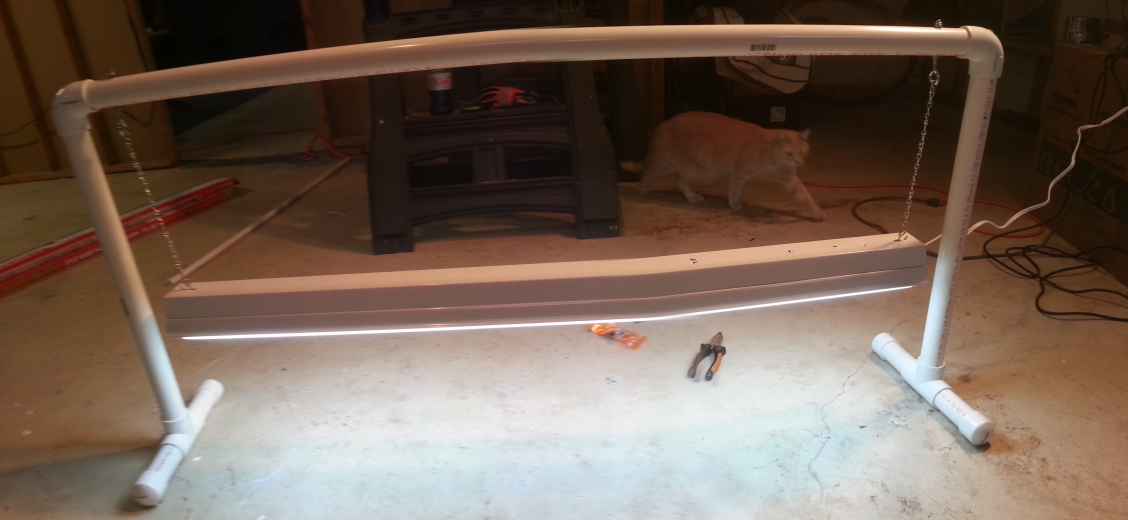
Then, using the connectors and end caps, join them all together to create the stand.
All the pipe fittings and lengths ready for assemblyEnd caps fitted to 5" pipe (QA manager, Barry checking craftsmanship on the left)End caps fitted to 5" pipeEnd caps, 5" lengths and three way connector combinedLight stand legs and cross bar assembledCompletely assembled stand without light fixture
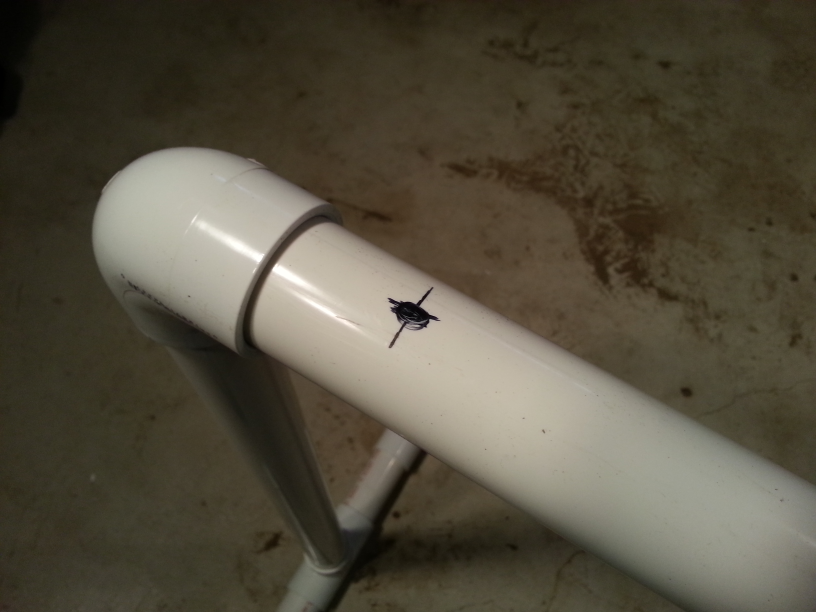
See, that was easy, right? No glue, just push it all together. It's a little disappointing that it did not include power tools, but don't worry, because this is where I whipped out my trusty drill after marking where I wanted the eye bolts to go. The shop light fixture hangs from these, so I measured where the chains would go in the shop light and chose eye bolt locations accordingly.
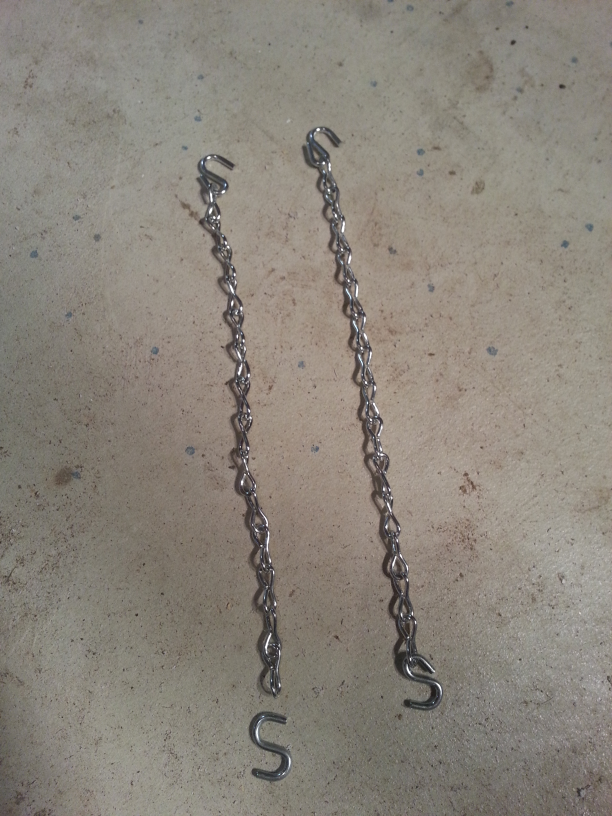
Chains, S hooks, etc. for attaching the light fixturePosition of eye bolt for one side of light fixture mounting
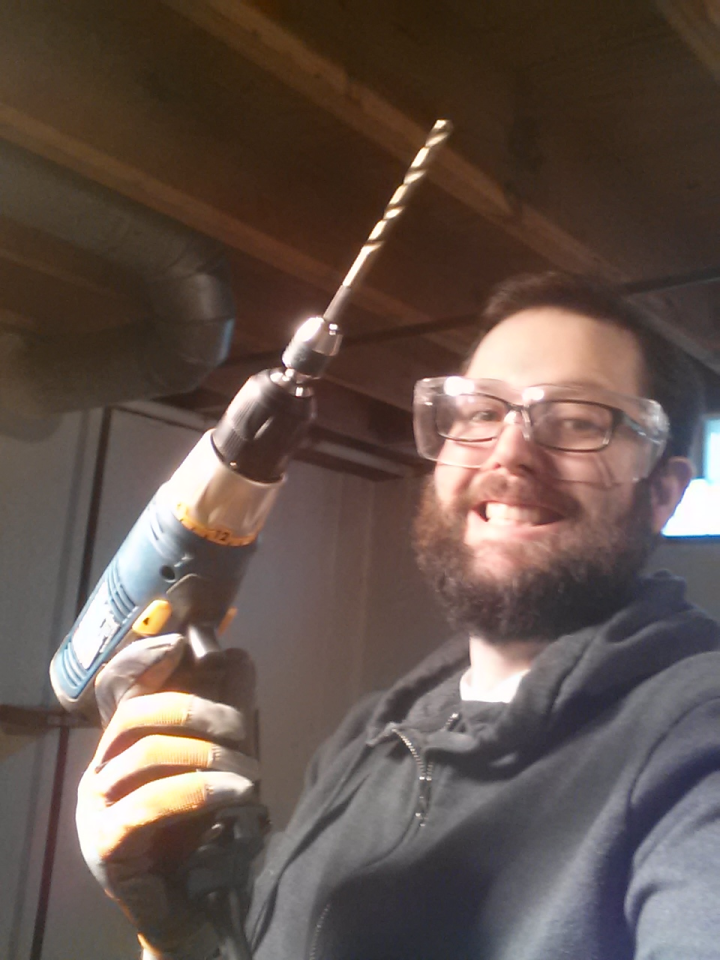
If you attempt this, be sure to wear your safety gear as I did; PVC pipe can be slippy and drills can make easily eye bolt holes in your hand if you're not careful (I recommend having some sleep too).
Safety gear on and ready to go
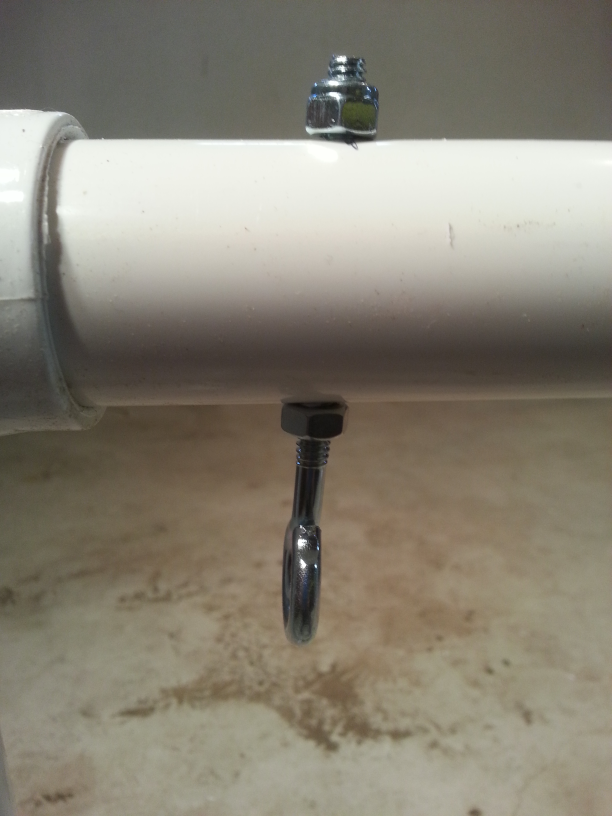
Once the holes were drilled in the pipe (though a little skewed), I fitted the eye bolts. In order to get a sturdy fixture, I first screwed a nut onto the eye bolt, then pushed the remainder through the pipe and applied a lock nut to the other side (though a regular nut would have done, I think). I then tightened the nuts on each side of the pipe so that the eye bolt was secure.
Eye bolt installed (note the two nuts on either side of the pipe)Chains showing S hook before being attached and after
The shop light fixture came with its own chains for suspending it, however, only one end of these chains had a hook, so I carefully crimped S hooks onto the other ends of the chains. I then hooked one end into the corresponding eye bolt and the other into the light fixture and that was job done.
The assembled and working light stand (with QA manager doing final inspection)
The height is even adjustable by threading the hook through the eye and hooking back into the chain.
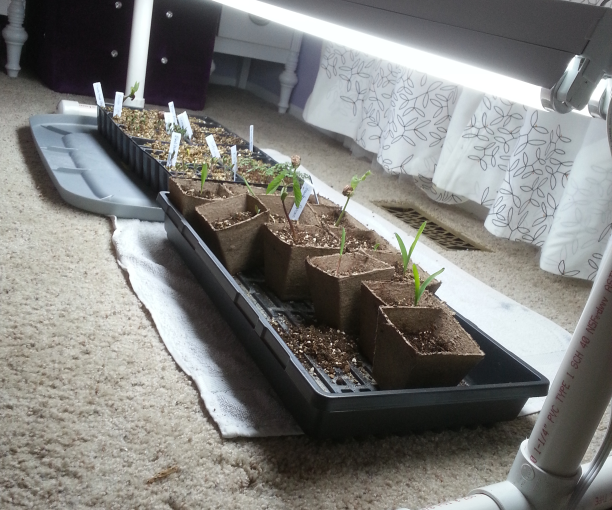
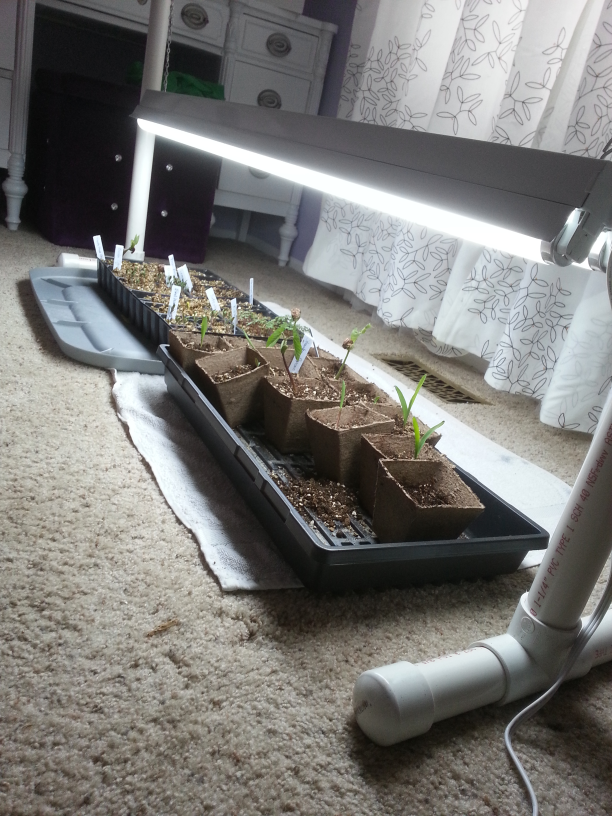
With the assembly complete, I placed the new stand over Chrissy's seedlings and plugged it into our timer ready for her to be surprised when she gets home or reads this (whichever is first).
Chrissy's seedlings enjoying their new light stand
Now, I've been awake for far too long so I'm off to play video games and eat snacks before a well-earned nap.
Update: I found the pictures I was missing, so I've edited them in below (they were hiding on Facebook).
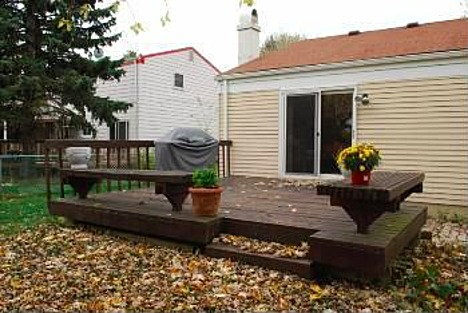
In my post on installing our rain barrel, I indicated that we now have a new patio. For a while we had wanted to remove our deck and replace it with a nice patio so it was exciting when we finally had enough money to get the job done.
Our fantastic neighbour, Tim, took charge on the project as our contractor and oversaw the effort of removing the deck and replacing it with a poured concrete patio. There were some issues we faced with the company responsible for pouring the concrete (if I could remember their name, I would tell you to avoid them, but I cannot right now), but Tim and I overcame those issues and he was able to get the patio finished.
The design for the patio was an amalgamation of ideas from myself, Chrissy and Tim. Here is a rough sketch to give you an idea of before and after (Tip: Make sure you have sketches, it will save time explaining what you want and help avoid conflict on the job). This does not show the height difference between the deck with its high railings and the patio. Also, this is not to scale, the patio is actually bigger than the deck, but my sketching abilities are inadequate.
Sketched plan of the deck before and patio afterThe deck
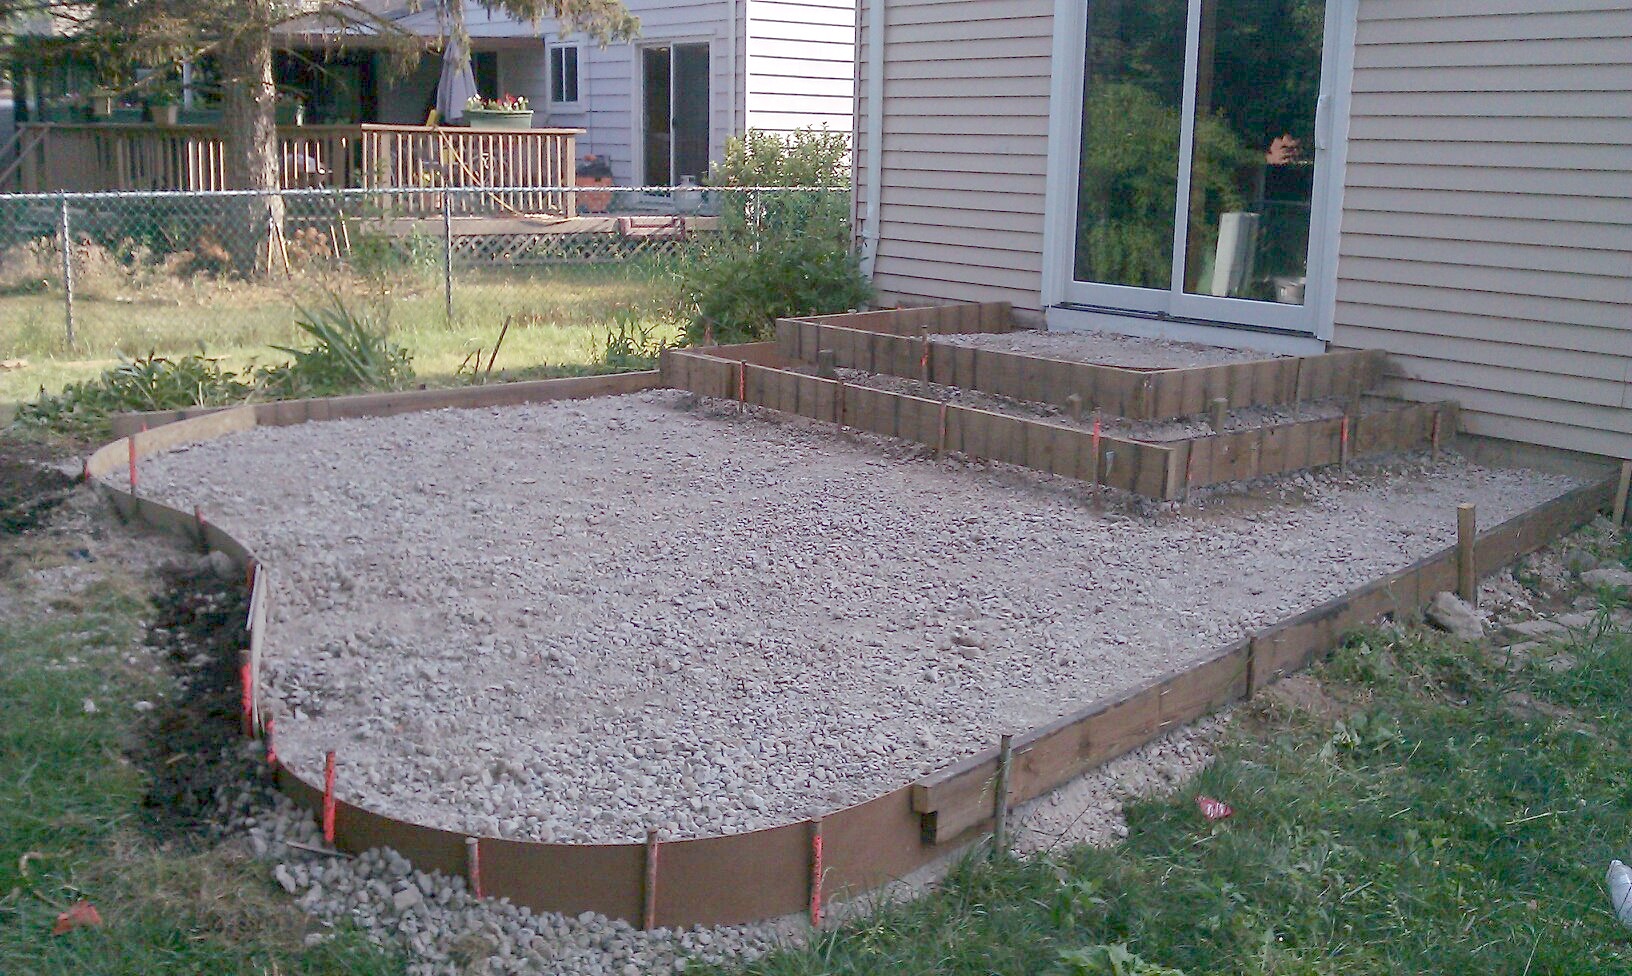
Once the deck was removed (and some conflict had been ironed out over the shape), the patio and steps were framed and leveled ready for the concrete to be poured.
Patio framed ready for concrete
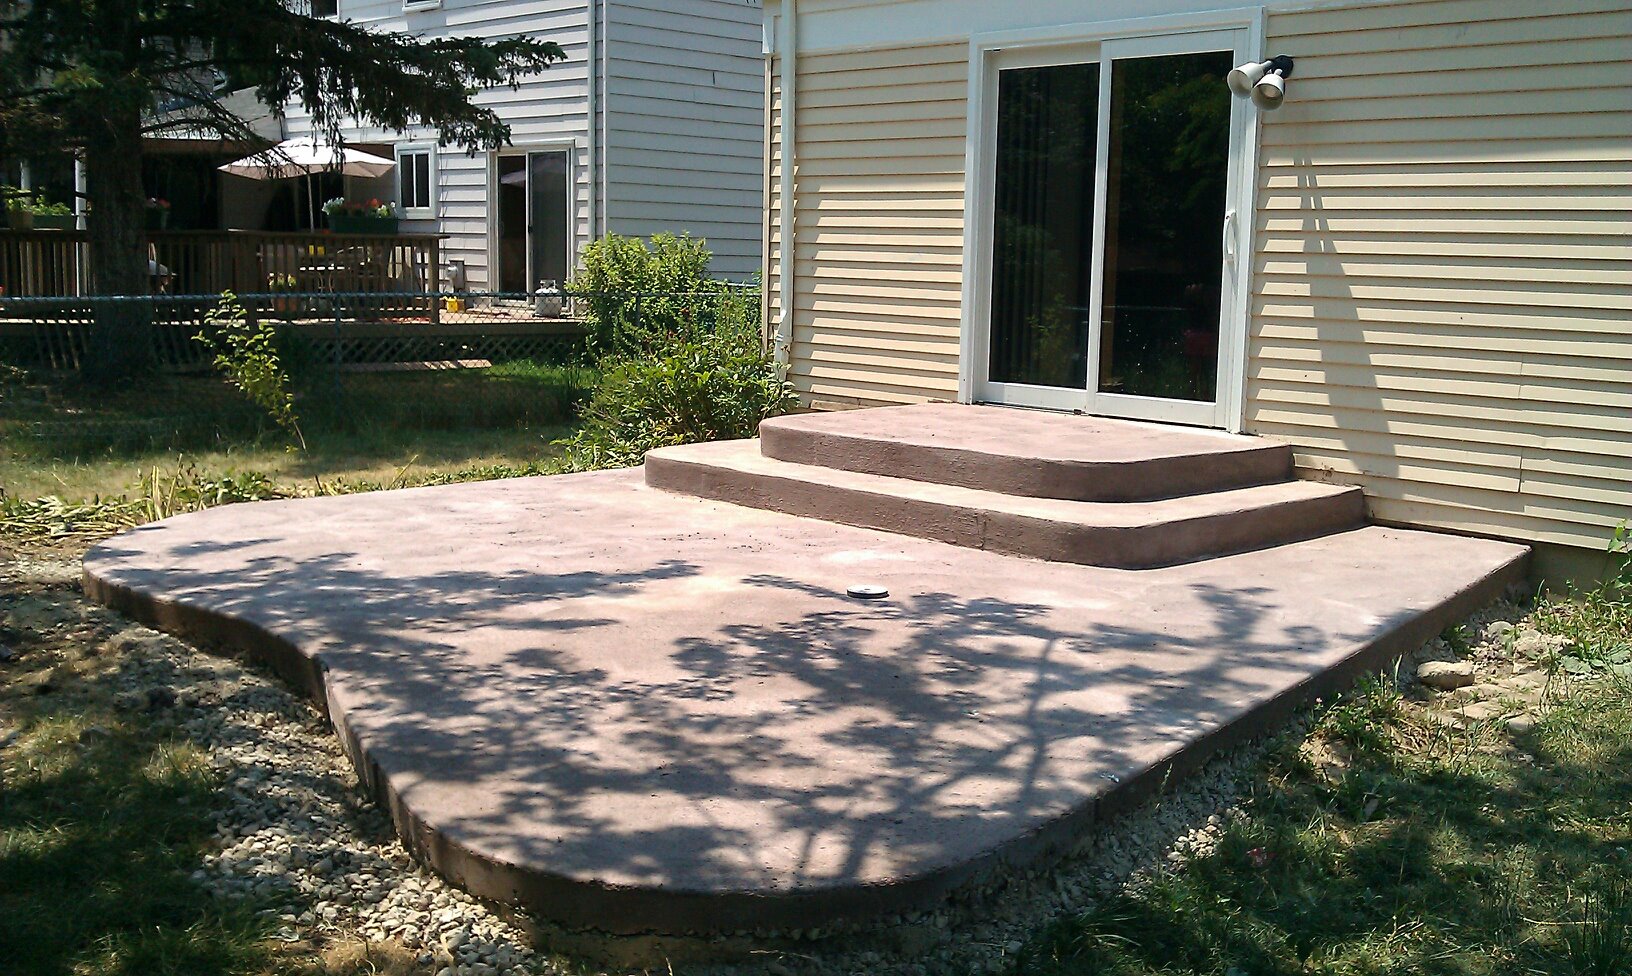
The concrete was coloured so that once finished, it would look somewhat stone-like. Once the concrete had time to dry, the framing was removed.
The patio before landscaping or final finish
At this point, our neighbour took over and started to work on the finish. In the above photo, you may be able to just make out a grind stone which Tim used to slough off the rough burrs and blemishes so that we had a more appealing surface. He then applied a top coat to level out any big imperfections. Finally, two different colour powders were added to give more of a stone-effect before the whole thing was coated in a protective seal that also had gold flecks mixed in to catch the sunlight.
With the patio surface finished, Tim suggested we get some crushed concrete to pack around the patio, providing additional support and reducing the amount of space that would need filling with topsoil. Several tons of topsoil were distributed to landscape around the new patio. Although the patio was much lower than the deck (the deck had been at the same level as the back door), the slope of the back yard meant that the patio was up to 11 inches higher than the surround lawn in some areas. This meant that several cycles of dumping, raking and compacting soil were used to create a nice, sturdy transition from patio to lawn. In hindsight, I would have used more of the crushed concrete or some other filler and less topsoil, but it worked out.
After landscapting with soil, putting down weed blocker and new borders
While moving the soil around, we also added a new bed to the right of the backdoor and extended an existing bed on the far side of the patio to come around the front. They were covered with weed blocking membrane in preparation for plants. These are clearer to see in the next photo which was taken after I had sown grass seed.
Patio with grass seed sown
While we waited for the grass to grow, we started work on the beds. A few plants were acquired from a vendor at Ann Arbor Farmers Market as well as some white marble chips to go around them. Unfortunately, we didn't really work the ground properly or put enough weed blocker down, so we now have white marble peppered with crab grass. In hindsight, we should have treated the soil with Round Up first (or a similar product) to kill everything before we put the weed blocker and marble down. New plants could have waited. Instead, we will be tasked with tearing up all the marble and weed blocker this spring or summer so that we can lay a thicker layer or perhaps, go the Round Up route if none of the new plants survived the winter.
Grass growing, beds planted and marble chips put down
I will perhaps go into the plants we got after they have had chance to attempt surviving their first Michigan winter (they just got reburied by snow this morning), until then, just know that they live (I think) as does the grass.
Grass growing around the patio. From left to right: Chrissy, Nico (our neighbours' cat), Barry and Shaun.
We are very happy with how this has turned out and look forward to getting some nice patio furniture for the summer (and maybe even a grill1). We might even have an English tea party to christen it.
Last year, my wife made a lasagne garden in the backyard and grew some delicious lasagne. No, not really, but she did grow some delicious vegetables.
This year, after a class on Square Foot Gardening we added an additional 4ft by 4ft bed using the Square Foot Gardening principles. The crop was phenomenal: squash (including ninja zucchinis1), beans, tomatoes (so many tomatoes), cucumbers and peppers.
Eager to build on her successes, Chrissy wanted another bed for us to grow even more delicious food. Having salvaged some 4×4 posts from our deck before it was destroyed to make way for our patio (post to come), I set to work.
Measuring and cutting
Reclaimed deck posts used for the project
Our reclaimed deck posts were of varying lengths, so the first thing I did was measure them to determine just how big a bed we could make. Some quick calculations determined that given the shortest post available, our bed would be just under 4ft along the inside edge.
Measuring the sides
As the posts were used, there were some rough spots and quite a few nails left behind. I'm not one for doing more than is necessary so I left most of the nails where they were and just selected the best portion of the post to be used. I marked the correct length and then, with my safety goggles and gloves on, used my reciprocating saw to cut them accordingly.
Safety gearCutting the sides to length
Marking the Joints
Arranging the posts
With the four sides of the bed cut, I arranged them on the garage floor and marked where the end of one post butted against the side of the next.
Marking the joints
I then marked the outer post of the join to show where the screw holes should be drilled. First, I marked the top to show roughly where the screws should go to ensure a good alignment with the butting post.
Marking the screw positions
Then I turned the post on its side and marked the screw locations.
Marking the screw holes
Construction
With all the posts cut to size and marked for assembly, it was time to drill holes for the screws. Because the posts were 4 inches across and my screws were only 4 inches themselves, I needed to drill into the post so that the screw would secure the bed together. For this, I used two bits. The first to countersink the screw, the other to ensure the screw could pass through the first post and into the second.
Drill bits used for the project
With my safety gear on, I took my trusty drill and set to work.
My drill…for drilling
Once all eight holes were drilled, I used my drill and an appropriate driver to drive the screws into the joints and assemble the bed.
Screw holes drilled and sides aligned for joining
Ready for Next Year
The newly created bed now sits resting against the garage wall in anticipation of 2013's growing season and my wife's grand plans.
The assembled bed
Ninja zucchinis (or courgettes, as my friends back home might know them) are zucchini squash that you didn't know you had planted. [↩]
Chrissy grinning over our rain barrelEarlier this year, my wife, Chrissy and I attended a workshop on making a rain barrel. Since then, the rain barrel has sat in the corner of our garage awaiting someone1 to prepare a suitable home for it in our garden (more commonly referred to as a yard round these parts).
While my wife was eager for someone to get the rain barrel set up immediately, I was formulating a plan.
Then
When we were looking for a house, we had a list of things we wanted. One of the top three items on our list, alongside a fireplace and a finished basement, was a deck. The house we eventually bought, our house, not only had a fireplace and a basement that had enough potential to overlook its unfinished state, it also had a deck. Perfect.
Now
Looking back now, we were merely young and naive. We didn't have a clue what we really wanted, we just guessed a little. It turns out that while we love the fireplace that we don't use often enough and we're excited about finishing the basement sometime in the future, the deck was an impostor, a dictator that divided and overpowered our back garden. When we bought the house, a deck had sounded like a great idea but in reality, it turned out to be a bit rubbish. What we really wanted was a patio. My plan was to put our rain barrel on that patio.
Of course, that meant getting rid of the deck and building a patio. I'll leave the patio building to another post (I'm waiting for the grass to grow to take the last few "after" pictures) but I can tell you that it looks great and we are much happier about the way our back garden is looking (not to mention that the garden is quite pleased to have been liberated). And with the patio in place, someone2, with the fantastic assistance of our neighbour, was able to install the rain barrel.
Installation
The rain barrel is best positioned near a downspout (also known as a drainpipe in some parts) so that water from the roof can be collected. I earmarked a spot on the corner of our patio where the barrel fit perfectly. Next, my neighbour reveled in the opportunity to use his Dremel as he neatly cut the bottom of the downspout. We inserted the spout into the elbow joint that came with the rain barrel and screwed them together. Unfortunately, the elbow wasn't long enough to reliably deliver water to the barrel, so we took a short length of the trimmed downspout and attached that. This extended the spout all the way to the top of the rain barrel.
The modified downspoutThe downspout feeding the barrel
That was that. The rain barrel was ready to be filled. We had no idea when that would happen or how long it would take until a day or two later when it rained for a few hours, filling the rain barrel to overflowing. This was a bit of a problem as we hadn't yet redirected the overflow to something useful, so it just spilled out and washed away the topsoil I had been landscaping around the patio.
A full barrelThe washed away soil
Overflow
Fortunately, we had two spare hoses. We had just bought a new garden hose to replace the two shorter ones that had come with the house. The best of these newly spare hoses was already destined to become the main outlet for the rain barrel, delivering lovely rain water down to the vegetables growing in our garden3. This left the second, leakier hose for me to use on the rain barrel overflow.
I attached the hose to the rain barrel, but where would it go. I didn't think having it draped across the lawn to the vegetable garden was really going to work and having the water just drain away seemed a bit of waste. So, I lay the hose out across the topsoil that was to form the flower bed next to the patio. Once I had reached the end of the bed, I cut the hose to length and discarded the remainder. I then proceeded to bury the hose along the bed, making sure to cut notches in it every few inches so that any overflow could irrigate the surrounding soil.
Cutting holes for irrigationRain barrel in place with overflow connected
To finish things off, we purchased some white marble chips, rinsed them free of dust and distributed them on the lid of the rain barrel to discourage mosquitoes and other undesirable things from getting inside.
Finishing touches with a spot of marble
Where can I get one?
I hope the tales of our rain barrel have inspired you to get one (or more) of your own, they really are a great way to get some inexpensive fresh water to your garden. Look for someone in your area who is working to re-purpose food-grade containers just like Maxi Container and MI Rain Barrel are here in southeast Michigan. That way, you're not only going to conserve water but you'll also help to recycle these containers.
If you already have a rain barrel or are thinking of getting one, I'd love to hear about it.
From this point on, just follow my wife's lead and assume "someone" is me. [↩]


, Barry and Shaun.")


