Making a Grow Light Stand

Last night was the quarterly hackathon at work, the day where we get to work on something fun and new until 4am and then demo to the team. Beers were drunk, Thai food was eaten and the sports tournaments were played out (darts and ping pong, or table tennis, if you prefer). It was a great time and although my work wasn't as brilliant as some of my colleagues, I felt accomplished by the time we crawled off for breakfast sometime around 7am.

That was 6 hours ago. I'm still awake. I've been awake since sometime between 7am and 9am yesterday.

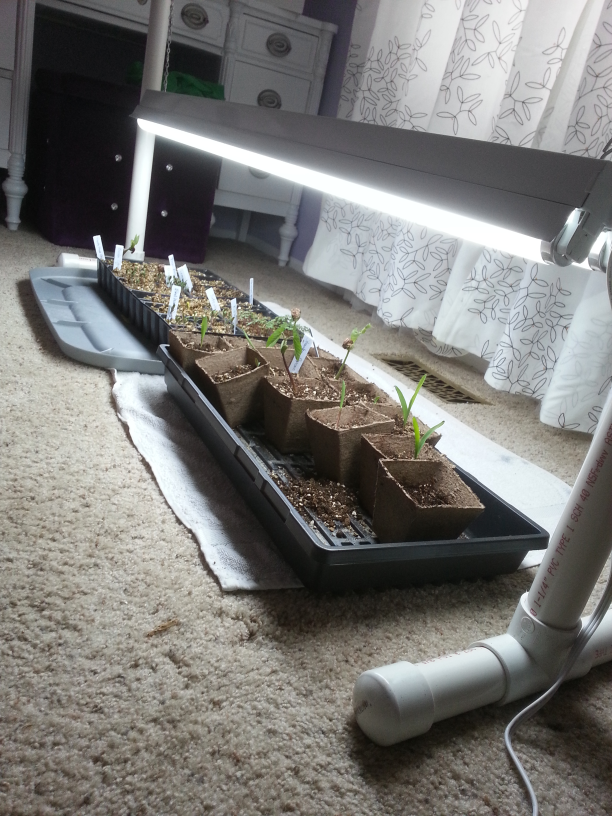
I don't know why, really. I ran an errand for the wife this morning and one thing led to another. Before I knew it, I had not only completed the errand (returning some plants and a grow light stand to Growing Hope after Chrissy did some seed starting for them), I had also completed our own grow light stand (a project we purchased the pieces for back when I made the raised bed) and cleaned the cat litter boxes. Luckily for you, I didn't take pictures of the latter task; I'm keeping those precious memories of being watched by a cat while I dug around in his feces (mostly) to myself, but I digress.

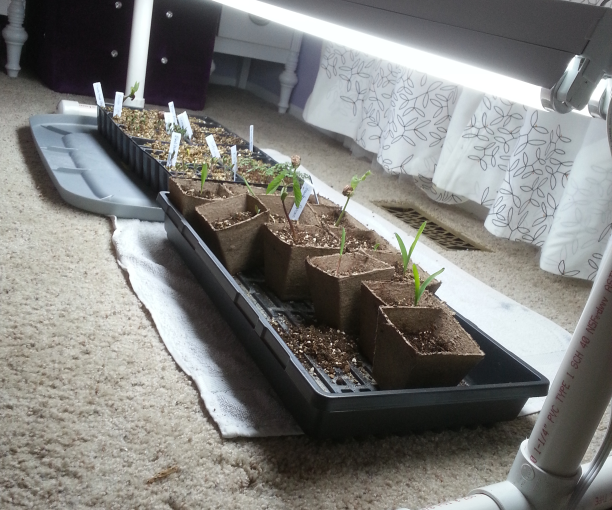
Often, when you garden, you have to start some seeds. When the weather is inclement prior to the growing season, as it often is in these parts, you need to start those seeds indoors and, much like this winter in Michigan, there's no Sun indoors (I'm thankful for that, I like my stuff unsinged), so an artificial source of equivalent light is required. That's where the grow light stand comes in.

Unlike the one we had borrowed from Growing Hope, which was a simple wood construction with two A-frames at each end joined by two planks from which the 4' long fluorescent grow lamps were suspended, our grow light stand was to be made out of PVC. As mentioned earlier, we had purchased the pieces for it some time ago, which explains why some of the pieces were wrong. Thankfully, Home Depot awesomely gave me store credit for those incorrect pieces despite a lack of receipt. That's customer service for you.

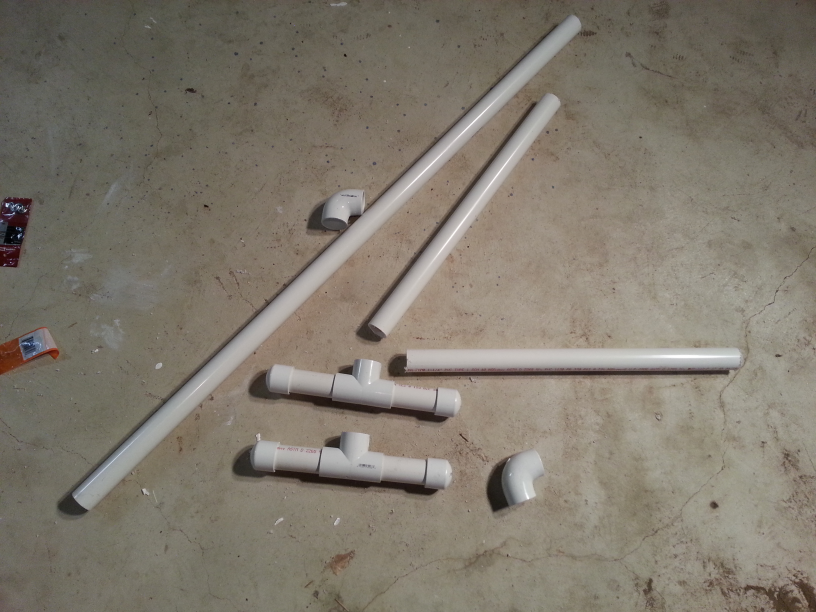
The parts required for this little project were:

  • 120" of 2" PVC pipe
  • 4x end caps
  • 2x three-way connectors
  • 2x elbow connectors
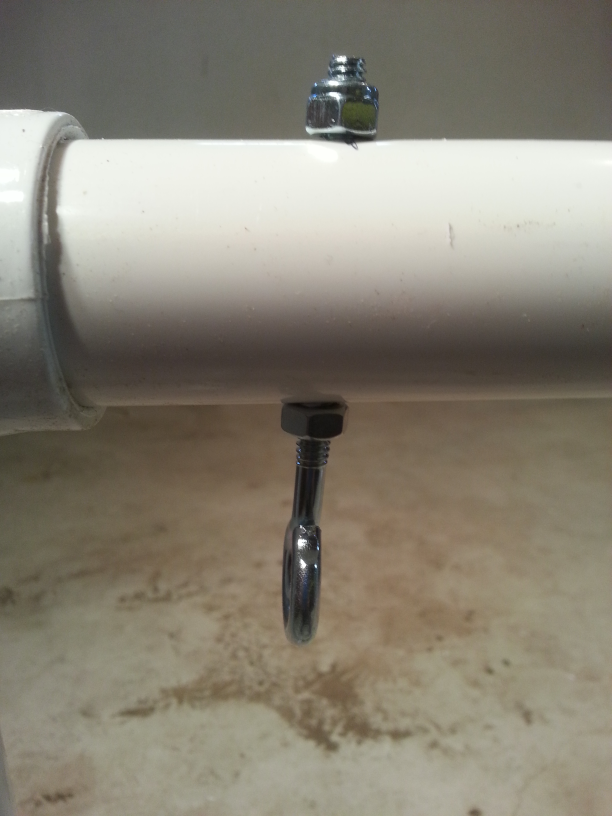
  • 2x ¼" eye bolts with 4 nuts
  • 2x S hooks
  • 1x shop light
  • 2x fluorescent grow lamp tubes
Barry inspecting the parts and tools

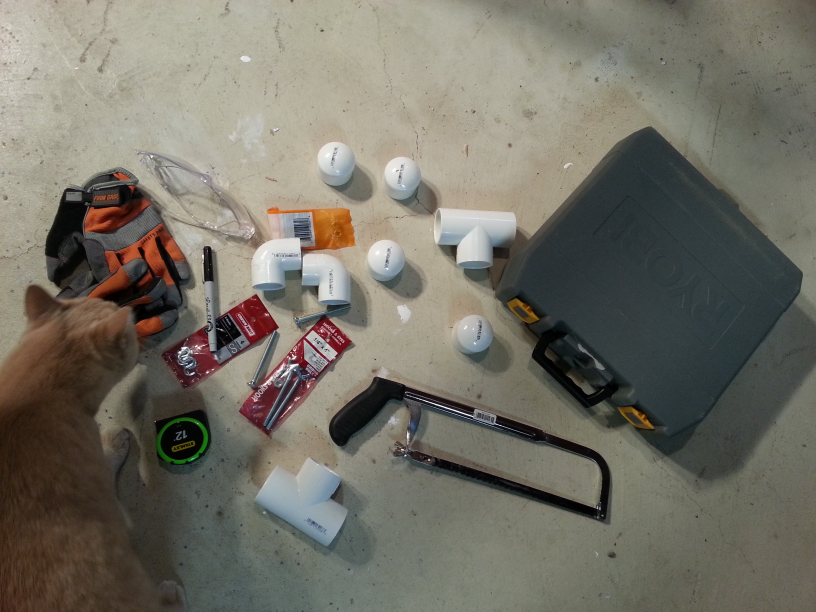
In addition, the following tools were used:

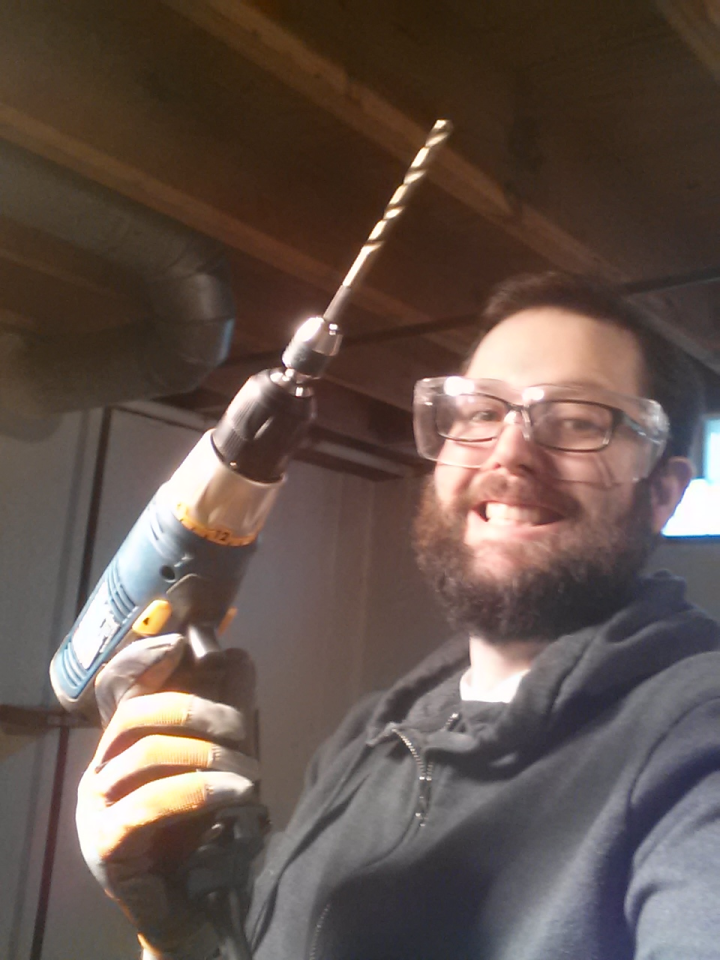
  • Safety Gloves and Glasses
  • Drill
  • ¼" drill bit
  • Permanent marker (I used the one Chrissy got from John Mayer's fan club)
  • Hacksaw
  • Pliers
  • Wrench/Spanner (for tightening the nuts)

The assembly was really quite easy and probably would have taken about an hour at most if I hadn't needed to go to Home Depot twice (once for the shop light and again to get the correct size elbows).

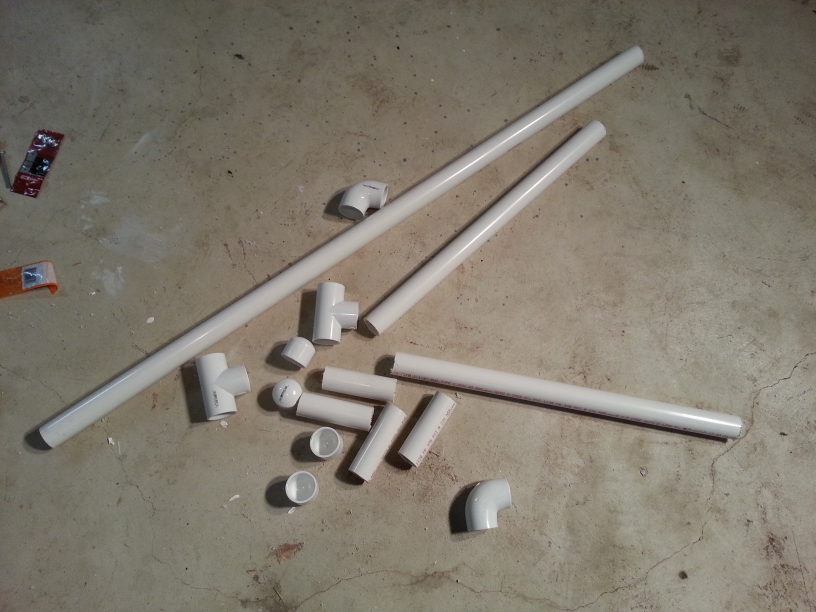
First, the PVC pipe was marked (with the John Mayer fan club marker) and cut (with the hacksaw) to the following lengths:

  • 4x 5"
  • 2x 24"
  • 1x 52"

Then, using the connectors and end caps, join them all together to create the stand.

All the pipe fittings and lengths ready for assembly
End caps fitted to 5" pipe (QA manager, Barry checking craftsmanship on the left)
End caps fitted to 5" pipe (QA manager, Barry checking craftsmanship on the left)End caps fitted to 5" pipe
End caps, 5" lengths and three way connector combined
Light stand legs and cross bar assembled
Completely assembled stand without light fixture

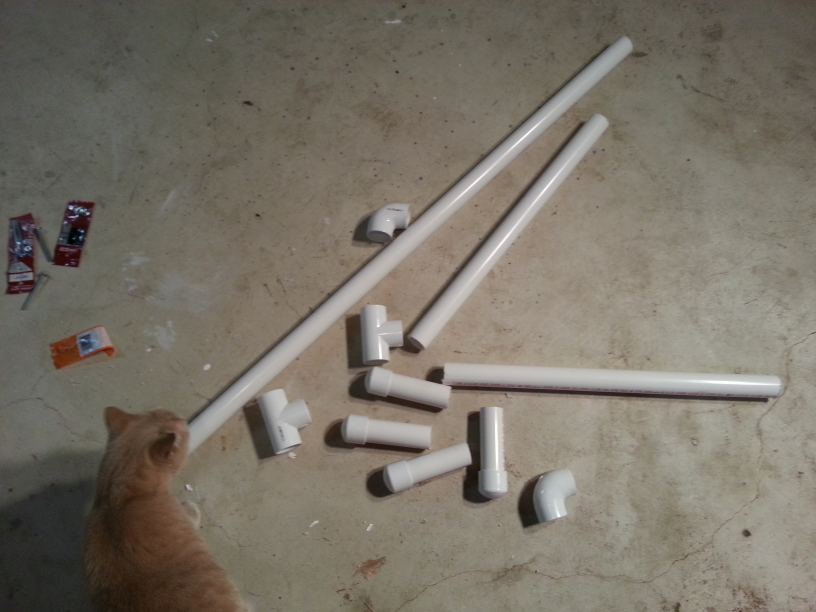
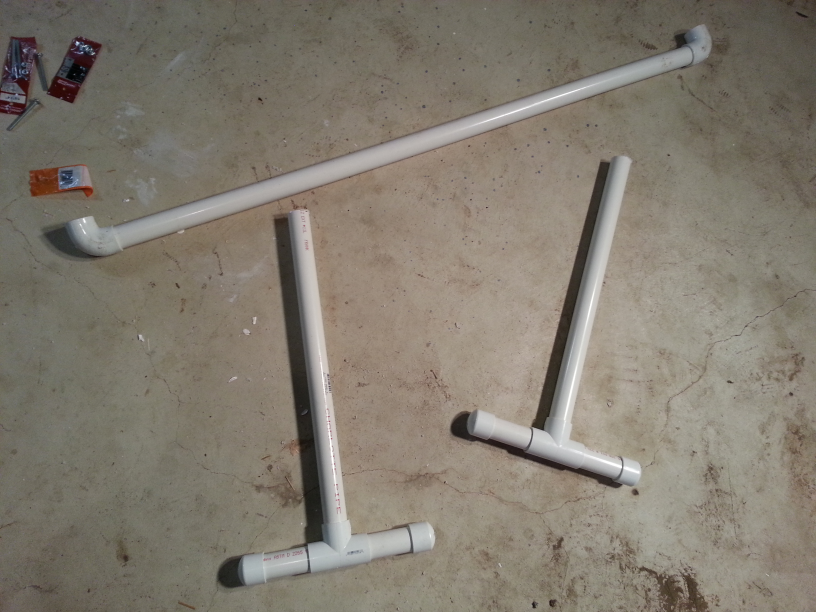
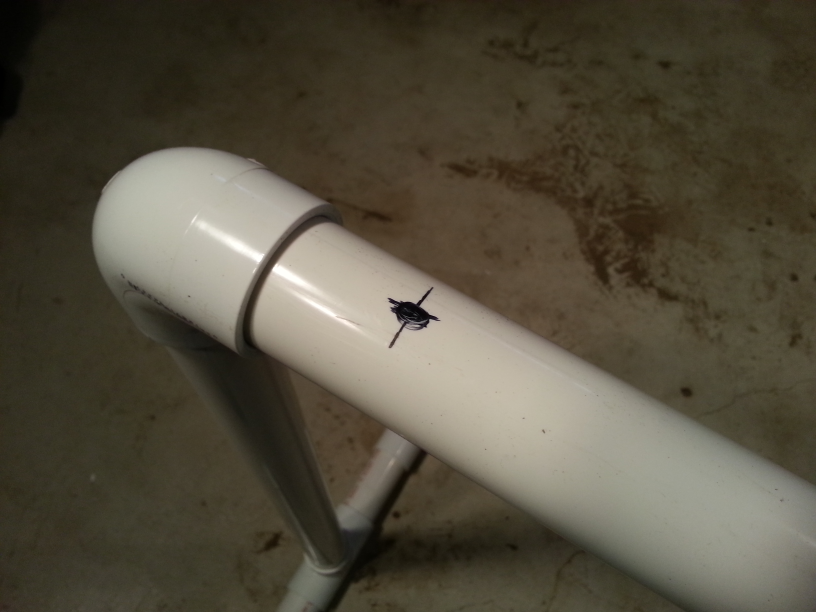
See, that was easy, right? No glue, just push it all together. It's a little disappointing that it did not include power tools, but don't worry, because this is where I whipped out my trusty drill after marking where I wanted the eye bolts to go. The shop light fixture hangs from these, so I measured where the chains would go in the shop light and chose eye bolt locations accordingly.

Chains, S hooks, etc. for attaching the light fixture
Position of eye bolt for one side of light fixture mounting

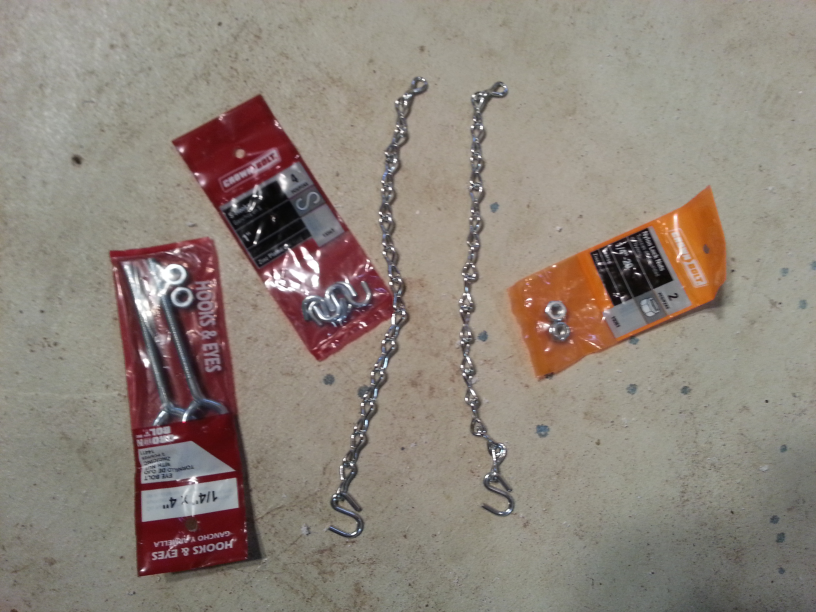
If you attempt this, be sure to wear your safety gear as I did; PVC pipe can be slippy and drills can make easily eye bolt holes in your hand if you're not careful (I recommend having some sleep too).

Safety gear on and ready to go

Once the holes were drilled in the pipe (though a little skewed), I fitted the eye bolts. In order to get a sturdy fixture, I first screwed a nut onto the eye bolt, then pushed the remainder through the pipe and applied a lock nut to the other side (though a regular nut would have done, I think). I then tightened the nuts on each side of the pipe so that the eye bolt was secure.

Eye bolt installed (note the two nuts on either side of the pipe)
Chains showing S hook before being attached and after

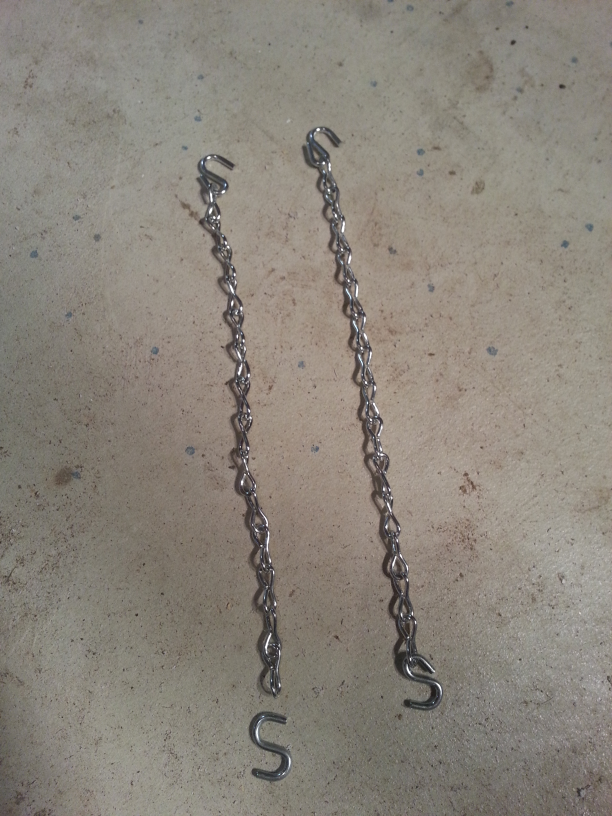
The shop light fixture came with its own chains for suspending it, however, only one end of these chains had a hook, so I carefully crimped S hooks onto the other ends of the chains. I then hooked one end into the corresponding eye bolt and the other into the light fixture and that was job done.

The assembled and working light stand (with QA manager doing final inspection)

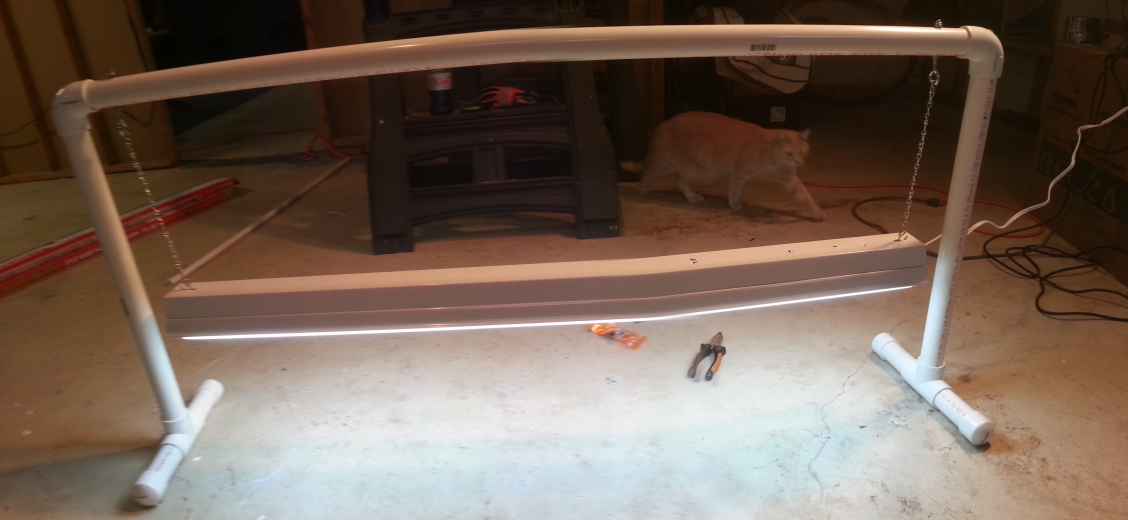
The height is even adjustable by threading the hook through the eye and hooking back into the chain.

With the assembly complete, I placed the new stand over Chrissy's seedlings and plugged it into our timer ready for her to be surprised when she gets home or reads this (whichever is first).

Chrissy's seedlings enjoying their new light stand

Now, I've been awake for far too long so I'm off to play video games and eat snacks before a well-earned nap.

Replacing a Door Threshold

Identifying the problem

The door between our garage and house has probably been in place since the house was constructed. However, last year we discovered that the same was not true of the rubber seal between the threshold and the door. It had been glued down to make up for the low clearance between the door and our hardwood flooring and the repeated friction of using the door had taken its toll. So, we removed the seal (it was getting annoying, flapping around every time we use the door and was entirely ineffectual) and proceeded to find a suitable replacement.

During my investigation into the various types of seal available, from simple door sweeps to threshold/door combinations, I found that part of our problem was the old door threshold. It had become worn and the saddle (the part that has an adjustable height on some types of threshold) was no longer adjustable. As I'm a bit of a DIY novice, I consulted a few Internet searches, a book, my dad while he was visiting and our wonderful neighbour (a local contractor). It seemed that the door was pre-hung including the threshold, so the right thing to do was to replace the whole door. Unfortunately, replacing the door is a pricey undertaking, so I decided to try replacing the threshold. In the worst case that I messed it up, I'd just be back to the original option of replacing the door.

Removing the existing threshold

The first thing I had to do was remove the old threshold. To do this, I used a reciprocating saw and cut the threshold down the middle. This was a little more difficult than I had anticipated due to both the uneven structure of the threshold and the hardwood floor in our house, both of which would catch the saw and jar it in my hands. After some trial and error, I was able to slice the threshold almost entirely in half.

Cutting out the old threshold
With the cut finished, I used a pry bar to lift the threshold and take out each half. This took some effort, lifting and pushing the threshold repeatedly to shear the remaining uncut portions. In fact, it took much more effort than I thought it would.
Prying out the old threshold
Halfway through removing the old threshold
Once the whole threshold was out and I had a chance to look, it became clear exactly why it was so difficult to remove. The threshold had been attached to the door frame on each side by three screws and I had sheared two screws on each side and torn the remaining screw out of the frame.
The door frame, showing where the screws were torn out or sheared off
Where the old threshold was attached to the door frame
The screws that sheared off or were torn from the door frame when removing the old threshold
I'm not sure that I could have avoided this as the door frame was overhanging the threshold, making it impossible for me to use the reciprocating saw to cut the screws. However, it's probably worth knowing should you try this yourself.

Before doing anything else, I cleaned up the edges that adjoined the threshold and swept up any remaining debris. This included getting rid of the flooring adhesive that had been used to seal the gap between the threshold and the floor.

Where the old threshold used to meet the floor

Fitting the new threshold

With the old threshold removed, it was time to prepare the new threshold. I had shopped around and settled on a threshold that was mostly the same as the one I had removed except that it had a wooden saddle rather than a metal one and it was too wide for the door. I measured the width of the door frame (it seemed important) and the new threshold to determine just how much had to be trimmed.

To ensure that the saddle adjustment screws were properly positioned after trimming, I wanted to trim an equal amount from each end of the threshold and to ensure I didn't get the cuts wrong, I measured the two cut points in two ways. First, I measured from each end half the width of what was to be removed and marked it with a pencil, then I added the same amount to the door width and measured that from each end, again marking it with a pencil. Finally, with my trusty hacksaw, I made the cuts as marked.

Trimming the new threshold to fit
Once cut to size, I placed the threshold against the door frame to check the fit.
Checking the fit of the new threshold
Although the width was now correct, it was clear that the threshold was not going to just slip into place. After all, I had to cut the old one in half just to pull it out. In addition, the profile of the new threshold was different to that of the old one, which meant adjusting the door frame to fit.
Indicating the new threshold cross-section
Indicating where the door frame needs adjusting to fit the new threshold
With several ideas coming to mind that all involved potentially irreversible actions, I was a little stumped on the right way to go so I consulted my awesome neighbour, Tim. He suggested flush-cutting the door frame so that the threshold would slide right in and then screwing the threshold down. He even lent me his flush-cutter to do the job, so after marking the door frame to show where the cut needed to go, I stacked up some things to give a platform for the flush-cutter to rest on. This turned out to be my first practical use of the Borders signs I had obtained when the beloved bookstore folded last year.
Setting the height for the flush cut
Flush cutting the door frame to fit the new threshold
With both sides of the frame cut and without the right tools to hand (a chisel would've helped here), I used my multipurpose paint-stripping tool to clean up the cut. It turns out that the part of the frame that needed cutting was thicker than expected so the finish was less than perfect, but it would be hidden once the job was done.
Tidying up the flush cut
Checking the fit of the threshold in the freshly cut door frame
To finish up this stage before actually getting the threshold into place, I checked the fit against the newly cut frame by using one of the pieces I had trimmed off.

Installation

With everything trimmed to size, it was time to install the threshold. On the advice of my neighbour, I removed the saddle so that I would be able to screw the threshold down once it was in place. I also marked the saddle and the threshold to ensure there was no frustrations when putting the saddle back on.

Removing the saddle from the new threshold
New threshold with the saddle removed
Marking the saddle and threshold to simplify re-assembly
With the saddle removed, I tapped the threshold into place.
Getting the new threshold into place
I added a bead of caulk to seal the gap between the inside floor and the threshold and pushed the threshold all the way home.
Making sure the join between new threshold and floor is sealed
Pushing the new threshold into place
It was now time for power tool number three. I drilled three pilot holes for the screws to fix the threshold in place. I also drilled countersinks to ensure the screws would be flush.
Drilling pilot holes for the screws that will secure the threshold
Drilling countersink to ensure the screw will be flush against the threshold
Driving the screws to secure the threshold
Once all three screws were in and holding the threshold in place, I reattached the saddle and adjusted its height to fit against the bottom of the door (this involved a lot of opening and closing the door).
Reattaching the saddle and adjusting the height
The new door threshold in place
Checking that the door closes
To finish everything off, I caulked all of the edges.
Caulking the gaps around the new door threshold
New threshold in place and caulked

Conclusion

I have learned a lot from this, had a lot of fun and saved quite a bit from not having to install a new door. When I started I wasn't entirely convinced it would work out and if I were to do it all again, I certainly might do things a little differently. That said, I am still very happy with the results and more importantly, so is my wife.