🖍 Combining React Client and Render Server for SSR

Photo by Mike Petrucci on Unsplash

This is part 6 of my series on server-side rendering (SSR):

  1. 🤷🏻‍♂️ What is server-side rendering (SSR)?
  2. ✨ Creating A React App
  3. 🎨 Architecting a privacy-aware render server
  4. 🏗 Creating An Express Server
  5. 🖥 Our first server-side render
  6. [You are here] 🖍 Combining React Client and Render Server for SSR
  7. ⚡️ Static Router, Static Assets, Serving A Server-side Rendered Site
  8. 💧 Hydration and Server-side Rendering
  9. 🦟 Debugging and fixing hydration issues
  10. 🛑 React Hydration Error Indicator
  11. 🧑🏾‍🎨 Render Gateway: A Multi-use Render Server

Here we are at last? Finally, a server-side rendered application? We shall see1. After making a simple client-side React application and talking about, building, and extending a server-side rendering (SSR) architecture, we can do the work of combining the two.

Last time we took our simple express server and got it to return an HTML page that included some actual rendered React. It was not particularly flashy, but it did prove out the concept. So, what now? Well, we need to somehow have our server-side code render our client-side code.

🥣 Combining the server and client

Currently, these are two separate projects. One, our client-side app, is using JSX; the other, our server-side app, does not know what JSX is. To combine them, we need to either teach the server about JSX or incorporate a built version of the client app.

My personal preference is to keep the server as unaware of the client-side specifics as possible. This has the advantage that in the long term, the server might even need to know that it is rendering React at all. However, before we resort to that, let's try to compromise a little for the sake of keeping things simple.

Incorporating our client app into our server app is not quite so simple as just copying the code over. Our server needs to understand it. Thankfully, it only needs to understand how to turn JSX into regular JS, so we can add our own Babel configuration for that. Since the client app is in its own Git repository, we can import a version of it via commit SHA. However, we do need the production build of the template, which creates a problem since we cannot build the client application in the server repository; it has developer dependencies that won't be fulfilled in the server project.

The traditional way to resolve that would be to publish the client app as a package in a package repository. That way the built template would be a part of the package for us to include. Of course, we are not going to do that; it's far more work than I want to do right now. Instead, what we will do is have both packages co-exist in the same repository as siblings. The server can then easily invoke commands on the client application if it so requires in order to ensure access to the client production assets. This allows both server and client to exist on their own while still allowing for the integration we seek2.

To get the server able to compile the JSX files, I ran the following commands, added the given Babel config file, and modified our package.json scripts to add babel-watch to the start command so that we can edit code and auto-transpile and restart3. With these changes, I then updated the index.js server file to replace our previous hack of using React.createElement with some actual JSX.

yarn add --dev @babel/cli @babel/core @babel/proposal-plugin-class-properties @babel/preset-env @babel/preset-react
{
  "name": "hello-react-world-ssr",
  "version": "0.0.1",
  "description": "A server-side rendering server",
  "main": "index.js",
  "license": "MIT",
  "dependencies": {
    "express": "^4.17.1",
    "react": "^16.12.0",
    "react-dom": "^16.12.0"
  },
  "scripts": {
    "start": "NODE_ENV=development babel-watch index.js"
  },
  "devDependencies": {
    "@babel/cli": "^7.8.4",
    "@babel/core": "^7.8.4",
    "@babel/plugin-proposal-class-properties": "^7.8.3",
    "@babel/preset-env": "^7.8.4",
    "@babel/preset-react": "^7.8.3",
    "babel-watch": "^7.0.0"
  }
}
const express = require("express");
const React = require("react");
const {renderToString} = require("react-dom/server");
const {getPageTemplate} = require("./get-page-template.js");

const port = 3000;
const app = express();

const pageTemplate = getPageTemplate();

const renderPage = (reactComponent) => {
    const renderedComponent = renderToString(reactComponent);
    return pageTemplate.replace('<div id="root"></div>', `<div id="root">${renderedComponent}</div>`);
};

app.get("/*", (req, res) => res.send(
    renderPage(<div>Hello World!</div>),
));

app.listen(port, () => console.log(`Example app listening on port ${port}!`));

Running yarn start demonstrates that this updated code is working, so our final step is to incorporate our actual App component. This is as simple as importing the App component and then replacing the <div>Hello World!</div> with <App />. Great! yarn start again.

Sadly, this immediately results in an error when the App component tries to import the SVG logo. To work around this, we can extend Node's require to support the SVG extension (while we're at it, we also have to do this for the CSS imports).

const fs = require("fs");

const requireText = function (module, filename) {
    module.exports = fs.readFileSync(filename, 'utf8');
};

require.extensions[".svg"] = requireText
require.extensions[".css"] = requireText;

Now when we yarn start, things appear to be all right. However, if we navigate to localhost:3000, instead of any part of our app, we get an error:

Error: Invariant failed: Browser history needs a DOM
    at invariant (/hello-react-world/client/node_modules/tiny-invariant/dist/tiny-invariant.cjs.js:13:11)
    at Object.createBrowserHistory (/hello-react-world/client/node_modules/history/cjs/history.js:273:16)
    at new BrowserRouter (/hello-react-world/client/node_modules/react-router-dom/modules/BrowserRouter.js:11:13)
    at processChild (/hello-react-world/server/node_modules/react-dom/cjs/react-dom-server.node.development.js:3159:14)
    at resolve (/hello-react-world/server/node_modules/react-dom/cjs/react-dom-server.node.development.js:3124:5)
    at ReactDOMServerRenderer.render (/hello-react-world/server/node_modules/react-dom/cjs/react-dom-server.node.development.js:3598:22)
    at ReactDOMServerRenderer.read (/hello-react-world/server/node_modules/react-dom/cjs/react-dom-server.node.development.js:3536:29)
    at renderToString (/hello-react-world/server/node_modules/react-dom/cjs/react-dom-server.node.development.js:4245:27)
    at renderPage (/hello-react-world/server/index.js:14:31)
    at app.get (/hello-react-world/server/index.js:19:5)

Oh noes! Indeed, we forgot that our app currently renders inside a BrowserRouter component and we don't have a browser with history on our render server. Of course, we could fake one, but there is no need as React Router already has us covered with StaticRouter. However, in order to use that, we're going to need to change our client-side component a little to accommodate our server expectations.

Next time, we will introduce the StaticRouter, and see that it leads to more things that we must address to get our application working the way we want. Until then, please question, comment, and discuss. The aim of this whole series is to learn more about how we can leverage SSR. That means we will continue to get messy with doing things the hard way and build an appreciation for the easy way we hopefully uncover. 🕵🏻‍♂️

  1. Hint: the answer is "sort of". []
  2. Knowledgeable folks among you will already see problems with this approach; we shall get to those []
  3. Eventually, we may want to build our server so that we do not need babel-watch for production usage; for now, it is not important. []

🖥 Our first server-side render

Photo by Markus Spiske on Unsplash

This is part 5 of my series on server-side rendering (SSR):

  1. 🤷🏻‍♂️ What is server-side rendering (SSR)?
  2. ✨ Creating A React App
  3. 🎨 Architecting a privacy-aware render server
  4. 🏗 Creating An Express Server
  5. [You are here] 🖥 Our first server-side render
  6. 🖍 Combining React Client and Render Server for SSR
  7. ⚡️ Static Router, Static Assets, Serving A Server-side Rendered Site
  8. 💧 Hydration and Server-side Rendering
  9. 🦟 Debugging and fixing hydration issues
  10. 🛑 React Hydration Error Indicator
  11. 🧑🏾‍🎨 Render Gateway: A Multi-use Render Server

Over the last few weeks, we have been chipping away at server-side rendering and how to implement it. In the last post, we created a server; in this one, we will see if we can make that server render a page containing some server-side rendered React. If you recall from last time, there are two ways we can approach implementing our render server:

  1. Standalone with a way to pass our React app to it
  2. Integrated so that it knows all about our React app

Both approaches start from common origins; they both need a server that can render a React component inside a page. By the end of this post, we should be able to request a URL from our server and receive a rendered HTML page with some rendered React embedded inside of it. This will give us some fundamentals that we can then use next time to finally render our client-side application.


🖌 Rendering React on the server

app.get("/*", (req, res) => res.send("Hello World!"));

The server that we made last time will be the basis for our solution. Above is our current route handler for the server. Regardless of the get request, the server responds with Hello World!. What we want to do is to replace Hello World! with the rendered React component tree embedded within an HTML page.

When rendering in a browser, our React application is mounted so that it will dynamically update based on events like mouse movements, network requests, etc. When we are rendering on the server, we do not want all that. In fact, we do not even have a DOM like the browser does in which to create elements and event handlers and the like1. Instead of mounting the React application, we want to capture the very first render of the application and stop. React provides a methods for doing things like this in the React DOM package. We are going to use its renderToString method2.

The renderToString method takes a React component and gives us back a string of the markup that is initially rendered by that component. Before we can try it, we need to add the appropriate packages to our server: react and react-dom.

yarn add react react-dom

Now, in theory, we can render some React. Sadly, just updating our route handler with a component as shown below will not work.

app.get("/*", (req, res) => res.send(
    renderToString(<div>Hello World!</div>)
));

If we add this and then run our server with yarn start, we get a rather cryptic error output.

app.get("/*", (req, res) => res.send(renderToString(<div>Hello World!</div>)));
                                                    ^

SyntaxError: Unexpected token <
    at Module._compile (internal/modules/cjs/loader.js:723:23)
    at Object.Module._extensions..js (internal/modules/cjs/loader.js:789:10)
    at Module.load (internal/modules/cjs/loader.js:653:32)
    at tryModuleLoad (internal/modules/cjs/loader.js:593:12)
    at Function.Module._load (internal/modules/cjs/loader.js:585:3)
    at Function.Module.runMain (internal/modules/cjs/loader.js:831:12)
    at startup (internal/bootstrap/node.js:283:19)
    at bootstrapNodeJSCore (internal/bootstrap/node.js:623:3)

The issue is, our server has no idea how to handle JSX syntax (the embedded HTML-like description of our React component; <div>Hello World!</div>). Our client-side application works because the create-react-app package sets up some tools to process JSX files and turn them into valid JavaScript that can be understood by a modern browser. Our server-side application does not have any of that magic and so it does not work.

Rather than spending time to add that magic into our server, it feels more appropriate to assume our server is just another browser and that our client-side code will already be transformed into JavaScript by the time we see it3. Instead, just to test our React rendering, we can replace the JSX with its transpiled counterpart, which is a call to React.createElement. React.createElement takes the component being rendered and its props. In our case, we are rendering an HTML div element. These are special cases where a string is used to represent them, rather than a real React component type. Therefore, our simple JSX example becomes; note how the text is passed as the children of the component.

app.get("/*", (req, res) => res.send(
    renderToString(React.createElement("div", { children: "Hello World!" }))),
);

If we now yarn start our server application, it runs and when we visit http://localhost:3000, we see our Hello World! text. This is great. It means that given a suitably transpiled React component, we can server-side render it. Now that we have the ability to render a component, we need to embed that rendered component inside a full HTML page.

📄 The Page Template

OK, so we have some HTML that represents our rendered component. Now we need to put that into an HTML page, we need to think about what that page looks like. What does the page include? We can revisit the React app we made and see for ourselves.

<!DOCTYPE html>
<html lang="en">
  <head>
    <meta charset="utf-8" />
    <link rel="icon" href="/favicon.ico" />
    <meta name="viewport" content="width=device-width, initial-scale=1" />
    <meta name="theme-color" content="#000000" />
    <meta
      name="description"
      content="Web site created using create-react-app"
    />
    <link rel="apple-touch-icon" href="/logo192.png" />
    <!--
      manifest.json provides metadata used when your web app is installed on a
      user's mobile device or desktop. See https://developers.google.com/web/fundamentals/web-app-manifest/
    -->
    <link rel="manifest" href="/manifest.json" />
    <!--
      Notice the use of  in the tags above.
      It will be replaced with the URL of the `public` folder during the build.
      Only files inside the `public` folder can be referenced from the HTML.

      Unlike "/favicon.ico" or "favicon.ico", "/favicon.ico" will
      work correctly both with client-side routing and a non-root public URL.
      Learn how to configure a non-root public URL by running `npm run build`.
    -->
    <title>React App</title>
  </head>
  <body>
    <noscript>You need to enable JavaScript to run this app.</noscript>
    <div id="root"></div>
    <!--
      This HTML file is a template.
      If you open it directly in the browser, you will see an empty page.

      You can add webfonts, meta tags, or analytics to this file.
      The build step will place the bundled scripts into the <body> tag.

      To begin the development, run `npm start` or `yarn start`.
      To create a production bundle, use `npm run build` or `yarn build`.
    -->
  <script src="/static/js/bundle.js"></script><script src="/static/js/0.chunk.js"></script><script src="/static/js/main.chunk.js"></script></body>
</html>

Above is the development-time HTML template that is used with our simple React app. I have highlighted some important sections.

  1. The head containing page metadata, including title, description, favicon, etc.
  2. Scaffold body to provide a mounting point for our React component
  3. Scripts

The head content is static4 and the scripts are inserted by the build operation of our client app. The bit that matters to us is the mounting point for our React app, <div id="root"></div>, as this is where anything we render will need to be inserted by our server-side rendering operation.

Of course, we want to do all this with production code. To see how that affects things, we can run yarn build in our React app. Running this creates a build folder with all sorts of things in it, including a slightly different version of our HTML template (we will perhaps consider the other files another time).

<!DOCTYPE html>
<html lang="en">
  <head>
    <meta charset="utf-8" />
    <link rel="icon" href="/favicon.ico" />
    <meta name="viewport" content="width=device-width,initial-scale=1" />
    <meta name="theme-color" content="#000000" />
    <meta
      name="description"
      content="Web site created using create-react-app"
    />
    <link rel="apple-touch-icon" href="/logo192.png" />
    <link rel="manifest" href="/manifest.json" />
    <title>React App</title>
    <link href="/static/css/main.b0083702.chunk.css" rel="stylesheet" />
  </head>
  <body>
    <noscript>You need to enable JavaScript to run this app.</noscript>
    <div id="root"></div>
    <script>
      !(function(f) {
           // SNIPPED FOR CLARITY
      })([]);
    </script>
    <script src="/static/js/2.78e6b881.chunk.js"></script>
    <script src="/static/js/main.dcbf6a7c.chunk.js"></script>
  </body>
</html>

This looks a little different than what we had before, but it is not as different as you may think. We still have the head element metadata (though this time it includes a CSS file, which was not there in the development version), we still have the scripts (though there is now some inlined scripting that wasn't there before, which I have snipped out just to make things a little more readable), and most importantly, we still have our mounting point, <div id="root"></div>.

Given this information, we can update our server application to return a full page containing our rendered component. For our purposes here, we will hard code a simple page template. Eventually, we can replace this simple template and the React component being rendered with the production output of our client application.

🖼 Rendering the page and the component together

Using what we have learned here, I have modified the server as follows.

const express = require("express");
const React = require("react");
const {renderToString} = require("react-dom/server");

const port = 3000;
const app = express();

const pageTemplate = `<!DOCTYPE html>
<html lang="en">
  <head>
    <meta charset="utf-8" />
    <meta
      name="description"
      content="SSR result"
    />
    <title>React App</title>
  </head>
  <body>
    <noscript>You need to enable JavaScript to run this app.</noscript>
    <div id="root"></div>
  </body>
</html>
`;

const renderPage = (reactComponent) => {
    const renderedComponent = renderToString(reactComponent);
    return pageTemplate.replace('<div id="root"></div>', `<div id="root">${renderedComponent}</div>`);
};

app.get("/*", (req, res) => res.send(
    renderPage(React.createElement("div", {children: "Hello World!"})),
));

app.listen(port, () => console.log(`Example app listening on port ${port}!`));

We have a page template string called pageTemplate. Then we have a renderPage method that does a simple replace operation to replace <div id="root"></div> in our template with the same div containing our rendered React component. Finally, in the get handler, the renderPage method is invoked with our React component.

If we yarn start this version of the server and visit http://localhost:3000, viewing the resultant page source gives us the following HTML.

<!DOCTYPE html>
<html lang="en">
  <head>
    <meta charset="utf-8" />
    <meta
      name="description"
      content="SSR result"
    />
    <title>React App</title>
  </head>
  <body>
    <noscript>You need to enable JavaScript to run this app.</noscript>
    <div id="root"><div data-reactroot="">Hello World!</div></div>
  </body>
</html>

On the highlighted line, you can see the inserted server-side rendered React code. Success! We haven't even loaded any scripts client-side to see this result. Of course, if we want an app that a user can interact with, we are going to need to change that. Join me next time when we work out how to integrate our server with our client-side application in order to get our very first server-side rendered app. Of course, that does not mean we will have reached our destination on this server-side rendering adventure; on the contrary, it feels like we have barely begun.

Thanks again for reading. I hope that something you find here is useful. Please comment as you see fit. 💝

  1. We could introduce a DOM using a library like JSDOM. However, that is an extra step that we would like to avoid as it increases the latency of our server-side rendering process. Instead, we should aim to make sure our React app does not rely on there being a DOM present at all. []
  2. It is worth looking at the other options, such as renderToNodeStream, to see what they can offer you and your specific SSR challenges []
  3. You may notice that this starts to lead us down one of our two paths; does the server know all about the client code, or does it get blindly provided somehow? []
  4. For now, let's assume that the page metadata (item 1, above) remains static; while we can certainly build in a mechanisms to make this dynamic, such as changing page title when the selected route is different, that will over-complicate things at this stage. []

🏗 Creating An Express Server

Photo by Kelly Sikkema on Unsplash

This is part 4 of my series on server-side rendering (SSR):

  1. 🤷🏻‍♂️ What is server-side rendering (SSR)?
  2. ✨ Creating A React App
  3. 🎨 Architecting a privacy-aware render server
  4. [You are here] 🏗 Creating An Express Server
  5. 🖥 Our first server-side render
  6. 🖍 Combining React Client and Render Server for SSR
  7. ⚡️ Static Router, Static Assets, Serving A Server-side Rendered Site
  8. 💧 Hydration and Server-side Rendering
  9. 🦟 Debugging and fixing hydration issues
  10. 🛑 React Hydration Error Indicator
  11. 🧑🏾‍🎨 Render Gateway: A Multi-use Render Server

Over the previous three posts in this series we have described what server-side rendering (SSR) is, created a simple application using React, and discussed the architecture of a privacy-aware server to ensure we understand some of the sharp edges around SSR. Now, we will actually implement a basic server. Just as with the React application we created, the server we create will not be a complete solution, but it will provide a foundation from which we can continue to explore SSR.

✨ A New Project

Where do we start? Well, we need a server that can receive web requests and respond to them. For that, I am going to use Express1, but first I need a project.

NOTE: Where you see yarn, know that you can use your own package manager as you see fit.

  1. Add a new repository on GitHub (or your source control platform of choice).
  2. Make a new folder locally for your code
  3. cd to your new folder and run git init
  4. git remote add origin <your github repo URL>
  5. git pull origin master
  6. git branch --set-upstream-to=origin/master
  7. Create and commit a .gitignore file
  8. Initialize it for JavaScript package management with yarn init
  9. Run yarn install to generate the lock file
  10. Commit the yarn.lock and package.json to the git repository

Great, so now we have a project we can start working on. Let's add Express.

yarn add express

This should update our package.json and yarn.lock, so don't forget to commit those changes. I also recommend pushing often to your remote repository, that way your code is backed up online in case your computer suffers a nasty accident2.

👋🏻 Hello World!

At this point we need to write some code. We need to setup a route for our server that can handle providing a rendered result for any URL that our application might have. There are a couple of ways we could do this:

  1. Assuming that our server is invoked by some intermediate layer, such as a cache, we could have the server implement a single route (e.g. /render) and pass the URL to be rendered as a query parameter.
  2. Our server could assume the URL is to be rendered by the client code and just accept any URL.

Option 1 gives us a great deal of flexibility in what our server can do, but it forces us to ensure that there is a layer between the original browser request and our server, as something has to be responsible for constructing the appropriate /render route request. Option 2 removes the need to have an intermediate layer, but it perhaps restricts us from expanding server functionality. Of course, option 2 can be changed to option 1 if the need arises, so we can go with option 2 for now, knowing that later, it can be updated to suit changing needs.

Normally, I would add lots of other things to this server to improve development and runtime investigations, such as linters, testing, and logging, but for the sake of brevity, right now we will stick to the main functionality.

const express = require("express");

const port = 3000;
const app = express();

app.get("/*", (req, res) => res.send("Hello World!"));

app.listen(port, () => console.log(`Example app listening on port ${port}!`));

This is our index.js file. It is not doing a lot. On line 4, we create our express app. On line 6, we tell it that for any route matching /*, return Hello World!. On line 8, we tell it to listen for requests on port 30003.

If we run this app with node index.js, we can go to our browser, visit any route starting with localhost:3000 and see the text, Hello World!. This is fantastic. We have a server and it is responding as we hope. Since we are going to run this often as we make changes, I will add a script to our package.json to run node index.js for us.

{
  "name": "hello-react-world-ssr",
  "version": "0.0.1",
  "description": "A server-side rendering server",
  "main": "index.js",
  "license": "MIT",
  "dependencies": {
    "express": "^4.17.1"
  },
  "scripts": {
    "start": "node index.js"
  }
}

In the package.json file shown above, I have highlighted the section I added containing the new start command. From now on, we can start our app with yarn start. The next step is getting our server to render our React application. Before we do that, consider these questions:

  1. How does the server know about and load the code for our React application?
  2. How does the server get the rendered result to send back?
  3. How do we isolate render requests to avoid side-effects bleeding across requests?

🤔 The Hows

The answers to the first two questions have implications beyond the server itself, possibly influencing both our client application and any deployment process.

How our server knows about and loads our client application may affect how our server is deployed. Some server-side rendering solutions involve deploying the client-side code with the server so that it has direct access to the appropriate code, others use a mechanism such as looking up in a manifest to identify the files to load from a separate location (such as a content delivery network (CDN)). Neither of these is necessarily a bad choice – they both have their advantages and disadvantages. For example, deploying the server with the right code means:

  • ✅The server has fast access to the client application it is rendering
  • ✅The server can integrate nicely with the client application
  • ❌The render server must be deployed every time the client application changes
  • ❌The server is closely coupled to the client application

Whereas, looking up files in a manifest and loading them from elsewhere means:

  • ✅The render server rarely requires updating
  • ✅The server can render more than one application
  • ❌The server will probably need to cache JavaScript files locally or be at the mercy of latency when communicating with the CDN
  • ❌The client applications that the server renders likely need to include custom code to support being rendered by that server

Being aware of how these approaches differ – and they differ in more than just the ways I have suggested, is useful in understanding the trade-offs we must make when implementing our render server. Perhaps answering the second question will help us decided which route to take; consider how will our server get a rendered result of the client application?

Our server is going to invoke a call from the React framework that renders our React application to a string, rather than mounting it inside the DOM of a browser. To do that, it needs a React component to render, so it must load our client application and get the root-level component. In addition, assuming our render server is rendering the entire page and not just the React component, the server is likely going to need to gather additional information, such as which files must be loaded in the page, the page title, etc.

This whole process of capturing the application render and associated metadata requires interplay between the server code and the client code. Revisiting the first question and the two approaches I gave: if the server has the client code deployed with it, the server could know exactly which files to load to render the component, importing those directly and using them accordingly; if the server is less-closely coupled, we likely need some mechanism whereby the client application itself does more of the heavy lifting by hooking into some framework provided by the server, even if that is just exporting a specific object so that server can identify the appropriate things to coordinate rendering.

Ultimately, either we have a server that is custom built to our application, or we have a server that is built to support many applications. What to do? I say, dive in and try them both. To that end, next time we will look at the first option where the server knows all about the client application (though we may cut some corners to get to the salient points), and we will answer that third question; how do we isolate our renders?

🙇🏻‍♂️ In Conclusion

Herein we have created our server, though it does not do much yet. We have also considered two different approaches to connect our server to our client application: closely-coupled or more open, and we have started to think about how the server will isolate and respond to render requests.

This week's entry turned out a little longer than I had intended, and covered less things than I had hoped. Sometimes that is the way it goes. One of the biggest reasons I write these blogs is to discover what I do and do not know about something. Often in the effort of explaining it to someone else, I identify a bias that I have without any supporting evidence, or a topic I grasp that is far harder to explain than I expected.

Until next time, when we start to implement our server-side rendering, please leave a comment. Perhaps you have a question, a personal experience writing a render server, or want to take umbrage at something I have stated. I look forward to learning with you as we continue this journey into the land of SSR. 🗺

  1. I find Express easy enough to use and well-supported, though there are other options that one could use instead if one were so inclined []
  2. A lesson from bitter experience; hard drives die (especially SSDs) without warning, drinks spill, laptops get dropped – keep your work backed up []
  3. The port is currently hard-coded for simplicity, but we could make this configurable []

🎨 Architecting a privacy-aware render server

Photo by Sergey Zolkin on Unsplash

This is part 3 of my series on server-side rendering (SSR):

  1. 🤷🏻‍♂️ What is server-side rendering (SSR)?
  2. ✨ Creating A React App
  3. [You are here] 🎨 Architecting a privacy-aware render server
  4. 🏗 Creating An Express Server
  5. 🖥 Our first server-side render
  6. 🖍 Combining React Client and Render Server for SSR
  7. ⚡️ Static Router, Static Assets, Serving A Server-side Rendered Site
  8. 💧 Hydration and Server-side Rendering
  9. 🦟 Debugging and fixing hydration issues
  10. 🛑 React Hydration Error Indicator
  11. 🧑🏾‍🎨 Render Gateway: A Multi-use Render Server

This week, we are back to our adventures in server-side rendering (SSR). So far in this series, we have looked at:

At this point in our journey into SSR, we need a server. Before we make a server, we must consider privacy and performance so this post is going to be light on code as we talk through important considerations. Though these considerations can be dealt with later, thinking about them upfront will help us avoid some really big pitfalls.

📈 Performance

All our initial considerations regarding server architecture come down to performance. Performance is the reason we want to implement SSR. We want to reduce the time our users must wait to see and interact with our site. Since the render of a page, whether in a browser or in our render server, can take variable amounts of time based on network latency, data requirements, and more, this inevitably means caching. Caching also helps us reduce costs since the render server will do less work. Whether caching is provided by your own implementation or via a service like Fastly, it has implications on what we should render on the server.

  • To get the most from our SSR solution, we need to render as much of a page as we possibly can.
  • To get the most from our caching, we want to share renders among as large a user base as we can so that a single render provides a cache hit for many people.

These two points compete against one another. In an ideal SSR world, for any given route the entire page is rendered so that the client does as little work as possible, but in an ideal caching world, a single cached entry for a route is shared with every user so that it is rendered once and then just shared. Assuming our app changes the page based on information about the user, both general – what device they are on, whether they are logged in or not, etc., and specific – what their name is, where they live, etc., we only get the most from caching if we do not render differentiating information during SSR such that we can share that render with more users. I doubt there is a hard and fast rule about how to find that caching sweet spot between being too specific about cache keys or being too general about rendering, but we can make things easier for ourselves.

First, we must ensure the cache key only includes generalizations and non-user-specific info.

Second, we introduce means to make generalizations about the user that can be a part of the cache key (is logged in, using Android, etc.) and that we can then pass to the render server to influence what is rendered.

Combining these two pieces of generalizing users and using that to influence the cache keys enables us to maximize what we can render while providing cacheable results that can be shared without leaking personal information. However, since the generalized information must be calculated and it can influence the cache key, there are implications for our architecture; if the render server does the generalization work, how can it tell the cache about it? We will look into that later, but for now, let's just note it as a problem to be solved.

📊 Data Access

At this point, we have worked through how to architect our server to support caching via generalizing users so that cache hits are likely without leaking personal information. That's great, and in fact, one might think, unnecessary. As long as user-specific information is not available to the render server, we cannot possibly render user-specific data. In many apps, data is obtained via REST or GraphQL and as such, is asynchronous. Since our render server is only rendering the very first render of a page, any asynchronous data will not be resolved and therefore not included in the result. So, where's the problem?

Well, not all data is asynchronous; some may be in the request itself, and even if we don't cache based on it, we must still ensure it is not rendered in the result. To mitigate this, we can use frontend components that wrap access to user-specific information so that we have a consistent rendering experience. Whether rendering for the first time in the client or the first time on the render server, these components will ensure the right thing is rendered and that the client will render the real data. Such data access components might render a spinner or some other placeholder that represents the currently unusable personal information (such as username) until the data is available. This means that all the considerations for rendering the right thing, whether in a browser or in the render server, are codified within the React app itself.

By using components in conjunction with linters and tests, we can enforce a data access policy that enables us to SSR effectively while respecting and enforcing user privacy.

📃 In Summary

That's a lot of words. Hopefully it has clarified some of the more jagged edges to SSR that often do not seem apparent until much later. It is much easier to make considerations about these things up front1.

In discussing how our render server will work with respect to a cache and user privacy, we have uncovered some details that affect not only the render server, but also our React app:

  1. The render server should sit behind a cache for performance, cost, and other benefits
  2. User-specific data like names, location, etc. should be omitted from the SSR result, cache keys, and initial client-side render
  3. It is useful to allow generalized user information in SSR, but it must also form part of the cache key
  4. Using React components, linters, and tests can enforce your policy around rendering user-specific content

That is it for this week. I thought I would get around to implementing the first version of our server, but I did not, so we will get into that next time. In the meantime, here are some things to consider that we will likely address in upcoming posts.

  1. Given that SSR only performs the very first render of our React app, how can we include asynchronous data and render more of our page?
  2. How will our render server know what browser code to render?
  3. How can generalizations about users be included in the cache key and used by the render server?
  1. something I have painfully learned by not doing so []

✨ Creating A React App

Photo by Rolands Zilvinskis on Unsplash

This is part 2 of my series on server-side rendering (SSR):

  1. 🤷🏻‍♂️ What is server-side rendering (SSR)?
  2. [You are here] ✨ Creating A React App
  3. 🎨 Architecting a privacy-aware render server
  4. 🏗 Creating An Express Server
  5. 🖥 Our first server-side render
  6. 🖍 Combining React Client and Render Server for SSR
  7. ⚡️ Static Router, Static Assets, Serving A Server-side Rendered Site
  8. 💧 Hydration and Server-side Rendering
  9. 🦟 Debugging and fixing hydration issues
  10. 🛑 React Hydration Error Indicator
  11. 🧑🏾‍🎨 Render Gateway: A Multi-use Render Server

Last week, I gave my own brief history of web sites and how their frontend implementation has drifted from entirely server-based, to entirely client-based, and is now settling (perhaps) with hybrid that we call server-side rendering (SSR). The goal of this journey is to poke around the gnarly bones of SSR and learn what we learn. We may make mistakes, break idioms, and portray ourselves as fools, but we will definitely learn. For that reason, we are not going to bother with things like Next.js, which have already fleshed over and hidden away the gnarly bones for us1.

Now, before we dip even further in the specific world of SSR, we are going to need an app. To be specific, we are going to need a React app.

Hello, React World!

Before creating a React app, we need a package manager; either npm or yarn will suffice. Though we could put together our own app from scratch, there is no need to as the handy create-react-app package exists. There are numerous ways to use this, but the easiest is to use yarn create or npx, which will do the work of obtaining the package and executing it all in one go.

For yarn, drop create from the front of create-react-app:

yarn create react-app <app-name-here>

For npx:

npx create-react-app <app-name-here>

I want to also put this in a git repository so I can track my changes. I would normally make a directory, run git init and then get started. In this case, we do not need to as create-react-app takes care of that for us.

So, let's begin. Open a terminal and invoke create-react-app.

yarn create react-app hello-react-world

After executing this, you will have a working React app that uses react-scripts to manage the basics. This is perfect for our initial journey. If we navigate to that directory and run the project, we can see our app in action.

cd hello-react-world
yarn start
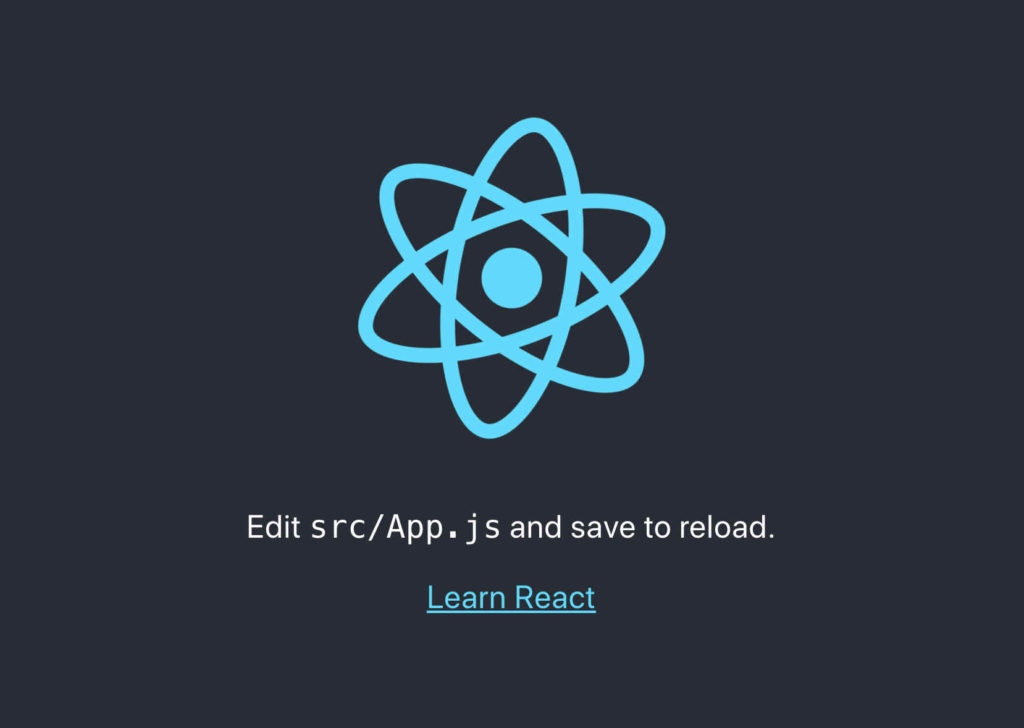
Screenshot of the website created by the create-react-app tool. It shows the React logo in blue, over a dark grey background, with the text "Edit src/App.js and save to reload." and a link labelled, "Learn React"

Fantastic. We have an app. Before we do any more, let's get some remote source control underway. I am paranoid of my machine dying and losing all my work, so having an off machine place to store things is really useful. First, add a new repository on your source control site of choice (I prefer GitHub). Second, connect the local repository to the remote one:

git remote add origin <repo-url>
git fetch
git branch --set-upstream-to origin/master master

Since we want our local code to be the first commit and we're pushing to a brand new repository, we can force push what we have.

git push -f

Routing

Okay, we have an app and it is in source control. This is usually a good spot to spend some time setting up code quality tools like eslint and prettier. I am going to be naughty and skip right over that right now and save it for a different post, perhaps. Instead, let us add some routing to our fledgling application.

There are a few options for implementing routing in a React application (some frameworks, like Next.js, even provide it out of the box). We are going to use React Router. There are two variants of React Router; one for React on websites, and one for React Native on mobile. We want the website variant, which is provided by the react-router-dom package.

yarn add react-router-dom

Now we will edit our app to have a couple of routes. The main app is defined in the src/App.js file. It should look something like this. I have highlighted the lines we're going to replace; we are also going to add some too.

import React from 'react';
import logo from './logo.svg';
import './App.css';

function App() {
  return (
    <div className="App">
      <header className="App-header">
        <img src={logo} className="App-logo" alt="logo" />
        <p>
          Edit <code>src/App.js</code> and save to reload.
        </p>
        <a
          className="App-link"
          href="https://reactjs.org"
          target="_blank"
          rel="noopener noreferrer"
        >
          Learn React
        </a>
      </header>
    </div>
  );
}

export default App;

There are two things we want to add.

  1. The routes to render our pages.
  2. The links to navigate to our routes.

First we import four things from react-router-dom:

  1. BrowserRouter
    This is the root of our React Router-based navigation. Basically, the router is responsible for the routing (I'm sure you guessed that).
  2. Link
    This replaces the anchor tag (<a>) for our navigation.
  3. Route
    This is used to render a matched route.
  4. Switch
    This allows us to specify a table of possible routes that can be used to work out what should handle the URL currently being viewed.

With these things, we can then add some routes. I am adding Home, About, and Contact. Here is my app code after the edit. I have highlighted the new lines.

import React from 'react';
import {BrowserRouter, Link, Route, Switch} from "react-router-dom";
import logo from './logo.svg';
import './App.css';

function App() {
  return (
    <BrowserRouter>
      <div className="App">
        <header className="App-header">
          <img src={logo} className="App-logo" alt="logo" />
          <div className="App-links">
            <Link className="App-link" to="/">Home</Link>
            <Link className="App-link" to="/about">About</Link>
            <Link className="App-link" to="/contact">Contact</Link>
          </div>
        </header>
        <section className="App-content">
          <Switch>
            <Route path="/about">
              This is the about page!
            </Route>
            <Route path="/contact">
              This is the contact page!
            </Route>
            <Route path="/">
              This is the home page!
            </Route>
          </Switch>
        </section>
      </div>
    </BrowserRouter>
  );
}

export default App;
Screenshot of the updated app using React router. The top shows the React logo with three links below it for "Home", "About" and "Contact" all on a dark grey background. Below that is a white region with the text "This is the home page!"

I also edited the CSS a little, but only to make things easier to see. The important bits are the router, wrapping our app, the Link components to perform navigation, and the Route components that render each route. With this, we now have a single page React app that has three pages for home, about, and contact.

This is going to be the application we will eventually render on the server. The important take away at this point is that we are not going to change the functionality of this app in order to achieve our aim. There are some changes we must make to support SSR, but we will not have two versions of the code. The code that runs in the browser will run on the server.

Next time, we are going to setup a server that will perform our SSR and consider what changes we need to make to our application infrastructure in order to support it. We might even get our first server-side rendered page. Until then, thanks for joining me on this continued exploration of server-side rendering using React.

  1. of course, if starting a new project knowing you need SSR, you should explore solutions like Next.js []