Happy birthday to me!
For my birthday this year, my amazing wife arranged for my almost as equally amazing friends and family to contribute towards a copy of Pro Tools 10 so that I could get back to recording music. It is one of the best gifts ever, but there was a snag; the computer I had built back in 2005 was already feeling its age1 and definitely not up to the task. As if by brilliant parental planning 30-something years ago, our tax refund arrived shortly thereafter and redirected to the Super Awesome Computer fund.
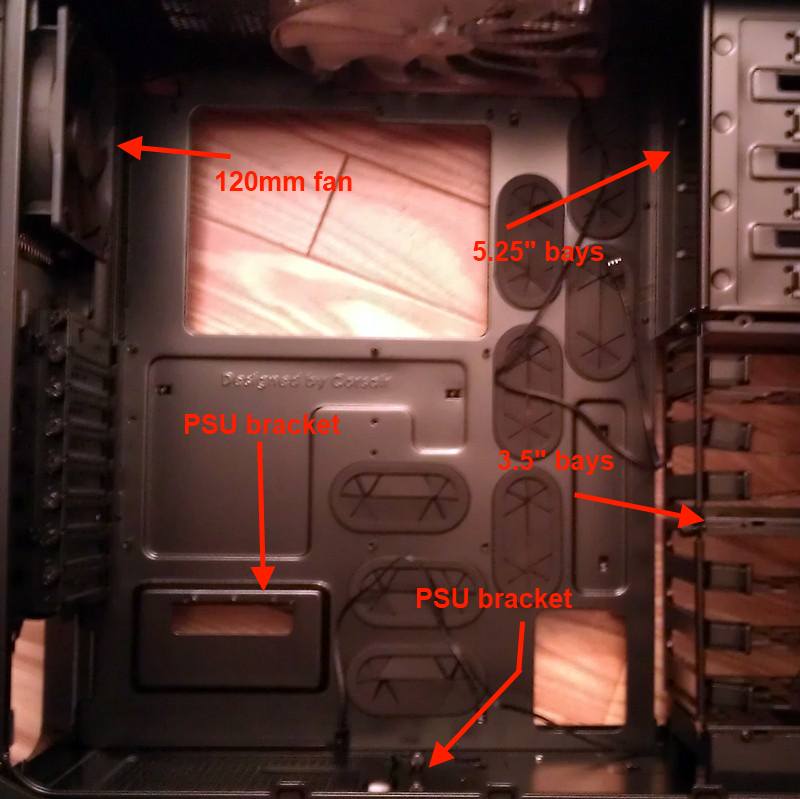
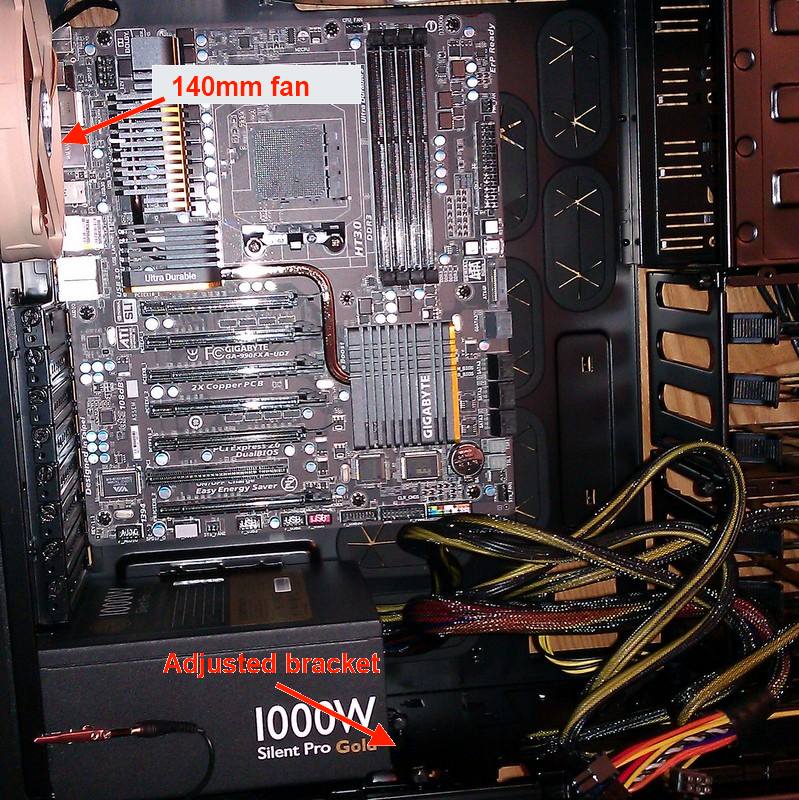
With the budget set at $2000, I proceeded to research what I could get for my money that would result in a Super Awesome Computer for me to record music (and perhaps a few other things). The research took six hours, twice (the first time I just added things to the online cart and then left it open on the wife's MacBook, which then ended up needing a restart the following evening and lost all my selections). Besides the customer reviews on sites like TigerDirect.com and NewEgg.com, one of my primary resources was Coding Horror; in particular, Building A PC, Part VII: Rebooting. It was from this blog that I settled on the 600T case from Corsair. This case is a little bulky (so much so that it doesn't fit inside our new desk as I originally planned), but it has plenty of room inside and some nice ventilation including two 200mm fans and an open grill in the side2. I also purchased the larger 140mm fan to replace the stock 120mm as recommended by Jeff.

For the main hardware, I went with the AMD FX-8150 8-core processor. I chose AMD over Intel after quite some deliberation because I could get a little more for my budget that way. The rest of the parts I chose are:
- 32GB of Corsair Vengeance DDR memory (a choice I made while unaware that Jeff Atwood had selected the same memory for his build).
- GIGABYTE GA-990FXA-UD7 motherboard (a beast by all accounts)
- Cooler Master Silent Pro Gold 1000W PSU
- Sapphire Radeon HD 6870 video card
- 160GB Corsair SSD
- 1TB Western Digital SATA HD
- internal blu ray burner
- Corsair Graphite Series 600T case
- Noctua NF-P14 140mm Fan
- Phanteks PH-TC14PE heat sink
As I intend to use the system to record music, I wanted the system to be quiet so I chose a heat sink that would help to dissipate heat without the need for high speed fans. The larger 140mm Noctua fan to replace the stock 120mm fan on the 600T case was also intended for this purpose. Having the additional cooling capacity also has the added advantage of providing me with room to overclock.
Assembly

Assembling the Super Awesome Computer was not an easy task, mainly due to my inability to correctly determine the order in which things should be done. I started out by mounting the PSU inside the case. This was a breeze; the PSU secured by four screws through the rear of the case and a bracket in the bottom of the case that is easily adjusted. With the PSU in place, I moved on to the motherboard. This too was a simple addition. I then replaced the stock 120mm fan with the Noctua 140mm fan before inserting the CPU and memory. Everything was going great. Then I fitted the heat sink.

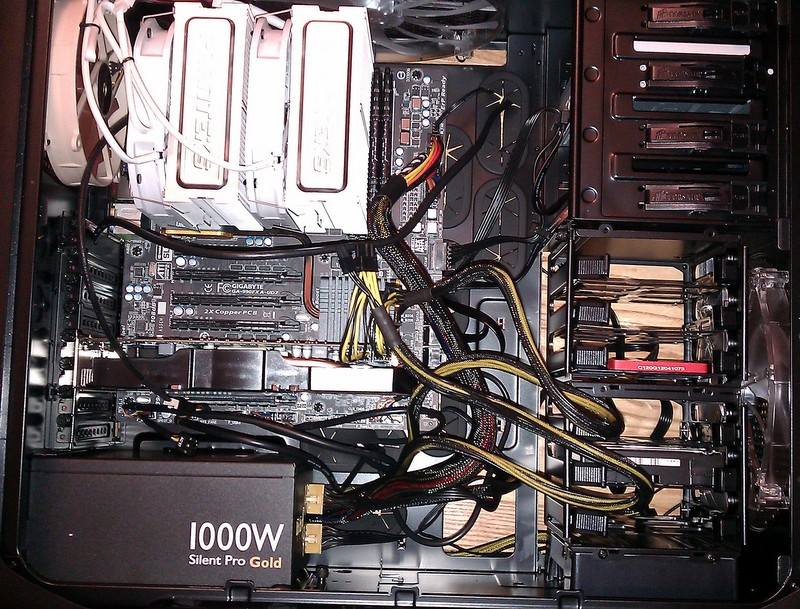
This thing is huge and requires some adjustments to the stock brackets on the motherboard before it fits. Once those changes were made, I applied heat transfer polymer to the top of the CPU and positioned the heat sink. The heat sink itself is secured to the bracket by two spring-loaded screws (the springs ensure a tight fit against the CPU). Reaching these screws is quite fiddly and requires a long screw driver or small hands (after some cursing, I opted for the former as my budget didn't cover surgery for the latter). It was clear early on that this was going to be a tight fit, the heat sink only just clearing the memory. In fact it was so tight, that two of the memory modules have absolutely no free movement with the heat sink sat on top. However, with the heat sink in place, I attached its fans and then went to the next step: connecting things.
And then I realised my mistake. You see the CPU power connectors and the CPU fan connector are down the sides of the motherboard that become pretty much inaccessible to human hands once the giant heat sink is mounted. Having spent far too long getting the heat sink secured, I was loathe to remove it, so I stupidly opted for fiddling. It took me forever to connect the cables; time I won't get back and time that was ultimately wasted (read on to find out why). After some perseverance, I did get these cables attached and proceeded to insert the graphics card, hard drives, blu ray drive and attach all their cables and the case connections to drive the header.

At this point, everything was assembled and I was tired, sweating and bleeding a little so I went to bed. From this point on, we're short on pictures because I don't always think ahead.
It's alive!…for 20 seconds
With concern over the slightly compressed memory and a few other little things, I waited two days before applying power to the system. With some trepidation, I plugged the computer into a monitor and a power source and turned it on. Everything came to life – the motherboard lit up, the fans lit up (to my surprise) and things started to whir. It was immediately clear that the fans were too loud, but that was the least of my problems. I jumped into the BIOS and as I reviewed various settings and set the clock, the system turned off. I started it again and again, after a few seconds it turned off. Something was wrong.
My instinct told me that it was probably the processor overheating so I started it one more time and jumped through the BIOS menus quickly to get to the system health display. Sure enough, the processor temperature climbed quickly until it reached 100°C and the system shutdown. The heat sink wasn't working. Great.
I opened up the computer, removed the heat sink fans and carefully unmounted the heat sink. It was clear from the smeared heat transfer on the top of the CPU that the heat sink had made adequate contact with it, so what was wrong? Turning over the heat sink, all became clear – in my tired, eager state-of-mind I had read and promptly disregarded the label on the base of the heat sink that said something along the lines of "REMOVE THIS BEFORE MOUNTING". Realising my error, I removed the sticker and reapplied heat transfer to the CPU. Before remounting the heat sink, I checked all the cable connections that I had struggled to reach before and made sure everything was properly seated (told you I had wasted my time).
Ssshhhh
While the computer was open and its guts were accessible (and while the cats were out of the way after inspecting it for me), I decided to tackle the fan noise issue. The case comes with a fan control dial but I was reluctant to use it having used a similar system on my previous build and finding it inadequate (Jeff's comments on the case fan control also helped here). Fortunately, the Noctua fan included what appeared to be two different fan speed limiters. Having deduced what they were – these little devices are quite simple, looking like a short connector with a resistor inline on one side – I attached one to the CPU fan and one to the Noctua 140mm fan, then I booted the system3. The difference was immediately noticeable – a low-level white noise4.
I checked out the system health in the BIOS to see the system and CPU temperatures level out at a pleasing 30-35°C.
It's alive…I mean it this time!
With the hardware apparently operating correctly, I booted from my Windows 7 DVD and installed Windows to the SSD. Everything went well and before long I was updating drivers and getting on to the network to start applying updates. It was a day before I noticed that the blu ray drive had disappeared.
Some research on the Internet led me to suspect the Marvell SATA chip included on the motherboard. When putting the various drives into my system, I had decided to attach the blu ray drive to this controller while my SSD and HDD were attached to the motherboard's southbridge SATA controller. This proved to be a mistake and after various driver updates and other tinkering, I reopened the case and moved the blu ray over to one of the vacant southbridge SATA connections. A reboot later and everything was working again.
Sweet, sweet music
I have since installed my birthday gift and gleefully tinkered with the various stock instruments included. Everything is working so beautifully that I haven't had the patience or inclination to overclock the system (the Windows Experience Index is currently a pleasing 7.6). Not only that, but I came in under budget at just over $1800. I have since spent a little more on one or two other items, but they're not key to the build.
All in all, I am very pleased with my new system and I am really excited about getting to record music again. Good times await.
- Ahtlon XP 64-bit, 1 GB RAM, 320GB RAID 0 array [↩]
- Unlike the stormtrooper variant that Jeff Atwood went with, which had a perspex panel in the side instead of the grill. [↩]
- I wouldn't recommend attaching random parts to your system if you don't know what they are. [↩]
- I suspect that with some eggbox foam, the noise would be barely noticeable. [↩]
