
Last week, I introduced Octokit and my plans to write a tool that will mine our GitHub repositories for information that can be used to craft release notes. This week, we will look at the first step; authentication. I am using Octokit.NET for my hackery; if you choose to use another variant of Octokit, some of the types and methods available may be different, but you should be able to follow along. In addition, I have no intention of documenting every aspect of Octokit and the GitHub API, so if you are intrigued by anything that I do not discuss, I encourage you to explore the relevant documentation.
The main `GitHubClient` class, used to access the GitHub APIs, has several constructors, some that take credentials (sort of) and some that do not. All but one of the constructors take a `ProductHeaderValue` instance, which provides some basic information about the application that is accessing the API. According to the documentation, this information is used by GitHub for analytics purposes and can be whatever you want.
Now, if you only want to read information about publicly accessible repositories, you do not need to provide any authentication at all. You can create a client instance and just get stuck in, like this:
var githubClient = new GitHubClient(new ProductHeaderValue("Tinkering"));
var repo = await githubClient.Repository.Get("octokit", "octokit.net" );
Console.WriteLine(repo.Name);
However, you can only perform some read-only tasks on public repositories and, unless you are performing the most trivial of tasks, you will hit rate limits for unauthenticated access.
NOTE: All of the Octokit.NET calls are awaitable
Authentication can be achieved in a several ways; via an implementation of `ICredentialStore` passed to a constructor of `GitHubClient`, by providing credentials to the `GitHubClient.Connection.Credentials` property, or by using the `GitHubClient.Oauth`. The `OAuth` API allows an application to authenticate without ever having access to a user's credentials; it is understandably a little more complex than approaches that just take credentials. Since, at this point, our focus is to craft some methods for extending the API functionality, we will worry about the `OAuth` workflow another time. The other two approaches are quite similar, although the constructor-based approach requires a little extra effort. The following two examples will both give you authenticated access, though I think the constructor-based access feels a little less hacky:
// Without the constructor
var githubClient = new GitHubClient(new ProductHeaderValue("tinkering"));
githubClient.Connection.Credentials = new Credentials("username", "password");
// With the constructor
public class CredentialsStore : ICredentialsStore
{
    public Task<Credentials> GetCredentials()
    {
        return Task.Run(() => new Credentials("username","password"));
    }
}

var githubClient = new GitHubClient(new ProductHeaderValue("tinkering"), new CredentialsStore());
Two-factor Authentication
Of course, using your username and password is futile because you have two-factor authentication enabled1. Luckily there is a constructor on the `Credentials` class that takes a token, which you can generate on GitHub.
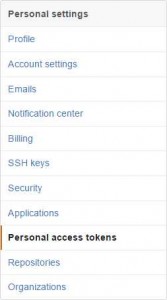 First, log into your GitHub account and choose Settings from the drop-down at the upper-right. On the fight, select Personal Access Tokens.
The right-hand side will change to the list of personal access tokens you have already created for your account (you may have created these yourself or an application may have created them via OAuth). Click the Generate New Token button and give it a useful name. You can now use this token as your credentials when using Octokit. I keep my token in the LINQPad password manager2 so that I can reference it in my code using the name I gave it, like this:
Util.GetPassword("the.name.I.gave.my.oauth.token")
In conclusion…
And that is it for this week. In the next entry of this series on Octokit, we will start getting to grips with releases and some of the basic pieces for my release note utility library.