Merging multiple accounts on UserEcho

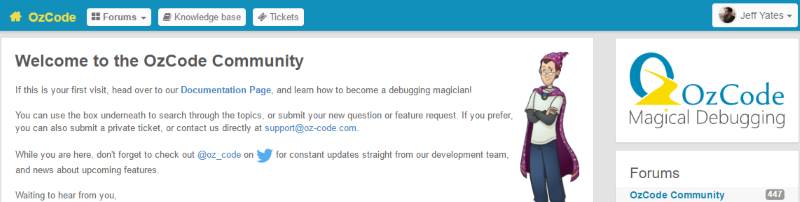
UserEcho is a service employed by the likes of OzCode and SublimeText for collecting and managing customer issues and suggestions; often regarding software features and bugs. It enables users and developers to discuss bugs and ideas, and respond to frequently asked questions.

OzCode UserEcho landing page

Recently, I signed into the OzCode UserEcho site using my Google credentials. UserEcho supports the OpenID identity system, providing a wide range of ways to authenticate. Upon logging in, I was immediately confused; where was the issue I had raised a week or two earlier? I was certain it should be there but it was not. After a little thought, I realised I may have logged in with the wrong credentials, inadvertently creating a new account. I logged out and then, using my GitHub account to authenticate instead of Google, tried logging back in. Voila! My issue appeared.

For some, this would probably be the end of it, but it bugged me that I now had two accounts. You may think this is no big deal and you are right, but it was bothering me1.

Settings dropdown on UserEcho

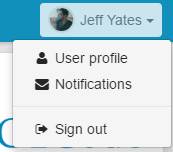
Using the dropdown captioned with my name at the top-right of the UserEcho site, I chose User Profile. At the bottom of the subsequent page, I found a table of OpenID logins that the account used but no way to edit it. How could I merge my accounts or add new OpenID identities?

OpenID table on UserEcho user profile screen

After searching around the UserEcho site a bit and trying a few Google searches2, I was almost ready to contact UserEcho for some help (or just give up), but then I had an idea. If UserEcho was like most sites these days, it probably keyed accounts using a primary email address for the user. So, I checked the two UserEcho accounts I knew I had and confirmed they had different email addresses.

User details section of a UserEcho profile

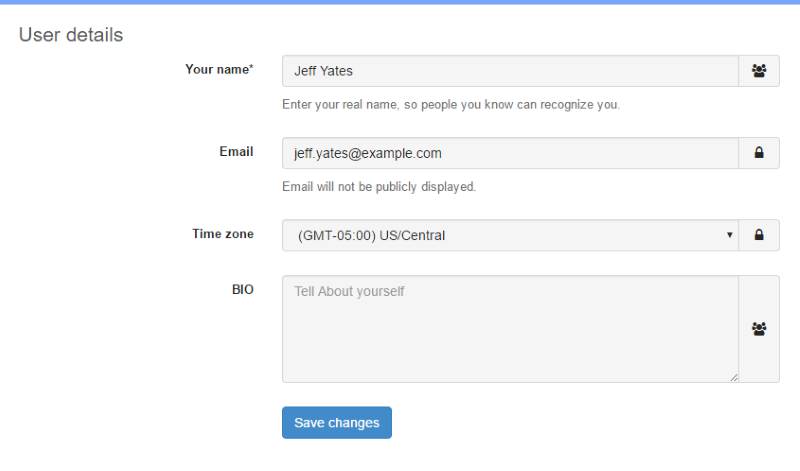
I edited the email address for one of the two accounts to match the other, triggering UserEcho to send a verification email3, so I followed the instructions and verified the email address change.

UserEcho table of accounts with the same email

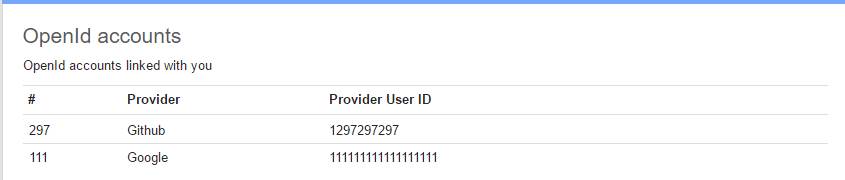
Then I returned to the User Profile screen in OzCode's UserEcho. At the bottom, below the OpenID table, I was now presented with a message saying that there were other accounts with the same email address, including a Merge button. I clicked that button and immediately, the table showed both the Google and GitHub logins.

OpenID table in UserEcho showing GitHub and Google IDs

So, there you go. If you have multiple accounts for a UserEcho product site, make sure the email addresses match and that you have verified the email address on each account, then view one and click Merge. Job done.

  1. In writing this blog and generating the screenshots, I discovered I actually had three accounts! []
  2. and maybe one Bing []
  3. just making sure you're still you []

Octokit and the Authenticated Access

Last week, I introduced Octokit and my plans to write a tool that will mine our GitHub repositories for information that can be used to craft release notes. This week, we will look at the first step; authentication. I am using Octokit.NET for my hackery; if you choose to use another variant of Octokit, some of the types and methods available may be different, but you should be able to follow along. In addition, I have no intention of documenting every aspect of Octokit and the GitHub API, so if you are intrigued by anything that I do not discuss, I encourage you to explore the relevant documentation.

The main `GitHubClient` class, used to access the GitHub APIs, has several constructors, some that take credentials (sort of) and some that do not. All but one of the constructors take a `ProductHeaderValue` instance, which provides some basic information about the application that is accessing the API. According to the documentation, this information is used by GitHub for analytics purposes and can be whatever you want.

Now, if you only want to read information about publicly accessible repositories, you do not need to provide any authentication at all. You can create a client instance and just get stuck in, like this:

var githubClient = new GitHubClient(new ProductHeaderValue("Tinkering"));
var repo = await githubClient.Repository.Get("octokit", "octokit.net" );
Console.WriteLine(repo.Name);

However, you can only perform some read-only tasks on public repositories and, unless you are performing the most trivial of tasks, you will hit rate limits for unauthenticated access.

NOTE: All of the Octokit.NET calls are awaitable

Authentication can be achieved in a several ways; via an implementation of `ICredentialStore` passed to a constructor of `GitHubClient`, by providing credentials to the `GitHubClient.Connection.Credentials` property, or by using the `GitHubClient.Oauth`. The `OAuth` API allows an application to authenticate without ever having access to a user's credentials; it is understandably a little more complex than approaches that just take credentials. Since, at this point, our focus is to craft some methods for extending the API functionality, we will worry about the `OAuth` workflow another time. The other two approaches are quite similar, although the constructor-based approach requires a little extra effort. The following two examples will both give you authenticated access, though I think the constructor-based access feels a little less hacky:

// Without the constructor
var githubClient = new GitHubClient(new ProductHeaderValue("tinkering"));
githubClient.Connection.Credentials = new Credentials("username", "password");
// With the constructor
public class CredentialsStore : ICredentialsStore
{
    public Task<Credentials> GetCredentials()
    {
        return Task.Run(() => new Credentials("username","password"));
    }
}

var githubClient = new GitHubClient(new ProductHeaderValue("tinkering"), new CredentialsStore());

Two-factor Authentication

Of course, using your username and password is futile because you have two-factor authentication enabled1. Luckily there is a constructor on the `Credentials` class that takes a token, which you can generate on GitHub.

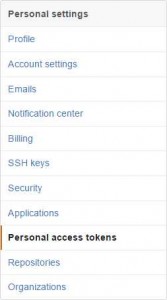
First, log into your GitHub account and choose Settings from the drop-down at the upper-right. On the fight, select Personal Access Tokens.

The right-hand side will change to the list of personal access tokens you have already created for your account (you may have created these yourself or an application may have created them via OAuth). Click the Generate New Token button and give it a useful name. You can now use this token as your credentials when using Octokit. I keep my token in the LINQPad password manager2 so that I can reference it in my code using the name I gave it, like this:

Util.GetPassword("the.name.I.gave.my.oauth.token")

In conclusion…

And that is it for this week. In the next entry of this series on Octokit, we will start getting to grips with releases and some of the basic pieces for my release note utility library.

  1. If you do not, you should rectify that []
  2. The LINQPad password manager is available via the File menu in LINQPad []