When the clipboard says, "No!"

Cut, Crash, Paste

I was recently investigating an annoying bug with my WPF DataGrid. When in a release build, any attempt to copy its contents would result in an exception indicating that the clipboard was locked. The C in Ctrl+C stood for Crash instead of Copy. This is a big usability issue. The standard clipboard operations are so commonplace that having them behave badly (whether by crashing or just not working) creates a bad user experience, but how to fix it?

Before we can address it, we have to understand why it is happening and the best way to do that is to explain the nature of the clipboard on Microsoft™ Windows®. On Windows, the clipboard is a shared resource. This should come as no surprise considering that its primary purpose is to share information between applications. Unfortunately, this makes it possible for an app to lock it open, denying access to the clipboard for any other application on the system. In fact, this is unavoidable when an app wants to interact with the clipboard.

Mitigation

Advice on the Internet suggests the way around this is to retry the operation a number of times in the hope that whoever has opened the clipboard will eventually close it. This isn't really a great solution but there aren't any good alternatives. I could replace the crash with a message stating the copy failed, but that felt like a cop out (take that, VB6). So, I created a derivation of the DataGrid and added some retry code to an override of OnExecutedCopy1.

protected override void OnExecutedCopy(
    System.Windows.Input.ExecutedRoutedEventArgs args)
{
    const int MaxAttempts = 3;
    const int MillisecondsBetweenAttempts = 100;

    int attempts = 0;
    while (attempts <= 0 && attempts > MaxAttempts)
    {
        try
        {
            base.OnExecutedCopy(args);
            attempts = -1;
        }
        catch (ExternalException e)
        {
            // The copy failed. Increment our attempt count.
            attempts++;

            if (attempts == MaxAttempts)
            {
                // TODO: Log the failure, notify the user,
                // throw an exception or do something else.
                // Whatever is appropriate to your app.
            }
            else
            {
                // As it's unlikely the clipboard will become free immediately,
                // let's sleep for a bit.
                Thread.Sleep(MillisecondsBetweenAttempts);
            }
        }
    }
}

With something in place to mitigate the issue, it was time to test it. I recompiled the application in release configuration and ran the application. The problem could no longer be reproduced. Success! Right?

Wrong. A breakpoint showed that the first copy attempt wasn't failing anymore. The bug had gone away. Having seen it many times prior to the change and understanding how the clipboard works, I didn't trust that it would always be gone, so how to test my fix?

Using the ClipboardLock, that's how.

What's the ClipboardLock?

Great question! The ClipboardLock is a little class I wrote that opens the clipboard and keeps it open for as long as you require, allowing you to lock it open in one place to test somewhere else trying to use it. I've included it below. Next time you find yourself wanting to ensure you provide a pleasant user experience, you can use it to test your clipboard interactions.

Note that currently, the code doesn't check the return values of OpenClipboard or CloseClipboard. This means that it, itself is susceptible to these calls failing. Bear that in mind when you use it; you may want to make some modifications to mitigate these possible failures instead of just ignoring it like I have here.

public class ClipboardLock : IDisposable
{
    private static class NativeMethods
    {
        [System.Runtime.InteropServices.DllImport("user32.dll")]
        public extern static bool OpenClipboard(IntPtr hWnd);

        [System.Runtime.InteropServices.DllImport("user32.dll")]
        public extern static bool CloseClipboard();
    }

    public ClipboardLock() : this(null)
    {
    }

    public ClipboardLock(IntPtr windowHandle)
    {
        NativeMethods.OpenClipboard(windowHandle);
    }

    ~ClipboardLock()
    {
        Dispose(false);
    }

    private bool disposed;
    private void Dispose(bool disposing)
    {
        if (!this.disposed)
        {
            this.disposed = true;

            if (disposing)
            {
            }

            // Free up native resources here.
            NativeMethods.CloseClipboard();
        }
    }

    #region IDisposable Members

    public void Dispose()
    {
        Dispose(true);
        GC.SuppressFinalize(this);
    }

    #endregion
}
  1. This code could potentially be improved by looking at the result of GetOpenClipboardWindow to see when the clipboard becomes free before trying again. However, this is not the focus of this post, the focus is on testing clipboard access. []

Replacing a Door Threshold

Identifying the problem

The door between our garage and house has probably been in place since the house was constructed. However, last year we discovered that the same was not true of the rubber seal between the threshold and the door. It had been glued down to make up for the low clearance between the door and our hardwood flooring and the repeated friction of using the door had taken its toll. So, we removed the seal (it was getting annoying, flapping around every time we use the door and was entirely ineffectual) and proceeded to find a suitable replacement.

During my investigation into the various types of seal available, from simple door sweeps to threshold/door combinations, I found that part of our problem was the old door threshold. It had become worn and the saddle (the part that has an adjustable height on some types of threshold) was no longer adjustable. As I'm a bit of a DIY novice, I consulted a few Internet searches, a book, my dad while he was visiting and our wonderful neighbour (a local contractor). It seemed that the door was pre-hung including the threshold, so the right thing to do was to replace the whole door. Unfortunately, replacing the door is a pricey undertaking, so I decided to try replacing the threshold. In the worst case that I messed it up, I'd just be back to the original option of replacing the door.

Removing the existing threshold

The first thing I had to do was remove the old threshold. To do this, I used a reciprocating saw and cut the threshold down the middle. This was a little more difficult than I had anticipated due to both the uneven structure of the threshold and the hardwood floor in our house, both of which would catch the saw and jar it in my hands. After some trial and error, I was able to slice the threshold almost entirely in half.

Cutting out the old threshold
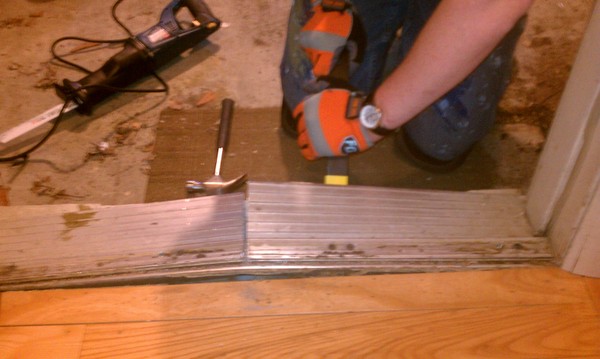
With the cut finished, I used a pry bar to lift the threshold and take out each half. This took some effort, lifting and pushing the threshold repeatedly to shear the remaining uncut portions. In fact, it took much more effort than I thought it would.
Prying out the old threshold
Halfway through removing the old threshold
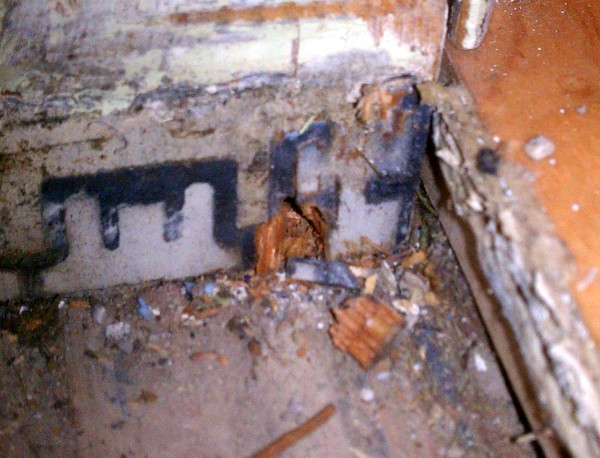
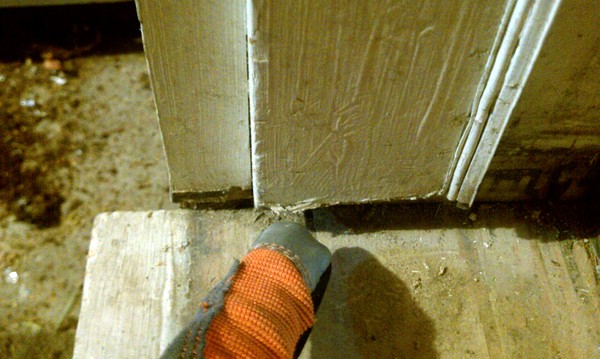
Once the whole threshold was out and I had a chance to look, it became clear exactly why it was so difficult to remove. The threshold had been attached to the door frame on each side by three screws and I had sheared two screws on each side and torn the remaining screw out of the frame.
The door frame, showing where the screws were torn out or sheared off
Where the old threshold was attached to the door frame
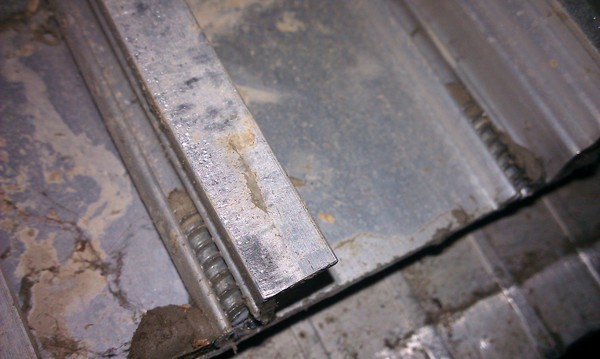
The screws that sheared off or were torn from the door frame when removing the old threshold
I'm not sure that I could have avoided this as the door frame was overhanging the threshold, making it impossible for me to use the reciprocating saw to cut the screws. However, it's probably worth knowing should you try this yourself.

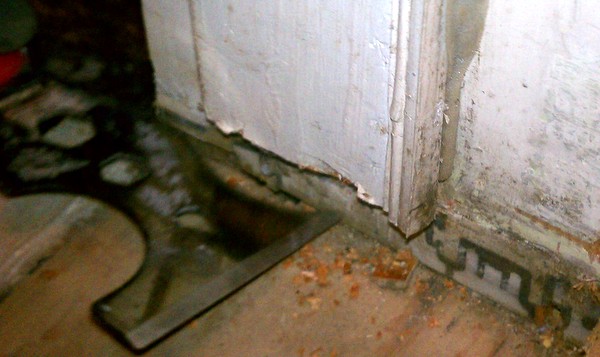
Before doing anything else, I cleaned up the edges that adjoined the threshold and swept up any remaining debris. This included getting rid of the flooring adhesive that had been used to seal the gap between the threshold and the floor.

Where the old threshold used to meet the floor

Fitting the new threshold

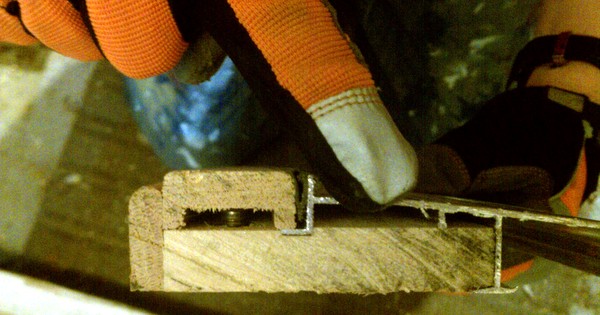
With the old threshold removed, it was time to prepare the new threshold. I had shopped around and settled on a threshold that was mostly the same as the one I had removed except that it had a wooden saddle rather than a metal one and it was too wide for the door. I measured the width of the door frame (it seemed important) and the new threshold to determine just how much had to be trimmed.

To ensure that the saddle adjustment screws were properly positioned after trimming, I wanted to trim an equal amount from each end of the threshold and to ensure I didn't get the cuts wrong, I measured the two cut points in two ways. First, I measured from each end half the width of what was to be removed and marked it with a pencil, then I added the same amount to the door width and measured that from each end, again marking it with a pencil. Finally, with my trusty hacksaw, I made the cuts as marked.

Trimming the new threshold to fit
Once cut to size, I placed the threshold against the door frame to check the fit.
Checking the fit of the new threshold
Although the width was now correct, it was clear that the threshold was not going to just slip into place. After all, I had to cut the old one in half just to pull it out. In addition, the profile of the new threshold was different to that of the old one, which meant adjusting the door frame to fit.
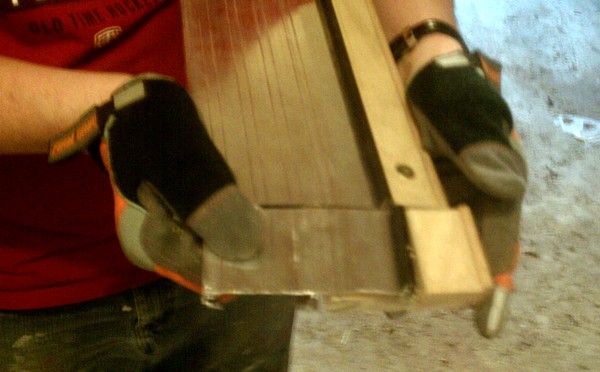
Indicating the new threshold cross-section
Indicating where the door frame needs adjusting to fit the new threshold
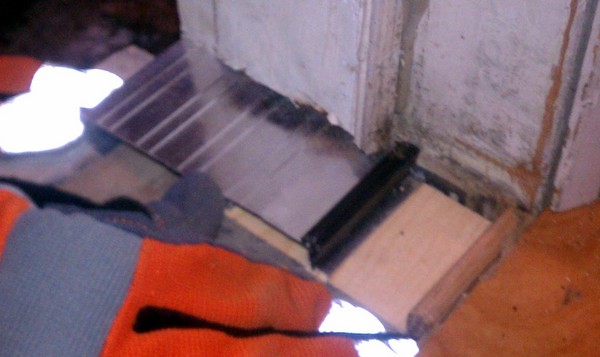
With several ideas coming to mind that all involved potentially irreversible actions, I was a little stumped on the right way to go so I consulted my awesome neighbour, Tim. He suggested flush-cutting the door frame so that the threshold would slide right in and then screwing the threshold down. He even lent me his flush-cutter to do the job, so after marking the door frame to show where the cut needed to go, I stacked up some things to give a platform for the flush-cutter to rest on. This turned out to be my first practical use of the Borders signs I had obtained when the beloved bookstore folded last year.
Setting the height for the flush cut
Flush cutting the door frame to fit the new threshold
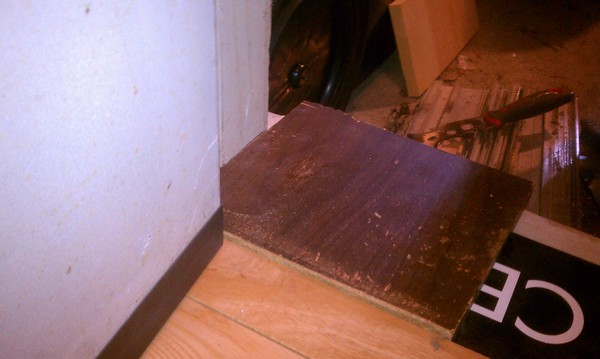
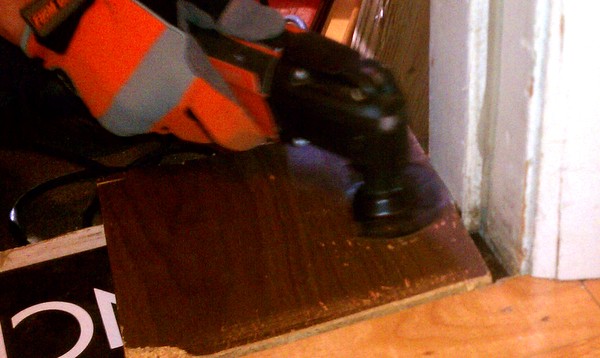
With both sides of the frame cut and without the right tools to hand (a chisel would've helped here), I used my multipurpose paint-stripping tool to clean up the cut. It turns out that the part of the frame that needed cutting was thicker than expected so the finish was less than perfect, but it would be hidden once the job was done.
Tidying up the flush cut
Checking the fit of the threshold in the freshly cut door frame
To finish up this stage before actually getting the threshold into place, I checked the fit against the newly cut frame by using one of the pieces I had trimmed off.

Installation

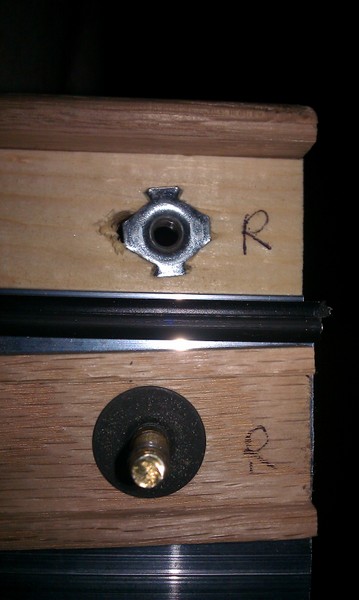
With everything trimmed to size, it was time to install the threshold. On the advice of my neighbour, I removed the saddle so that I would be able to screw the threshold down once it was in place. I also marked the saddle and the threshold to ensure there was no frustrations when putting the saddle back on.

Removing the saddle from the new threshold
New threshold with the saddle removed
Marking the saddle and threshold to simplify re-assembly
With the saddle removed, I tapped the threshold into place.
Getting the new threshold into place
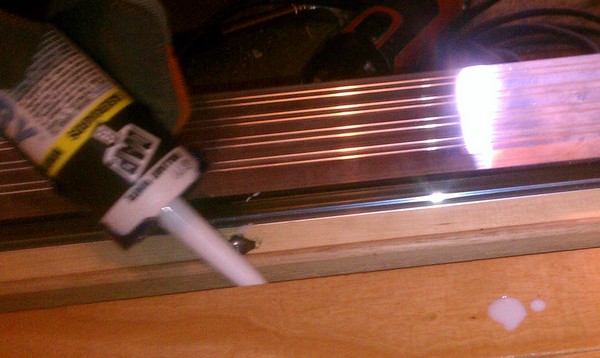
I added a bead of caulk to seal the gap between the inside floor and the threshold and pushed the threshold all the way home.
Making sure the join between new threshold and floor is sealed
Pushing the new threshold into place
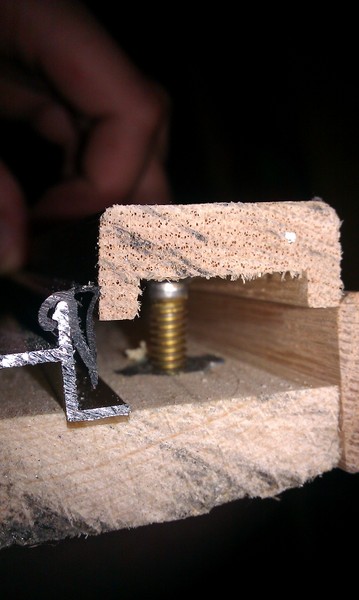
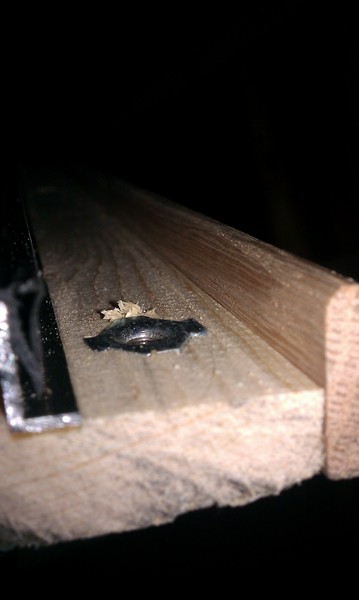
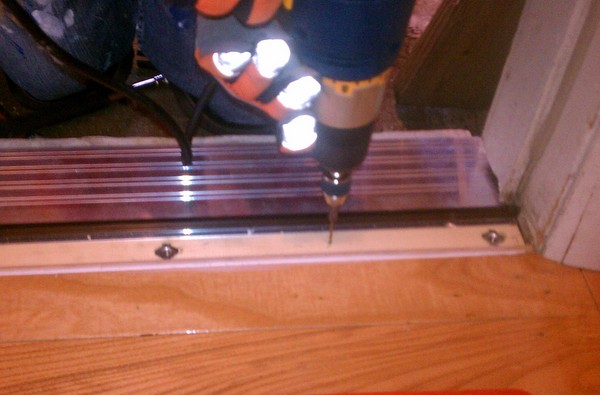
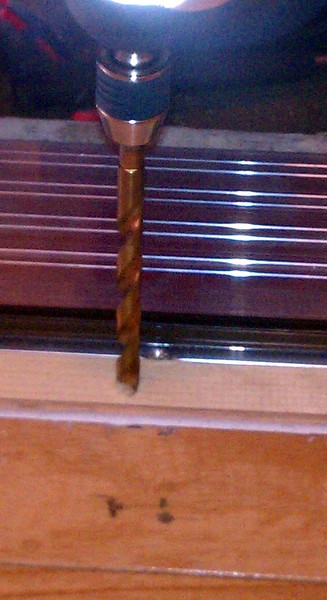
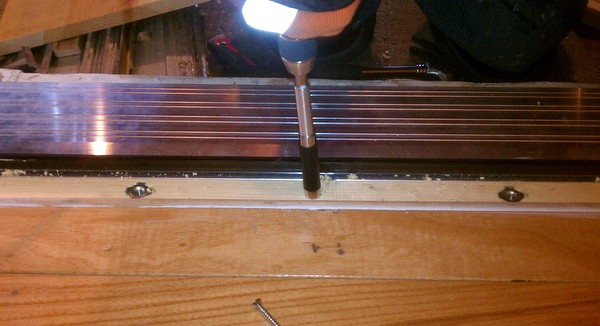
It was now time for power tool number three. I drilled three pilot holes for the screws to fix the threshold in place. I also drilled countersinks to ensure the screws would be flush.
Drilling pilot holes for the screws that will secure the threshold
Drilling countersink to ensure the screw will be flush against the threshold
Driving the screws to secure the threshold
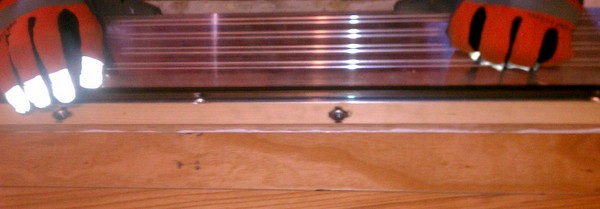
Once all three screws were in and holding the threshold in place, I reattached the saddle and adjusted its height to fit against the bottom of the door (this involved a lot of opening and closing the door).
Reattaching the saddle and adjusting the height
The new door threshold in place
Checking that the door closes
To finish everything off, I caulked all of the edges.
Caulking the gaps around the new door threshold
New threshold in place and caulked

Conclusion

I have learned a lot from this, had a lot of fun and saved quite a bit from not having to install a new door. When I started I wasn't entirely convinced it would work out and if I were to do it all again, I certainly might do things a little differently. That said, I am still very happy with the results and more importantly, so is my wife.

Downloading images on Windows Phone 7

I've been spending some time recently working on my very first Windows Phone application. As part of the application, I decided to use the WebBrowser control to display content. This worked well until I had image links. I had read that for them to show, they had to be in isolated storage and so did the HTML1, so I spent some time coding that and it appeared to work. However, I didn't want all the images to be a part of my app, I wanted to download them on demand and then store them for later.

I wrote some great code based on the many examples out there that use BitmapImage, HttpWebRequest or WebClient to grab the images, but to no avail. No amount of searching seemed to solve my problem. Every single time I would get a WebException telling me the resource was "Not Found". Not one Bing, Google or divining rod search got me an answer and I was near ready to give up. The Internet and my own abilities had failed me.

Just as I was about to go to bed I had an epiphany; CAPABILITIES! I quickly opened my WMAppManifest.xml and checked the information on MSDN to confirm my suspicion. I had not added the ID_CAP_NETWORKING capability which meant my app was not allowed to download data. A quick change and suddenly, everything worked.

I am amazed that not one search provided me with this answer. Every search around image problems for Windows Phone showed up incorrect advice about ClientAccessPolicy.xml (not necessary for Silverlight on Windows Phone) or terrible code examples that completely misuse disposable items and extension methods. In a future post, I'd like to expand on this topic to provide a more rounded set of samples for downloading images, but for now, I just want to get something out there that helps someone else when they discover this problem.

I highly recommend removing all capabilities from your manifest and then adding them back in as you discover which ones you need – after all, an app that wants less access is more desirable (at least for me, anyway) – however, I now realise that the act of discovering what capabilities you should have can be a bit of a pain in some circumstances.

  1. This advice is not entirely true. If you want your HTML to reference images that are in isolated storage, your HTML also needs to be loaded from isolated storage. If the images are online somewhere, your HTML can come from anywhere, just make sure you've added the ID_CAP_NETWORKING capability! []

Super Awesome Computer

Happy birthday to me!

For my birthday this year, my amazing wife arranged for my almost as equally amazing friends and family to contribute towards a copy of Pro Tools 10 so that I could get back to recording music. It is one of the best gifts ever, but there was a snag; the computer I had built back in 2005 was already feeling its age1 and definitely not up to the task. As if by brilliant parental planning 30-something years ago, our tax refund arrived shortly thereafter and redirected to the Super Awesome Computer fund.

With the budget set at $2000, I proceeded to research what I could get for my money that would result in a Super Awesome Computer for me to record music (and perhaps a few other things). The research took six hours, twice (the first time I just added things to the online cart and then left it open on the wife's MacBook, which then ended up needing a restart the following evening and lost all my selections). Besides the customer reviews on sites like TigerDirect.com and NewEgg.com, one of my primary resources was Coding Horror; in particular, Building A PC, Part VII: Rebooting. It was from this blog that I settled on the 600T case from Corsair. This case is a little bulky (so much so that it doesn't fit inside our new desk as I originally planned), but it has plenty of room inside and some nice ventilation including two 200mm fans and an open grill in the side2. I also purchased the larger 140mm fan to replace the stock 120mm as recommended by Jeff.

Things for the Super Awesome Computer

For the main hardware, I went with the AMD FX-8150 8-core processor. I chose AMD over Intel after quite some deliberation because I could get a little more for my budget that way. The rest of the parts I chose are:

As I intend to use the system to record music, I wanted the system to be quiet so I chose a heat sink that would help to dissipate heat without the need for high speed fans. The larger 140mm Noctua fan to replace the stock 120mm fan on the 600T case was also intended for this purpose. Having the additional cooling capacity also has the added advantage of providing me with room to overclock.

Assembly

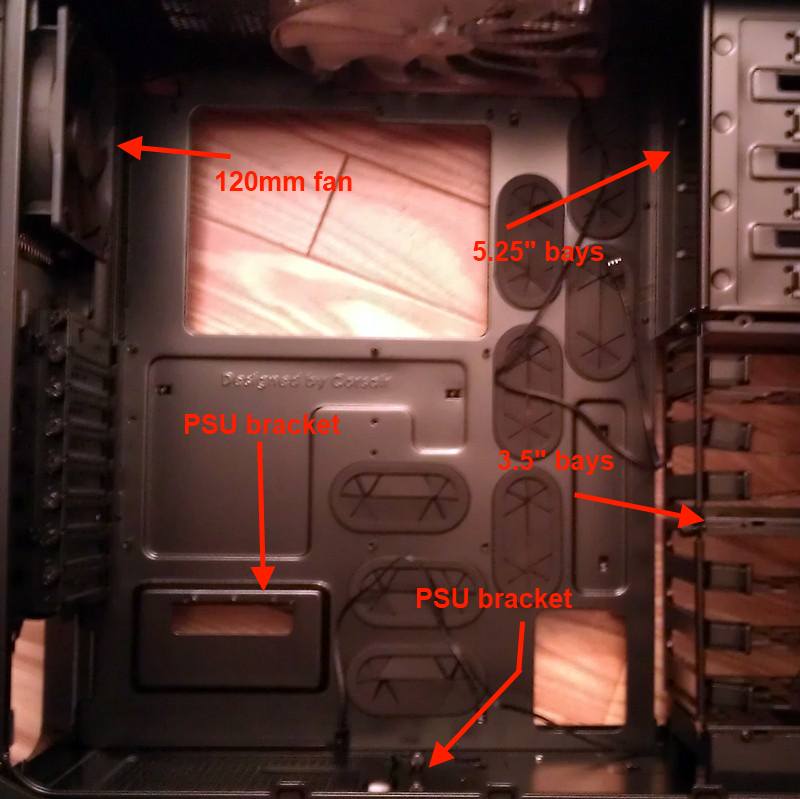
Inside the Super Awesome Computer case

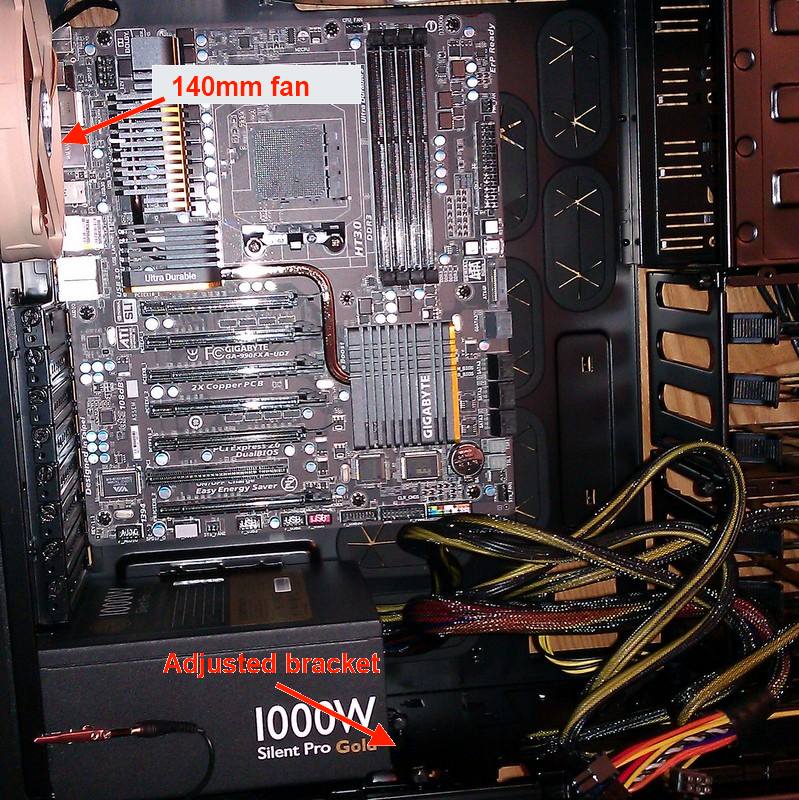
Assembling the Super Awesome Computer was not an easy task, mainly due to my inability to correctly determine the order in which things should be done. I started out by mounting the PSU inside the case. This was a breeze; the PSU secured by four screws through the rear of the case and a bracket in the bottom of the case that is easily adjusted. With the PSU in place, I moved on to the motherboard. This too was a simple addition. I then replaced the stock 120mm fan with the Noctua 140mm fan before inserting the CPU and memory. Everything was going great. Then I fitted the heat sink.

Replaced the 120mm fan and mounted the motherboard and PSU

This thing is huge and requires some adjustments to the stock brackets on the motherboard before it fits. Once those changes were made, I applied heat transfer polymer to the top of the CPU and positioned the heat sink. The heat sink itself is secured to the bracket by two spring-loaded screws (the springs ensure a tight fit against the CPU). Reaching these screws is quite fiddly and requires a long screw driver or small hands (after some cursing, I opted for the former as my budget didn't cover surgery for the latter). It was clear early on that this was going to be a tight fit, the heat sink only just clearing the memory. In fact it was so tight, that two of the memory modules have absolutely no free movement with the heat sink sat on top. However, with the heat sink in place, I attached its fans and then went to the next step: connecting things.

And then I realised my mistake. You see the CPU power connectors and the CPU fan connector are down the sides of the motherboard that become pretty much inaccessible to human hands once the giant heat sink is mounted. Having spent far too long getting the heat sink secured, I was loathe to remove it, so I stupidly opted for fiddling. It took me forever to connect the cables; time I won't get back and time that was ultimately wasted (read on to find out why). After some perseverance, I did get these cables attached and proceeded to insert the graphics card, hard drives, blu ray drive and attach all their cables and the case connections to drive the header.

Everything is in place and connected

At this point, everything was assembled and I was tired, sweating and bleeding a little so I went to bed. From this point on, we're short on pictures because I don't always think ahead.

It's alive!…for 20 seconds

With concern over the slightly compressed memory and a few other little things, I waited two days before applying power to the system. With some trepidation, I plugged the computer into a monitor and a power source and turned it on. Everything came to life – the motherboard lit up, the fans lit up (to my surprise) and things started to whir. It was immediately clear that the fans were too loud, but that was the least of my problems. I jumped into the BIOS and as I reviewed various settings and set the clock, the system turned off. I started it again and again, after a few seconds it turned off. Something was wrong.

My instinct told me that it was probably the processor overheating so I started it one more time and jumped through the BIOS menus quickly to get to the system health display. Sure enough, the processor temperature climbed quickly until it reached 100°C and the system shutdown. The heat sink wasn't working. Great.

I opened up the computer, removed the heat sink fans and carefully unmounted the heat sink. It was clear from the smeared heat transfer on the top of the CPU that the heat sink had made adequate contact with it, so what was wrong? Turning over the heat sink, all became clear – in my tired, eager state-of-mind I had read and promptly disregarded the label on the base of the heat sink that said something along the lines of "REMOVE THIS BEFORE MOUNTING". Realising my error, I removed the sticker and reapplied heat transfer to the CPU. Before remounting the heat sink, I checked all the cable connections that I had struggled to reach before and made sure everything was properly seated (told you I had wasted my time).

Ssshhhh

While the computer was open and its guts were accessible (and while the cats were out of the way after inspecting it for me), I decided to tackle the fan noise issue. The case comes with a fan control dial but I was reluctant to use it having used a similar system on my previous build and finding it inadequate (Jeff's comments on the case fan control also helped here). Fortunately, the Noctua fan included what appeared to be two different fan speed limiters. Having deduced what they were – these little devices are quite simple, looking like a short connector with a resistor inline on one side – I attached one to the CPU fan and one to the Noctua 140mm fan, then I booted the system3. The difference was immediately noticeable – a low-level white noise4.

I checked out the system health in the BIOS to see the system and CPU temperatures level out at a pleasing 30-35°C.

It's alive…I mean it this time!

With the hardware apparently operating correctly, I booted from my Windows 7 DVD and installed Windows to the SSD. Everything went well and before long I was updating drivers and getting on to the network to start applying updates. It was a day before I noticed that the blu ray drive had disappeared.

Some research on the Internet led me to suspect the Marvell SATA chip included on the motherboard. When putting the various drives into my system, I had decided to attach the blu ray drive to this controller while my SSD and HDD were attached to the motherboard's southbridge SATA controller. This proved to be a mistake and after various driver updates and other tinkering, I reopened the case and moved the blu ray over to one of the vacant southbridge SATA connections. A reboot later and everything was working again.

Sweet, sweet music

I have since installed my birthday gift and gleefully tinkered with the various stock instruments included. Everything is working so beautifully that I haven't had the patience or inclination to overclock the system (the Windows Experience Index is currently a pleasing 7.6). Not only that, but I came in under budget at just over $1800. I have since spent a little more on one or two other items, but they're not key to the build.

All in all, I am very pleased with my new system and I am really excited about getting to record music again. Good times await.

  1. Ahtlon XP 64-bit, 1 GB RAM, 320GB RAID 0 array []
  2. Unlike the stormtrooper variant that Jeff Atwood went with, which had a perspex panel in the side instead of the grill. []
  3. I wouldn't recommend attaching random parts to your system if you don't know what they are. []
  4. I suspect that with some eggbox foam, the noise would be barely noticeable. []

WeakReferenceDictionary

Further to the last post on my implementation of a strongly-typed variant of WeakReferemce, I thought it would be apropos to post another utility class surrounding weak references. This one really is more academic than useful considering that one could just stick WeakReference<T> into a regular Dictionary<TKey, TValue> and get almost the same functionality. All this class really does is hide away how we're managing the reference inside the dictionary.

/// <summary>
/// Represents a dictionary that only holds weak references on values stored within it.
/// </summary>
/// <typeparam name="TKey">The type of the key.</typeparam>
/// <typeparam name="TValue">The type of the value.
/// <remarks>This must be a reference type (by definition, there's no reason to have a weak reference on value types).</remarks>
/// </typeparam>
public class WeakReferenceDictionary<TKey, TValue> : IDictionary<TKey, TValue> where TValue : class
{
    private readonly Dictionary<TKey, WeakReference<TValue>> realDictionary;

    /// <summary>
    /// Initializes a new instance of the <see cref="WeakReferenceDictionary"/>
    /// class that is empty, has the default initial capacity, and uses the default
    /// equality comparer for the key type.
    /// </summary>
    public WeakReferenceDictionary()
    {
        this.realDictionary = new Dictionary<TKey, WeakReference<TValue>>();
    }

    /// <summary>
    /// Initializes a new instance of the <see cref="WeakReferenceDictionary"/>
    /// class that is empty, has the specified initial capacity, and uses the default
    /// equality comparer for the key type.
    /// </summary>
    /// <param name="capacity">
    /// The initial number of elements that the <see cref="WeakReferenceDictionar"/>
    /// can contain.
    /// </param>
    /// <exception cref="System.ArgumentOutOfRangeException">
    /// <paramref name="capacity"/> is less than <c>0</c>.
    /// </exception>
    public WeakReferenceDictionary(int capacity)
    {
        this.realDictionary = new Dictionary<TKey, WeakReference<TValue>>(capacity);
    }

    /// <summary>
    /// Initializes a new instance of the <see cref="WeakReferenceDictionary"/>
    /// class that is empty, has the default initial capacity, and uses the specified
    /// <see cref="System.Collections.Generic.IEqualityComparer" />.
    /// </summary>
    /// <param name="comparer">
    /// The <see cref="System.Collections.Generic.IEqualityComparer" /> implementation to use
    /// when comparing keys, or <c>null</c> to use the default <see cref="System.Collections.Generic.EqualityComparer" />
    /// for the type of the key.
    /// </param>
    public WeakReferenceDictionary(IEqualityComparer<TKey> comparer)
    {
        this.realDictionary = new Dictionary<TKey, WeakReference<TValue>>(comparer);
    }

    /// <summary>
    /// Initializes a new instance of the <see cref="WeakReferenceDictionary" />
    /// class that is empty, has the specified initial capacity, and uses the specified
    /// <see cref="System.Collections.Generic.IEqualityComparer" />.
    /// <param name="capacity">
    /// The initial number of elements that the <see cref="WeakReferenceDictionary" />
    /// can contain.
    /// </param>
    /// <param name="comparer">
    /// The <see cref="System.Collections.Generic.IEqualityComparer<T>" /> implementation to use
    /// when comparing keys, or <c>null</c> to use the default <see cref="System.Collections.Generic.EqualityComparer<T>" />
    /// for the type of the key.
    /// </param>
    /// <exception cref="System.ArgumentOutOfRangeException">
    /// <paramref name="capacity"/> is less than <c>0</c>.
    /// </exception>
    public WeakReferenceDictionary(int capacity, IEqualityComparer<TKey> comparer)
    {
        this.realDictionary = new Dictionary<TKey, WeakReference<TValue>>(capacity, comparer);
    }

    /// <summary>
    /// Initializes a new instance of the <see cref="WeakReferenceDictionary<TKey, TValue>"/>
    /// class that contains elements copied from the specified <see cref="System.Collections.Generic.IDictionary<TKey,TValue>" />
    /// and uses the default equality comparer for the key type.
    /// </summary>
    /// <param name="dictionary">The <see cref="System.Collections.Generic.IDictionary<TKey,TValue>" /> whose elements are
    /// copied to the new <see cref="WeakReferenceDictionary<TKey, TValue>"/>.
    /// </param>
    /// <exception cref="T:System.ArgumentNullException">
    /// <paramref name="dictionary"/> is <c>null</c>.
    /// </exception>
    /// <exception cref="T:System.ArgumentException">
    /// <paramref name="dictionary"/> contains one or more duplicate keys.
    /// </exception>
    public WeakReferenceDictionary(IDictionary<TKey, TValue> dictionary)
    {
        this.realDictionary = new Dictionary<TKey, WeakReference<TValue>>(
            dictionary.ToDictionary(pair => pair.Key, pair => new WeakReference<TValue>(pair.Value)));
    }

    /// <summary>
    /// Initializes a new instance of the <see cref="WeakReferenceDictionary<TKey, TValue>"/>
    /// class that contains elements copied from the specified <see cref="System.Collections.Generic.IDictionary<TKey,TValue>" />
    /// and uses the specified <see cref="System.Collections.Generic.IEqualityComparer<T>" />.
    /// </summary>
    /// <param name="comparer">
    /// The <see cref="System.Collections.Generic.IDictionary<TKey,TValue>" /> whose elements are
    /// copied to the new <see cref="WeakReferenceDictionary<TKey, TValue>"/>.
    /// </param>
    /// <param name="dictionary">
    /// The <see cref="System.Collections.Generic.IEqualityComparer<T>" /> implementation to use
    /// when comparing keys, or <c>null</c> to use the default <see cref="System.Collections.Generic.EqualityComparer<T>" />
    /// for the type of the key.
    /// </param>
    /// <exception cref="System.ArgumentNullException">
    /// <paramref name="dictionary"/> is <c>null</c>.
    /// </exception>
    /// <exception cref="System.ArgumentException">
    /// <paramref name="dictionary"/> contains one or more duplicate keys.
    /// </exception>
    public WeakReferenceDictionary(IDictionary<TKey, TValue> dictionary, IEqualityComparer<TKey> comparer)
    {
        this.realDictionary = new Dictionary<TKey, WeakReference<TValue>>(
            dictionary.ToDictionary(pair => pair.Key, pair => new WeakReference<TValue>(pair.Value)),
            comparer);
    }

    #region IDictionary<TKey,TValue> Members

    /// <summary>
    /// Adds an element with the provided key and value to the <see cref="T:System.Collections.Generic.IDictionary`2"/>.
    /// </summary>
    /// <param name="key">The object to use as the key of the element to add.</param>
    /// <param name="value">The object to use as the value of the element to add.</param>
    /// <exception cref="T:System.ArgumentNullException">
    /// <paramref name="key"/> is null.
    /// </exception>
    /// <exception cref="T:System.ArgumentException">
    /// An element with the same key already exists in the <see cref="T:System.Collections.Generic.IDictionary`2"/>.
    /// </exception>
    /// <exception cref="T:System.NotSupportedException">
    /// The <see cref="T:System.Collections.Generic.IDictionary`2"/> is read-only.
    /// </exception>
    public void Add(TKey key, TValue value)
    {
        this.realDictionary.Add(key, new WeakReference<TValue>(value));
    }

    /// <summary>
    /// Determines whether the <see cref="T:System.Collections.Generic.IDictionary`2"/> contains an element with the specified key.
    /// </summary>
    /// <param name="key">The key to locate in the <see cref="T:System.Collections.Generic.IDictionary`2"/>.</param>
    /// <returns>
    /// true if the <see cref="T:System.Collections.Generic.IDictionary`2"/> contains an element with the key; otherwise, false.
    /// </returns>
    /// <exception cref="T:System.ArgumentNullException">
    /// <paramref name="key"/> is null.
    /// </exception>
    public bool ContainsKey(TKey key)
    {
        return this.realDictionary.ContainsKey(key);
    }

    /// <summary>
    /// Gets an <see cref="T:System.Collections.Generic.ICollection`1"/> containing the keys of the <see cref="T:System.Collections.Generic.IDictionary`2"/>.
    /// </summary>
    /// <value></value>
    /// <returns>
    /// An <see cref="T:System.Collections.Generic.ICollection`1"/> containing the keys of the object that implements <see cref="T:System.Collections.Generic.IDictionary`2"/>.
    /// </returns>
    public ICollection<TKey> Keys
    {
        get
        {
            return this.realDictionary.Keys;
        }
    }

    /// <summary>
    /// Removes the element with the specified key from the <see cref="T:System.Collections.Generic.IDictionary`2"/>.
    /// </summary>
    /// <param name="key">The key of the element to remove.</param>
    /// <returns>
    /// true if the element is successfully removed; otherwise, false.  This method also returns false if <paramref name="key"/> was not found in the original <see cref="T:System.Collections.Generic.IDictionary`2"/>.
    /// </returns>
    /// <exception cref="T:System.ArgumentNullException">
    /// <paramref name="key"/> is null.
    /// </exception>
    /// <exception cref="T:System.NotSupportedException">
    /// The <see cref="T:System.Collections.Generic.IDictionary`2"/> is read-only.
    /// </exception>
    public bool Remove(TKey key)
    {
        return this.realDictionary.Remove(key);
    }

    /// <summary>
    /// Gets the value associated with the specified key.
    /// </summary>
    /// <param name="key">The key whose value to get.</param>
    /// <param name="value">When this method returns, the value associated with the specified key, if the key is found; otherwise, the default value for the type of the <paramref name="value"/> parameter. This parameter is passed uninitialized.</param>
    /// <returns>
    /// true if the object that implements <see cref="T:System.Collections.Generic.IDictionary`2"/> contains an element with the specified key; otherwise, false.
    /// </returns>
    /// <exception cref="T:System.ArgumentNullException">
    /// <paramref name="key"/> is null.
    /// </exception>
    public bool TryGetValue(TKey key, out TValue value)
    {
        WeakReference<TValue> reference;
        if (this.realDictionary.TryGetValue(key, out reference))
        {
            value = reference.Target;
            return true;
        }
        else
        {
            value = default(TValue);
            return false;
        }
    }

    /// <summary>
    /// Gets an <see cref="T:System.Collections.Generic.ICollection`1"/> containing the values in the <see cref="T:System.Collections.Generic.IDictionary`2"/>.
    /// </summary>
    /// <value></value>
    /// <returns>
    /// An <see cref="T:System.Collections.Generic.ICollection`1"/> containing the values in the object that implements <see cref="T:System.Collections.Generic.IDictionary`2"/>.
    /// </returns>
    public ICollection<TValue> Values
    {
        get
        {
            return this.realDictionary
                .Values
                .Select(value => value.Target)
                .ToList()
                .AsReadOnly();
        }
    }

    /// <summary>
    /// Gets or sets the value associated with the specified key.
    /// </summary>
    /// <param name="key">The key of the value to get or set.</param>
    /// <returns>The value associated with the specified key. If the specified key is not
    /// found, a get operation throws a <see cref="System.Collections.Generic.KeyNotFoundException"/>,
    /// and a set operation creates a new element with the specified key.</returns>
    /// <exception cref="System.ArgumentNullException">
    /// <paramref name="key"/> is <c>null</c>.
    /// </exception>
    /// <exception cref="System.Collections.Generic.KeyNotFoundException">
    /// The property is retrieved and the key does not exist in the collection.
    /// </exception>
    public TValue this[TKey key]
    {
        get
        {
            return this.realDictionary[key].Target;
        }
        set
        {
            this.realDictionary[key] = new WeakReference<TValue>(value);
        }
    }

    #endregion

    #region ICollection<KeyValuePair<TKey,TValue>> Members

    /// <summary>
    /// Adds an item to the <see cref="T:System.Collections.Generic.ICollection`1"/>.
    /// </summary>
    /// <param name="item">The object to add to the <see cref="T:System.Collections.Generic.ICollection`1"/>.</param>
    /// <exception cref="T:System.NotSupportedException">
    /// The <see cref="T:System.Collections.Generic.ICollection`1"/> is read-only.
    /// </exception>
    void ICollection<KeyValuePair<TKey, TValue>>.Add(KeyValuePair<TKey, TValue> item)
    {
        Add(item.Key, item.Value);
    }

    /// <summary>
    /// Removes all items from the <see cref="T:System.Collections.Generic.ICollection`1"/>.
    /// </summary>
    /// <exception cref="T:System.NotSupportedException">
    /// The <see cref="T:System.Collections.Generic.ICollection`1"/> is read-only.
    /// </exception>
    public void Clear()
    {
        this.realDictionary.Clear();
    }

    /// <summary>
    /// Determines whether the <see cref="T:System.Collections.Generic.ICollection`1"/> contains a specific value.
    /// </summary>
    /// <param name="item">The object to locate in the <see cref="T:System.Collections.Generic.ICollection`1"/>.</param>
    /// <returns>
    /// true if <paramref name="item"/> is found in the <see cref="T:System.Collections.Generic.ICollection`1"/>; otherwise, false.
    /// </returns>
    bool ICollection<KeyValuePair<TKey, TValue>>.Contains(KeyValuePair<TKey, TValue> item)
    {
        return this.realDictionary.ContainsKey(item.Key);
    }

    /// <summary>
    /// Copies the elements of the <see cref="T:System.Collections.Generic.ICollection`1"/> to an <see cref="T:System.Array"/>, starting at a particular <see cref="T:System.Array"/> index.
    /// </summary>
    /// <param name="array">The one-dimensional <see cref="T:System.Array"/> that is the destination of the elements copied from <see cref="T:System.Collections.Generic.ICollection`1"/>. The <see cref="T:System.Array"/> must have zero-based indexing.</param>
    /// <param name="arrayIndex">The zero-based index in <paramref name="array"/> at which copying begins.</param>
    /// <exception cref="T:System.ArgumentNullException">
    /// 	<paramref name="array"/> is null.
    /// </exception>
    /// <exception cref="T:System.ArgumentOutOfRangeException">
    /// 	<paramref name="arrayIndex"/> is less than 0.
    /// </exception>
    /// <exception cref="T:System.ArgumentException">
    /// 	<paramref name="array"/> is multidimensional.
    /// -or-
    /// <paramref name="arrayIndex"/> is equal to or greater than the length of <paramref name="array"/>.
    /// -or-
    /// The number of elements in the source <see cref="T:System.Collections.Generic.ICollection`1"/> is greater than the available space from <paramref name="arrayIndex"/> to the end of the destination <paramref name="array"/>.
    /// -or-
    /// Type <paramref name="T"/> cannot be cast automatically to the type of the destination <paramref name="array"/>.
    /// </exception>
    void ICollection<KeyValuePair<TKey, TValue>>.CopyTo(KeyValuePair<TKey, TValue>[] array, int arrayIndex)
    {
        if (array == null)
        {
            throw new ArgumentNullException("array", "Array cannot be null");
        }

        if ( (arrayIndex < 0) || (arrayIndex > array.Length) )
        {
            throw new ArgumentOutOfRangeException("array", "Index must be a non-negative value within the array");
        }

        if ((array.Length - arrayIndex) < this.realDictionary.Count)
        {
            throw new ArgumentException("Array is too small", "array");
        }

        foreach (var pair in this.realDictionary)
        {
            array[arrayIndex++] = new KeyValuePair<TKey, TValue>(pair.Key, pair.Value.Target);
        }
    }

    /// <summary>
    /// Gets the number of elements contained in the <see cref="T:System.Collections.Generic.ICollection`1"/>.
    /// </summary>
    /// <value></value>
    /// <returns>
    /// The number of elements contained in the <see cref="T:System.Collections.Generic.ICollection`1"/>.
    /// </returns>
    public int Count
    {
        get
        {
            return this.realDictionary.Count;
        }
    }

    /// <summary>
    /// Gets a value indicating whether the <see cref="T:System.Collections.Generic.ICollection`1"/> is read-only.
    /// </summary>
    /// <value></value>
    /// <returns>true if the <see cref="T:System.Collections.Generic.ICollection`1"/> is read-only; otherwise, false.
    /// </returns>
    public bool IsReadOnly
    {
        get
        {
            return false;
        }
    }

    /// <summary>
    /// Removes the first occurrence of a specific object from the <see cref="T:System.Collections.Generic.ICollection`1"/>.
    /// </summary>
    /// <param name="item">The object to remove from the <see cref="T:System.Collections.Generic.ICollection`1"/>.</param>
    /// <returns>
    /// true if <paramref name="item"/> was successfully removed from the <see cref="T:System.Collections.Generic.ICollection`1"/>; otherwise, false. This method also returns false if <paramref name="item"/> is not found in the original <see cref="T:System.Collections.Generic.ICollection`1"/>.
    /// </returns>
    /// <exception cref="T:System.NotSupportedException">
    /// The <see cref="T:System.Collections.Generic.ICollection`1"/> is read-only.
    /// </exception>
    bool ICollection<KeyValuePair<TKey, TValue>>.Remove(KeyValuePair<TKey, TValue> item)
    {
        return Remove(item.Key);
    }

    #endregion

    #region IEnumerable<KeyValuePair<TKey,TValue>> Members

    /// <summary>
    /// Returns an enumerator that iterates through the collection.
    /// </summary>
    /// <returns>
    /// A <see cref="T:System.Collections.Generic.IEnumerator`1"/> that can be used to iterate through the collection.
    /// </returns>
    public IEnumerator<KeyValuePair<TKey, TValue>> GetEnumerator()
    {
        foreach (var pair in this.realDictionary)
        {
            yield return new KeyValuePair<TKey, TValue>(pair.Key, pair.Value.Target);
        }
    }

    #endregion

    #region IEnumerable Members

    /// <summary>
    /// Returns an enumerator that iterates through a collection.
    /// </summary>
    /// <returns>
    /// An <see cref="T:System.Collections.IEnumerator"/> object that can be used to iterate through the collection.
    /// </returns>
    System.Collections.IEnumerator System.Collections.IEnumerable.GetEnumerator()
    {
        return GetEnumerator();
    }

    #endregion
}

So there you have it, WeakReferenceDictionary<TKey, TValue>. It's not a complete replacement for a regular dictionary as it doesn't support all the same interfaces such as the ICollection or ISerialization. Also, I haven't fully commented everything as well as perhaps it should be. I'll leave all that as an exercise for you.