Making a Grow Light Stand

Last night was the quarterly hackathon at work, the day where we get to work on something fun and new until 4am and then demo to the team. Beers were drunk, Thai food was eaten and the sports tournaments were played out (darts and ping pong, or table tennis, if you prefer). It was a great time and although my work wasn't as brilliant as some of my colleagues, I felt accomplished by the time we crawled off for breakfast sometime around 7am.

That was 6 hours ago. I'm still awake. I've been awake since sometime between 7am and 9am yesterday.

I don't know why, really. I ran an errand for the wife this morning and one thing led to another. Before I knew it, I had not only completed the errand (returning some plants and a grow light stand to Growing Hope after Chrissy did some seed starting for them), I had also completed our own grow light stand (a project we purchased the pieces for back when I made the raised bed) and cleaned the cat litter boxes. Luckily for you, I didn't take pictures of the latter task; I'm keeping those precious memories of being watched by a cat while I dug around in his feces (mostly) to myself, but I digress.

Often, when you garden, you have to start some seeds. When the weather is inclement prior to the growing season, as it often is in these parts, you need to start those seeds indoors and, much like this winter in Michigan, there's no Sun indoors (I'm thankful for that, I like my stuff unsinged), so an artificial source of equivalent light is required. That's where the grow light stand comes in.

Unlike the one we had borrowed from Growing Hope, which was a simple wood construction with two A-frames at each end joined by two planks from which the 4' long fluorescent grow lamps were suspended, our grow light stand was to be made out of PVC. As mentioned earlier, we had purchased the pieces for it some time ago, which explains why some of the pieces were wrong. Thankfully, Home Depot awesomely gave me store credit for those incorrect pieces despite a lack of receipt. That's customer service for you.

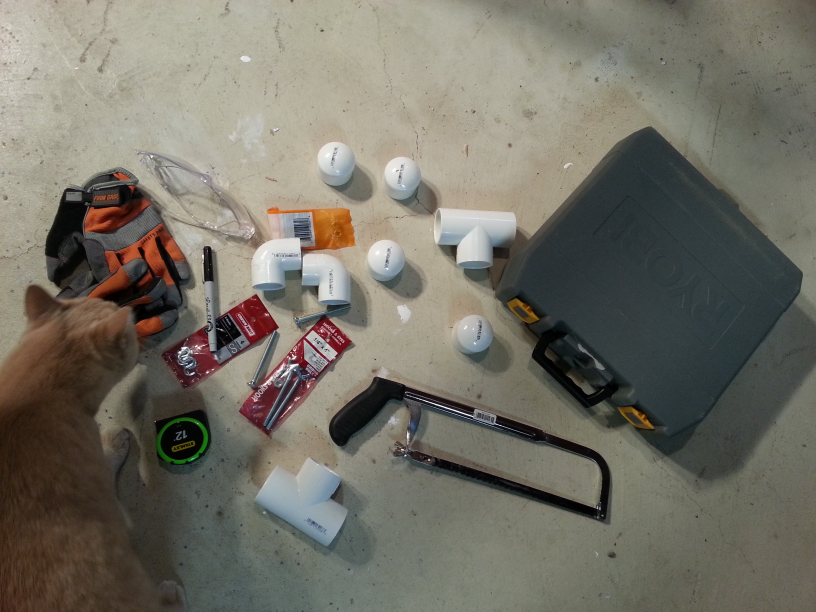
The parts required for this little project were:

  • 120" of 2" PVC pipe
  • 4x end caps
  • 2x three-way connectors
  • 2x elbow connectors
  • 2x ¼" eye bolts with 4 nuts
  • 2x S hooks
  • 1x shop light
  • 2x fluorescent grow lamp tubes
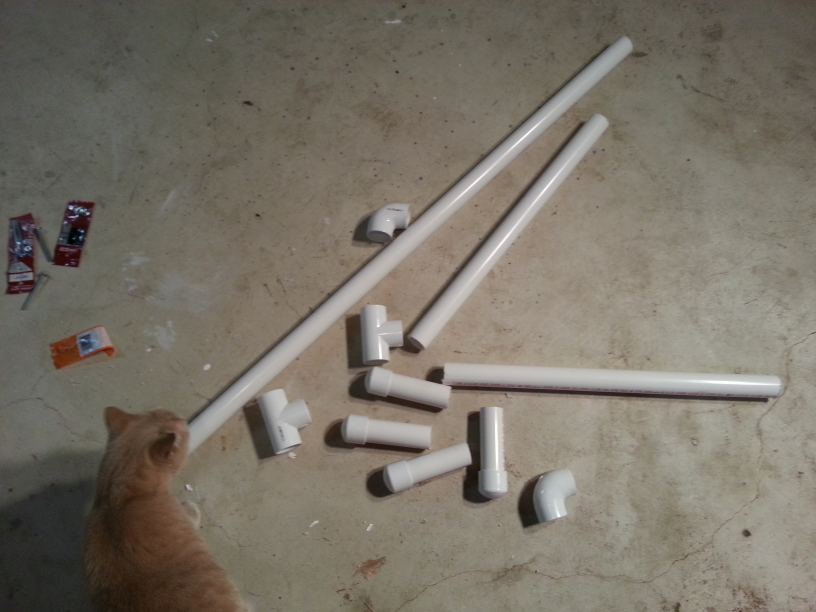
Barry inspecting the parts and tools

In addition, the following tools were used:

  • Safety Gloves and Glasses
  • Drill
  • ¼" drill bit
  • Permanent marker (I used the one Chrissy got from John Mayer's fan club)
  • Hacksaw
  • Pliers
  • Wrench/Spanner (for tightening the nuts)

The assembly was really quite easy and probably would have taken about an hour at most if I hadn't needed to go to Home Depot twice (once for the shop light and again to get the correct size elbows).

First, the PVC pipe was marked (with the John Mayer fan club marker) and cut (with the hacksaw) to the following lengths:

  • 4x 5"
  • 2x 24"
  • 1x 52"

Then, using the connectors and end caps, join them all together to create the stand.

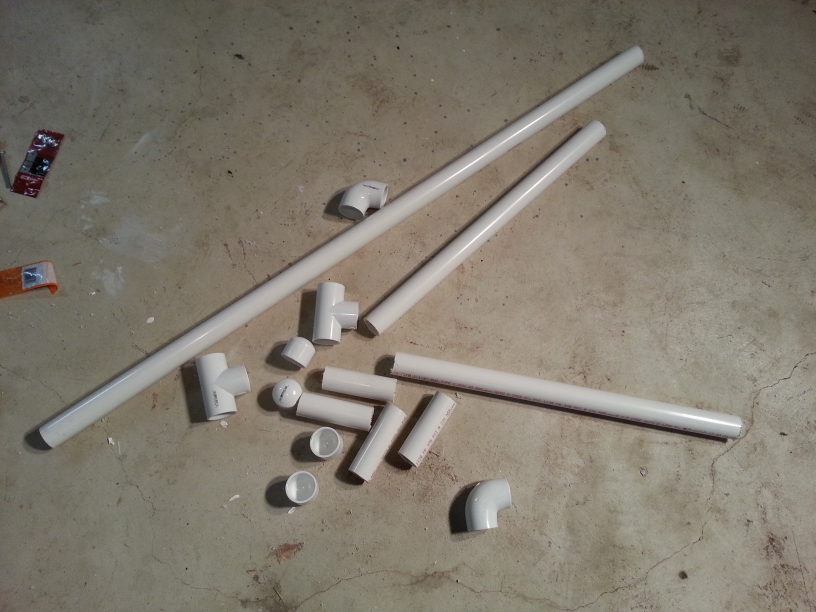
All the pipe fittings and lengths ready for assembly
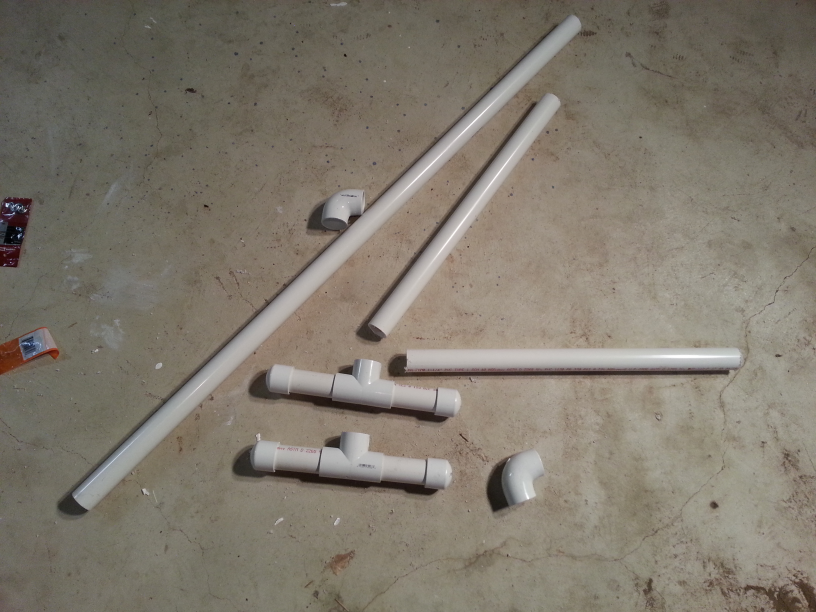
End caps fitted to 5" pipe (QA manager, Barry checking craftsmanship on the left)
End caps fitted to 5" pipe (QA manager, Barry checking craftsmanship on the left)End caps fitted to 5" pipe
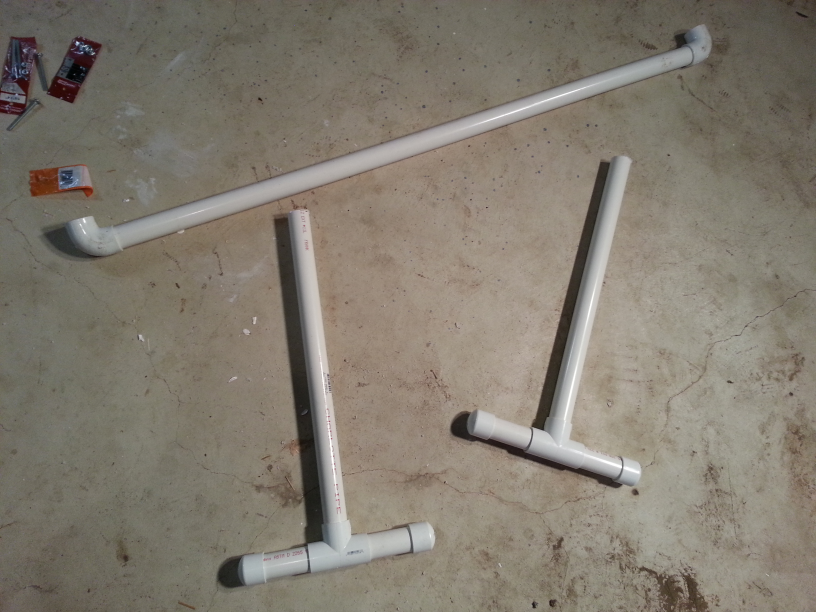
End caps, 5" lengths and three way connector combined
Light stand legs and cross bar assembled
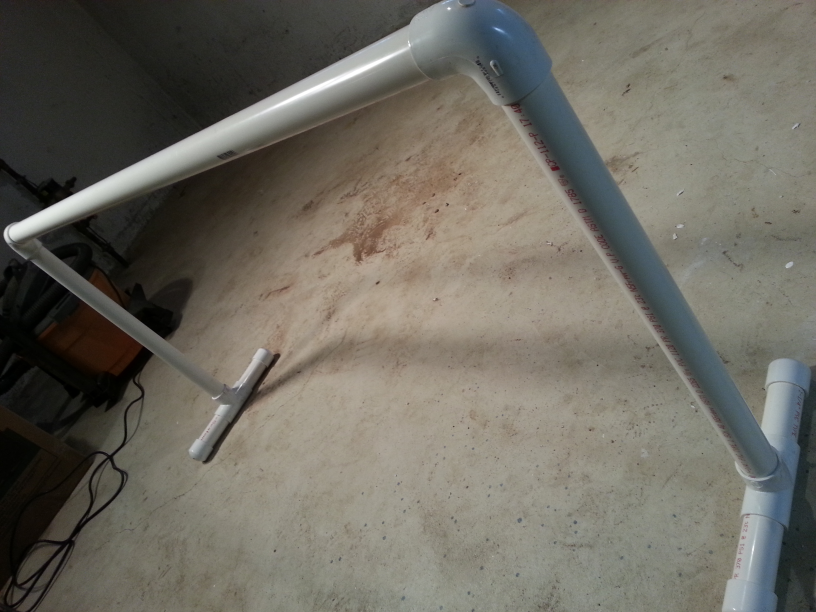
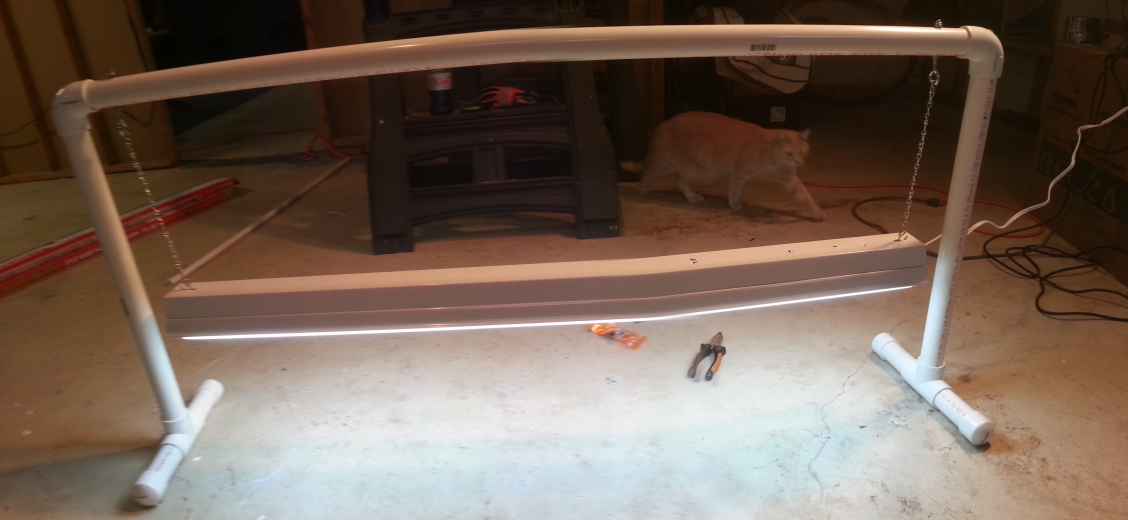
Completely assembled stand without light fixture

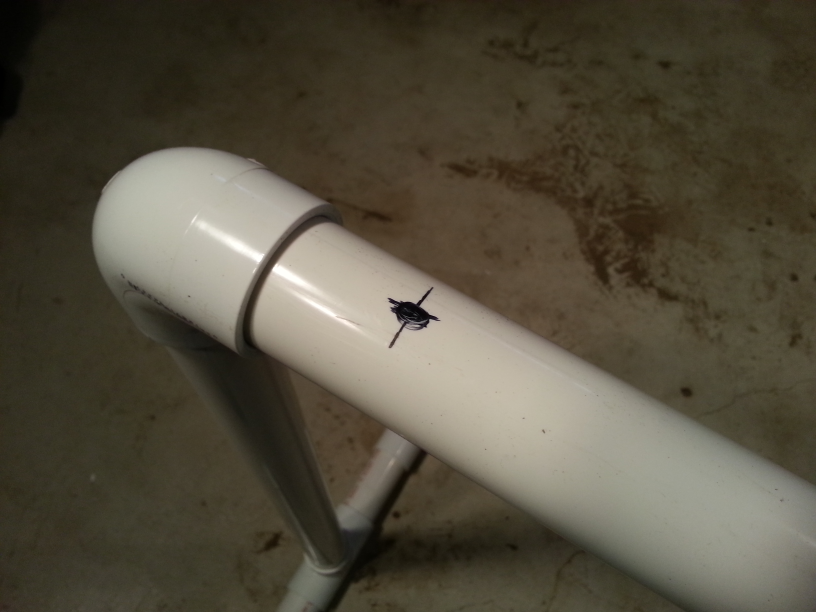
See, that was easy, right? No glue, just push it all together. It's a little disappointing that it did not include power tools, but don't worry, because this is where I whipped out my trusty drill after marking where I wanted the eye bolts to go. The shop light fixture hangs from these, so I measured where the chains would go in the shop light and chose eye bolt locations accordingly.

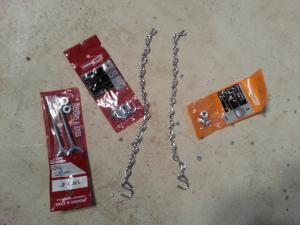
Chains, S hooks, etc. for attaching the light fixture
Position of eye bolt for one side of light fixture mounting

If you attempt this, be sure to wear your safety gear as I did; PVC pipe can be slippy and drills can make easily eye bolt holes in your hand if you're not careful (I recommend having some sleep too).

Safety gear on and ready to go

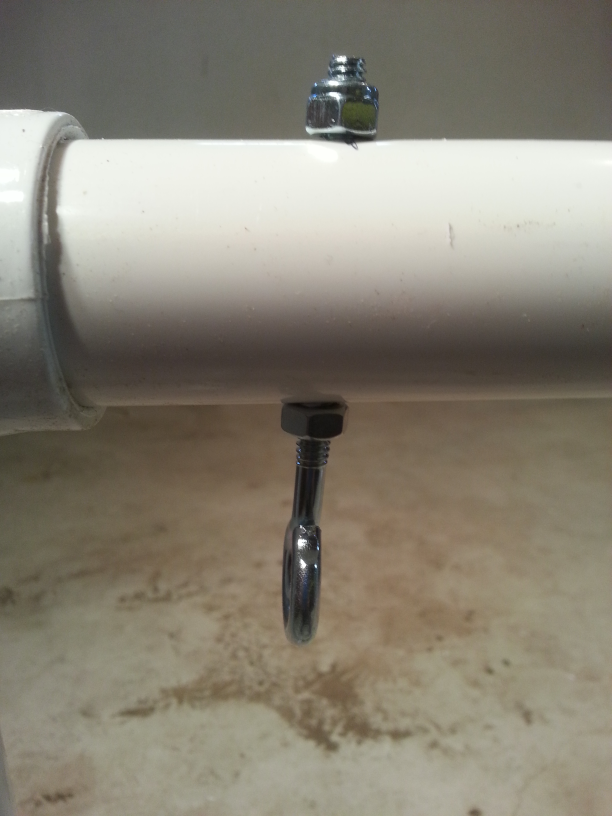
Once the holes were drilled in the pipe (though a little skewed), I fitted the eye bolts. In order to get a sturdy fixture, I first screwed a nut onto the eye bolt, then pushed the remainder through the pipe and applied a lock nut to the other side (though a regular nut would have done, I think). I then tightened the nuts on each side of the pipe so that the eye bolt was secure.

Eye bolt installed (note the two nuts on either side of the pipe)
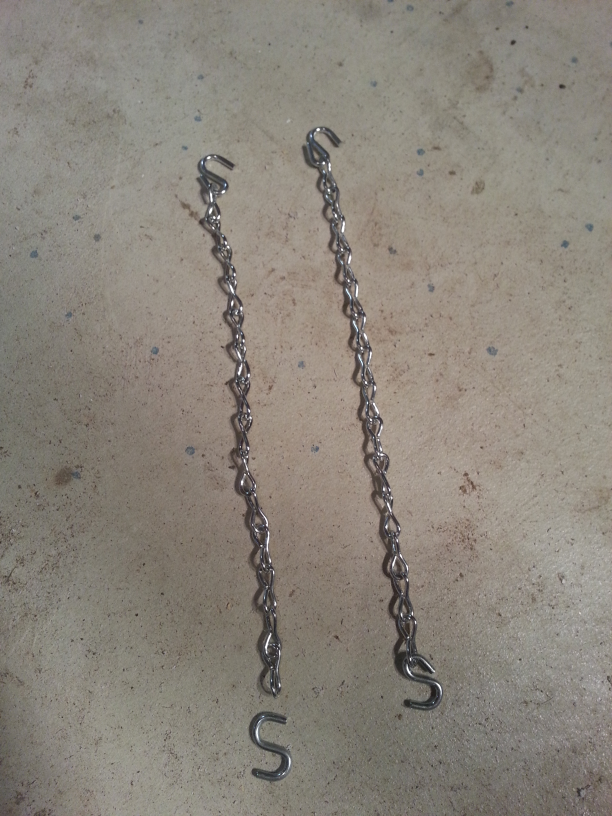
Chains showing S hook before being attached and after

The shop light fixture came with its own chains for suspending it, however, only one end of these chains had a hook, so I carefully crimped S hooks onto the other ends of the chains. I then hooked one end into the corresponding eye bolt and the other into the light fixture and that was job done.

The assembled and working light stand (with QA manager doing final inspection)

The height is even adjustable by threading the hook through the eye and hooking back into the chain.

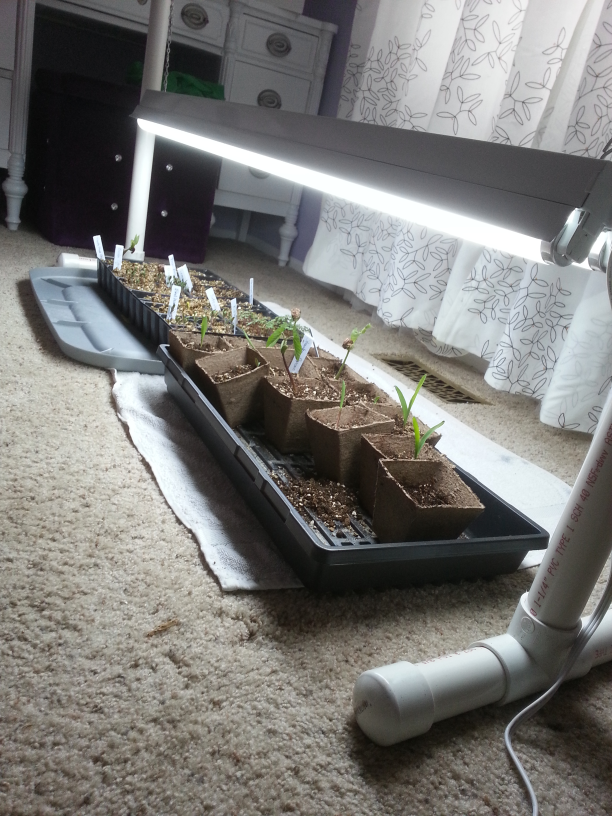
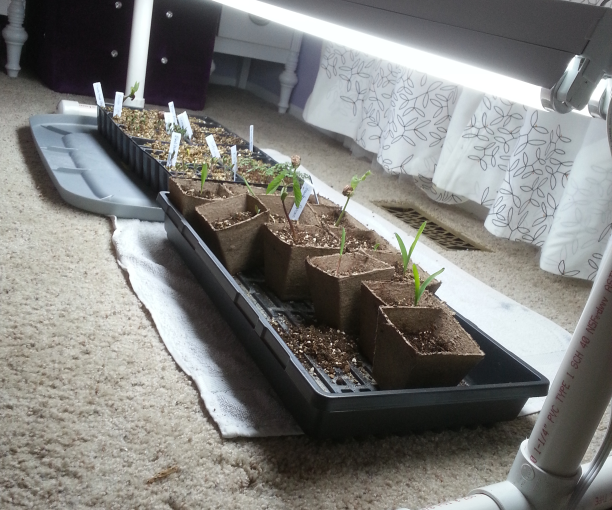
With the assembly complete, I placed the new stand over Chrissy's seedlings and plugged it into our timer ready for her to be surprised when she gets home or reads this (whichever is first).

Chrissy's seedlings enjoying their new light stand

Now, I've been awake for far too long so I'm off to play video games and eat snacks before a well-earned nap.

KalamazooX 2013

I struggle to put into words the Kalamazoo X Conference, more commonly known as KalamazooX, a single day, single track non-tech conference for techies. The difficulty is not in describing the talks, the speakers, the venue or the overall experience, describing the conference in such terms is easy; the talks were insightful and inspirational, the speakers were passionate and informative, the venue was accessible and appropriate, and the overall experience was emotionally demanding and entirely worthwhile. To describe what KalamazooX was to me, specifically, to reach deep inside and expose the raw emotions, to be open and honest about me, that is difficult.

It was the simple mantras:

It's not about you.
– Jim Holmes (@aJimHolmes)

Move the elephant. Direct the rider. Shape the path.
– Todd Kaufman (@toddkaufman)

It was the inspirational stories behind Todd Kaufman's talk on enacting change or Mike Wood's (@mikewo) talk on choices of doing the right thing, saving and changing lives, and becoming a better person.

It was the tears that welled in my eyes during Layla Driscoll's (@layladriscoll) talk on being happy, after she encouraged us to sit with our eyes closed and think about who we are. I wrote, "I am sensitive, funny, creative."

It was the encouragement from Leon Gersing (@rubybuddha) and Alan Stevens (@alanstevens) to take time out from time and reality, to meditate, and to find our inner voice.

It was the relief I felt in hearing Alan Stevens say, "you do not require approval from any external source," or Elizabeth Naramore (@ElizabethN) say, "It's okay for it not to be okay."

It was the moment I wrote in my notebook, "I feel less special than others. Is that true? Am I? Or do I need to redress my self image?" I think we both know the answer to that (though some have known a lot longer than others).

It was connecting with others in unexpected, overwhelming and assuring ways.

I do not believe for an instant that I was the only one in attendance that was deeply moved and I suspect that those who were returning attendees already knew about the impact this event can have. What a secret they have kept, hiding the true value of this event behind such dismissive phrases as "My favourite conference of the year!" and "It's a non-tech conference for techies. It's all about soft skills." Such pedestrian phrases pay no due to the experience at all. A more accurate and yet still inadequate phrase was tweeted to me by Michael Letterle (@mletterle) during this years event:

Now, you may think I'm being overly dramatic or reverent and you might be right. I have a tendency toward such things, but rather than assume that be the case, I encourage you to attend next year's KalamazooX and experience it for yourself (or at least look through the #kalx13 tweets). If, having done so, you still feel I have been exaggerating, I will concede and leave you and your cold, black heart to //Build, PyCon or whatever it is that floats your ghost ship (just playing, I'll still love you really).

To close, I thank Michael Eaton (@mjeaton), his team and all the speakers1 for putting on an event so cathartic that even writing about it overwhelms me a little. To uncover a part of oneself is enlightenment, to see that reflected in others is KalamazooX.

  1. Besides those mentioned above Suzan Bond (@suzanbond), Jen Myers (@antiheroine), Brian H Prince (@brianhprince), Jeff Blankenburg (@jeffblankenburg) and Justin Searls (@searls) all gave amazing talks. []

jQuery validation of select elements where multiple="multiple"

I was recently working on a simple feature in our web client at work. Part of the feature required that the user be able to select one to many items from a multiple select list. My first stab at this worked great; I added the required class to the select element and voila, the user was limited to at least one item. However, I thought it would be nice to give a custom error message with a little more context than just "this field is required" and perhaps provide the ability to limit the selection to a variable minimum and maximum length.

I quickly discovered that I don't understand the jQuery Validation plug-in and the documentation seems to be written by someone who thinks I might know way more than I actually do1. My next step was to find examples but they were all related to comparing element values on more standard input elements, which just served to confuse me further, so I embarked on a quest to find out how to solve my problem and write a blog about it.

Now, I'm sure that what I am about to document will seem like child's play to the jQuery ninjas out there, but for every ninja equipped with the skills to silently dispatch every henchman in the room, there's someone like me who just wants to get out of the room alive. So, please bear that in mind as you read on and whether a ninja or just a survivor, please comment.

<!DOCTYPE html>

<html lang="en" xmlns="http://www.w3.org/1999/xhtml">
<head>
    <meta charset="utf-8" />
    <title>My jQuery real good fun time yeah page</title>
    <script src="http://code.jquery.com/jquery-1.9.1.js" type="text/javascript"></script>
    <script src="http://ajax.aspnetcdn.com/ajax/jquery.validate/1.11.1/jquery.validate.js" type="text/javascript"></script>
    <script type="text/javascript">
        /* Placeholder for my amazing coding skills. */
    </script>
</head>
<body>
    <form id="mySuperCoolForm">
        <fieldset>
            <legend>Select some stuff</legend>
            <select name="things" multiple="multiple">
                <option>thing 1</option>
                <option>thing 2</option>
                <option>thing 3</option>
                <option>thing 4</option>
                <option>thing 5</option>
            </select>
            <input type="submit" />
        </fieldset>
    </form>
</body>
</html>

This is the simple HTML page that I'm going to work with. There's nothing complex here, just a form with a select and a submit input. I have also added some script imports for jQuery and the jQuery validate plug-in and an empty script element for our validation definitions to live.

To this, we want to add some validation to make sure that at least one element in the list is selected when the form is submitted. First, just to check things are wired up correctly, we will just specify the select named "things" as being required. Rather than do this by just adding the required class, let's use some scripting, that way we can manipulate the script as we go.

$(function () {
    $('#mySuperCoolForm').validate({
        rules:{
            things:{
                required:true
            }
        }
    });
});

This code is not doing much. It is telling the jQuery validate plug-in to attach its validation to our form, mySuperCoolForm with the rule that our field, things is required. If you try this out and click the submit button without selecting anything, you'll get a message stating, "This field is required." Not a very descriptive message, so let's fix that by adding a message for our "things are required" rule.

$(function () {
    $('#mySuperCoolForm').validate({
        rules: {
            things: {
                required: true
            }
        },
        messages: {
            things: {
                required: 'Please select at least one thing.'
            }
        }
    });
});

Again, not a very complex change. I have added a messages field to the JSON object being passed to the validate method. This field provides messages that should be displayed when validation rules fail. In this case, we are stating we want at least one thing to be selected whenever our required rule fails. You should note the correlation here between the name of our field, things and the rules and messages that are attached to it. This is important to understanding how to manipulate the jQuery validation. When a rule fails to validate for a named field, the message under the same named field with the matching name to that failed rule will be displayed.

That works nicely so it's job done, right? Not quite. You see, while this works for the cases where one to many items need selecting, it feels a little hacky. I'd rather say explicitly "I want x items selected" rather than rely on the required rule working the way it does for multiple select scenarios. I like being explicit. So, let's get explicit2.

Validating with minlength

It just so happens that the jQuery validation plug-in has another rule, minlength that appears to be exactly what we want. Thinking this, I naively wrote some code to require at least two items. I also included some string formatting for the error message so that the number of things in the message matched the number required by the rule.

$(function () {
    $('#mySuperCoolForm').validate({
        rules: {
            things: {
                minlength: 2
            }
        },
        messages: {
            things: {
                minlength: $.format('Please select at least {0} things.')
            }
        }
    });
});

Now, if we select two things, we can submit just fine, but if we select just one thing, we get told we need at least two. So far so good. However, if we select nothing, the form passes validation and submits fine! What? We stated a minimum of two and yet zero passes. That makes no sense. It made even less sense when I set my minlength to 1 and it didn't appear to do any validation at all. Everything was feeling so intuitive, what happened? By looking at the code, it becomes clearer.

The minlength rule looks like this:

minlength: function( value, element, param ) {
			var length = $.isArray( value ) ? value.length : this.getLength($.trim(value), element);
			return this.optional(element) || length >= param;
		}

If you put a breakpoint here, you'll discover that when nothing is selected, value is null, but that's okay because length becomes `0` in that circumstance anyway. The problem is on the second line of the function, which I have highlighted. It checks to see if the element is optional or not and if it is optional, the element passes validation regardless. A quick look at the optional function shows that it calls the required rule and returns the inverse of its result. When we have no items selected, required returns false which optional turns to true which incorrectly says our data is valid. However, when only one item is selected, required returns true which means the `length >= param` check occurs and our validation fails as we would like. While this behaviour is probably intuitive for say, string input fields where no value and values of a certain minimum length make sense, this is confusing when using minlength with select fields.

To get our validation working as we would like, we have to apply both the required and minlength rules as follows:

$(function () {
    $('#mySuperCoolForm').validate({
        rules: {
            things: {
                required: true,
                minlength: 2
            }
        },
        messages: {
            things: {
                required: 'Please select at least 2 things.'
                minlength: $.format('Please select at least {0} things.')
            }
        }
    });
});

Unfortunately, now we've lost the nice dynamic nature of our error messages. If we change the minlength rule to 3, we have to remember to edit the message for required. It seems we have gone from "feels hacky" to "feels hackier".

What I really want is for required to behave differently when I have the minlength rule applied to a select element. When using minlength on a select element, I want required to default to true but my error message to come from the minlength message format. This would feel far more intuitive for this use case than the current behaviour does. So, given that the plug-in does not do this, what can we do to fix it?

Implementing an intuitive minlength

The jQuery Validation plug-in provides the ability to add custom validation methods. Not only does this allow the addition of new methods, but it also allows for the replacement of existing methods. This gives us two options:

  1. Create a new minlengthofselection or similar that follows the rules we want.
  2. Override the existing minlength that does things the way we want.

While the first option is probably safest for those already familiar with the behaviour as it stands, option two is more fun. Guess which one I did3.

$(function () {
    $.validator.addMethod('minlength', function (value, element, param) {
        var length = $.isArray(value) ? value.length : this.getLength($.trim(value), element);

        if (element.nodeName.toLowerCase() === 'select' && this.settings.rules[$(element).attr('name')].required !== false) {
            // could be an array for select-multiple or a string, both are fine this way
            return length >= param;
        }

        return this.optional(element) || length >= param;
    }, $.format('Please select at least {0} things.'));

    $('#mySuperCoolForm').validate({
        rules: {
            things: {
                minlength: 2
            }
        },
        messages: {
            things: {
                minlength: $.format('Please select at least {0} things.')
            }
        }
    });
});

In this final update to the code, I provided a new implementation to the validator for minlength. This new version is almost identical to the default except that when checking a select element, it looks to see if the field is explicitly not required, thereby assuming that we want something to be selected. Finally, we have a minlength validation check that works intuitively for our scenario as well as the more common scenarios surround string lengths and we don't have to hard code numbers into the error message.

Conclusion

In conclusion, I ran into what is probably a corner case when it comes to using jQuery Validation where things were not as intuitive as I had hoped. In doing so, I was able to learn more about the plug-in and eventually, resolve my specific issue.

  • Have you had a similar problem?
  • Do you have improvements to suggest?
  • Should I submit this minor change for inclusion in the jQuery Validation plug-in?

Please, comment and let me know.

Acknowledgements

I would like to thank, alen, the author of this tutorial which gave me a foundation to work from when investigating and resolving this issue.
  1. Turns out the real reason was my expectations of what should work and the reality of what did work did not match, making the documentation hard to interpret. []
  2. Not in that way! []
  3. Hint: It's not the first one. []

Our new patio

Update: I found the pictures I was missing, so I've edited them in below (they were hiding on Facebook).

In my post on installing our rain barrel, I indicated that we now have a new patio. For a while we had wanted to remove our deck and replace it with a nice patio so it was exciting when we finally had enough money to get the job done.

Our fantastic neighbour, Tim, took charge on the project as our contractor and oversaw the effort of removing the deck and replacing it with a poured concrete patio. There were some issues we faced with the company responsible for pouring the concrete (if I could remember their name, I would tell you to avoid them, but I cannot right now), but Tim and I overcame those issues and he was able to get the patio finished.

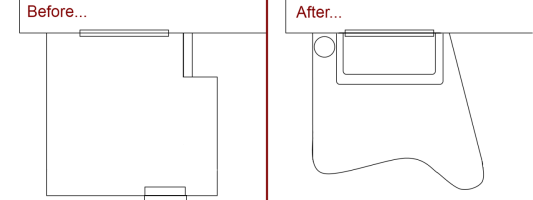
The design for the patio was an amalgamation of ideas from myself, Chrissy and Tim. Here is a rough sketch to give you an idea of before and after (Tip: Make sure you have sketches, it will save time explaining what you want and help avoid conflict on the job). This does not show the height difference between the deck with its high railings and the patio. Also, this is not to scale, the patio is actually bigger than the deck, but my sketching abilities are inadequate.

Sketched plan of the deck before and patio after
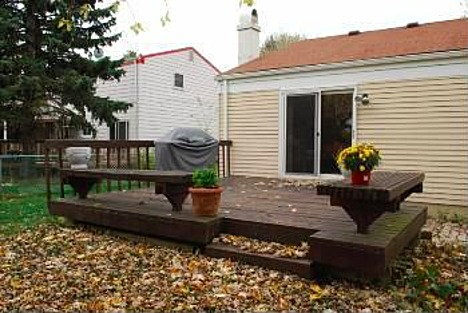
The deck
The deck

Once the deck was removed (and some conflict had been ironed out over the shape), the patio and steps were framed and leveled ready for the concrete to be poured.

Patio framed ready for concrete

The concrete was coloured so that once finished, it would look somewhat stone-like. Once the concrete had time to dry, the framing was removed.

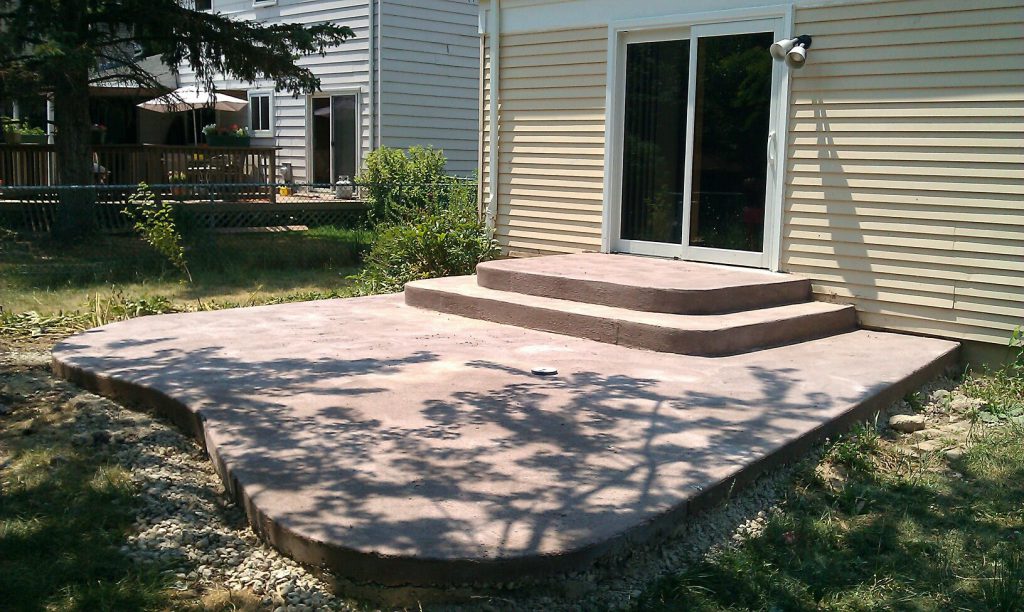
The patio before landscaping or final finish

At this point, our neighbour took over and started to work on the finish. In the above photo, you may be able to just make out a grind stone which Tim used to slough off the rough burrs and blemishes so that we had a more appealing surface. He then applied a top coat to level out any big imperfections. Finally, two different colour powders were added to give more of a stone-effect before the whole thing was coated in a protective seal that also had gold flecks mixed in to catch the sunlight.

With the patio surface finished, Tim suggested we get some crushed concrete to pack around the patio, providing additional support and reducing the amount of space that would need filling with topsoil. Several tons of topsoil were distributed to landscape around the new patio. Although the patio was much lower than the deck (the deck had been at the same level as the back door), the slope of the back yard meant that the patio was up to 11 inches higher than the surround lawn in some areas. This meant that several cycles of dumping, raking and compacting soil were used to create a nice, sturdy transition from patio to lawn. In hindsight, I would have used more of the crushed concrete or some other filler and less topsoil, but it worked out.

After landscapting with soil, putting down weed blocker and new borders

While moving the soil around, we also added a new bed to the right of the backdoor and extended an existing bed on the far side of the patio to come around the front. They were covered with weed blocking membrane in preparation for plants. These are clearer to see in the next photo which was taken after I had sown grass seed.

Patio with grass seed sown

While we waited for the grass to grow, we started work on the beds. A few plants were acquired from a vendor at Ann Arbor Farmers Market as well as some white marble chips to go around them. Unfortunately, we didn't really work the ground properly or put enough weed blocker down, so we now have white marble peppered with crab grass. In hindsight, we should have treated the soil with Round Up first (or a similar product) to kill everything before we put the weed blocker and marble down. New plants could have waited. Instead, we will be tasked with tearing up all the marble and weed blocker this spring or summer so that we can lay a thicker layer or perhaps, go the Round Up route if none of the new plants survived the winter.

Grass growing, beds planted and marble chips put down

I will perhaps go into the plants we got after they have had chance to attempt surviving their first Michigan winter (they just got reburied by snow this morning), until then, just know that they live (I think) as does the grass.

Grass growing around the patio. From left to right: Chrissy, Nico (our neighbours' cat), Barry and Shaun.

We are very happy with how this has turned out and look forward to getting some nice patio furniture for the summer (and maybe even a grill1). We might even have an English tea party to christen it.

  1. Barbecue for my non-American readers. []

CodeMash 2.0.1.3

I cannot praise the board members of CodeMash (@codemash) enough; this year was yet another excellent conference. Rather than focus on all the things I did at CodeMash this year, I want to focus on a single thread that made CodeMash special for me. I realise I'm a little late getting round to this considering the conference was in January, but I want to tell you about me winning the Pecha Kucha contest of CodeMash 2.0.1.3.

Public Speaking 101

On the first day, I decided I was going to attend the Choose Your Own Application precompiler1 session in the afternoon, but I was unsure of how to spend my morning. After perusing the other precompiler sessions, I decided to check out Leon Gersing's (@rubybuddha) workshop on public speaking. Though I fully intended to ditch this class midway through to continue my day with Brian Genisio (@BrianGenisio) and Dennis Burton (@dburton), Leon's workshop was so compelling and enjoyable, I couldn't do it. His background in theatre coupled with his patient, consistent and insightful coaching style ensured that attendees became comfortable with speaking (and sometimes singing) in front of one another. Though I attended some great sessions, had some great conversations and ate some awesome bacon, this workshop was my favourite experience of CodeMash. I doubt there were few, if any people who left that workshop not intending to do more public speaking at some point.

During the class we were tasked with putting together a five minute presentation about anything at all and delivering it to the class for critique about our presentation style and habits. My choice of in-class talk had been a toss-up between something about building a raised bed and something about British slang. Given the potentially offensive minefield of the latter and the fact that I already had a blog of material about the former, I babbled about DIY for five minutes in class and gained an disproportionate level of confidence about my abilities in public speaking. Running off the high I had gained from delivering an impromptu five minute gardening lesson, I decided to enter the Pecha Kucha contest with a presentation on British slang. After all, why offend a small room of forgiving workshop attendees when you can offend a much larger room of conference attendees?

Pecha Kucha

Pecha Kucha is a presentation contest where you get 20 slides that auto-advance at 20 seconds per slide. It's a battle of timing, content and delivery. For those who attended last year, you may remember the Urinal Rules Kata slide deck from Mel Grubb, Jon Skeet's Coding in the Style of Glee or Leon Gersing and his Pecha Kucha on Love. I felt that all three of these had set the bar pretty high, so I stayed up till 4:00 AM on Wednesday night agonising over what to include in my slides. I had decided to focus on areas of British slang that might be common pitfalls for Americans. I also wanted to avoid anything that might be directly offensive to the non-British audience (my apologies to Jon Skeet and other Brits that were in attendance). By 4:00 AM, with my slide deck almost complete, I fell asleep.

The next morning, I submitted my presentation title, "The Dog's Bollocks", to the contest so that  conference attendees could vote. The plan was that presentations with the highest number of votes would get to present in the main hall just after dinner. I checked my tally over the course of the morning and noted that I was not getting many votes. This was probably because my title flew in the face of what we had discussed in class; titles should give an indication as to the subject of the talk.

As the day wore on, my late night caught up with me and  I decided to go for a nap sometime around midday. While I was asleep, my friends pimped my talk all over the Kalahari resort, so I awoke a few hours later to my phone buzzing with text messages to let me know I was presenting in the contest. I had less than an hour to finish my presentation, but with a few edits and some new slides, I did so. Once the deck was submitted and at the insistence of my friend, I performed a couple of rehearsals in our hotel room as he grinned back at me with the most disconcerting of smiles and then we headed off for dinner and the main event.

The Main Event

After dessert, all the contestants gathered near the stage and determined in what order we would present. I have no idea what that order was, just that I wasn't first, I wasn't last and Jon Skeet was after me (I know this because he cleverly borrowed a bit of my talk to end his own, for which I was really flattered). All the talks varied wildly in both content and delivery, leaving a somewhat difficult choice for the audience to make when voting. In the end, it was determined that I and Jessica Kerr (@jessitron) were the most popular entries and so, we had to contend with the battle deck in order to determine a winner.

The battle deck consisted of ten slides, chosen by Brian Prince (@brianhprince), that neither I nor Jessica saw before presenting them. In the end, my battle deck performance swayed the audience just enough and I won the contest. I thanked Leon Gersing, my public speaking coach of two days earlier, several times after I won as I would not have done so if I had not attended his workshop and nor if he had been participating instead of compering.

Ocular Proof

I've included videos of my main talk and my battle deck performance below. I recommend that you hunt down videos of the other performances if you can as there were some great ones (I'll add any that I find or that you send me).

Also, you may note (as others have) that "Pigs" is slang to both the British and Americans. Due to last minute edits, this one slipped through. What can I say? I was tired.

  1. CodeMash lingo for the first two days of the conference. []